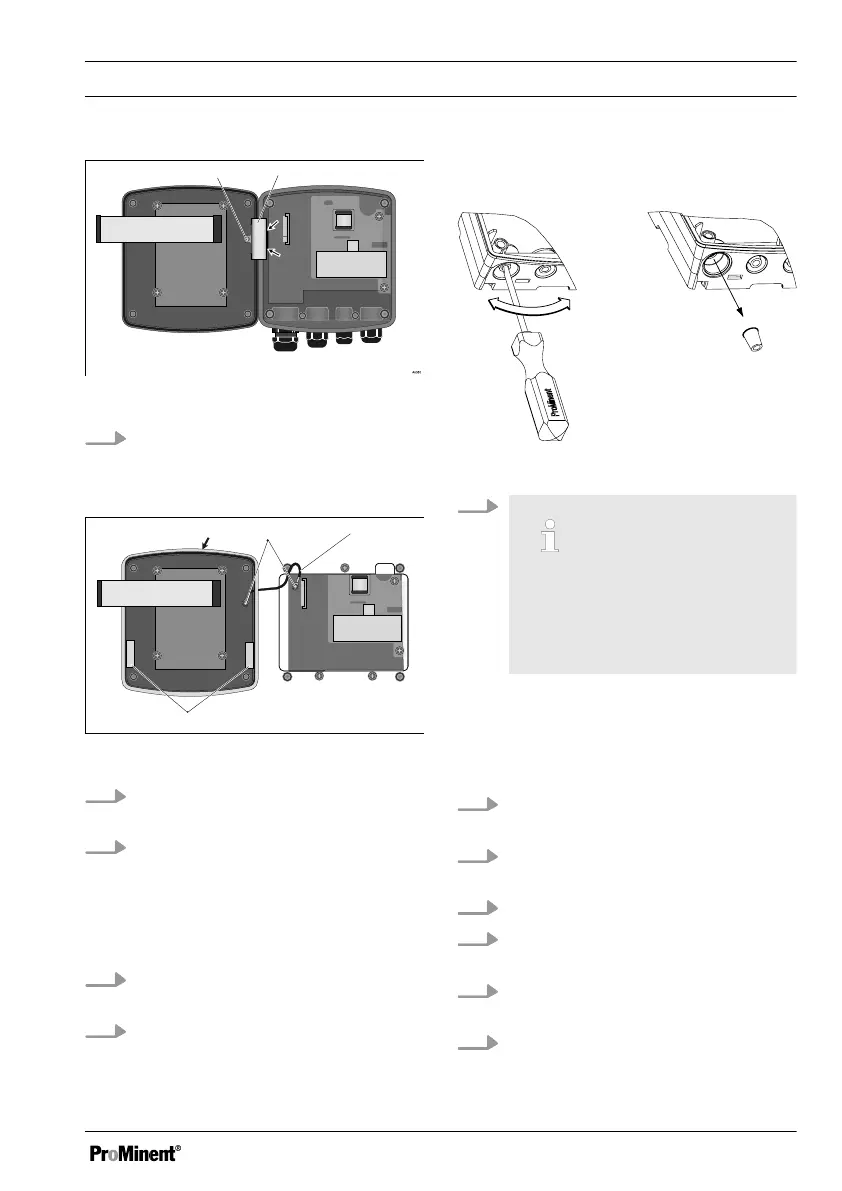
Fig. 47: Dismantling the hinge
3. Remove the screw (2), unclip the
hinge (1) on the lower part of the
controller housing (arrows) and
remove the hinge
Fig. 48: Removing the strain relief
4.
Remove the strain relief (2).
Remove the screws (1) to do so.
5. Check the profile seal (arrow), then
position the profile seal evenly into
the groove in the top part of the
DULCOMETER
®
Compact Con‐
troller housing. Arrange the flaps (3)
as shown in the figure
6. Remove the top part of the con‐
troller housing (3 fixing bolts)
7. Label the cable connectors fitted to
distinguish them and remove the
cables from the lower part of the
controller
Preparing the new lower part of the con‐
troller housing
Fig. 49: Punching out the threaded holes
8.
Large threaded connection (M
20 x 1.5)
Small threaded connection (M
16 x 1.5)
Punch out as many threaded holes
on the bottom of the lower part of
the controller housing as required
Fit the cable and threaded connectors
9. Guide the cable into the respective
reducing inserts
10. Insert the reducing inserts into the
threaded connectors
11. Guide the cable into the controller
12. Connect the cable as indicated in
the terminal diagram
13. Screw in the required threaded con‐
nectors and tighten
14. Tighten the threaded connector
clamping nuts so that they are prop‐
erly sealed
Replacing spare part units
107