SECTION 12—ELECTRONICS
Pronto
®
M50
™
, M51
™
and M61
™
with SureStep
™
76 Part No. 1125085
6. Connect the joystick. Refer to Disconnecting/Connecting the Joystick on page 78.
Standard Seat
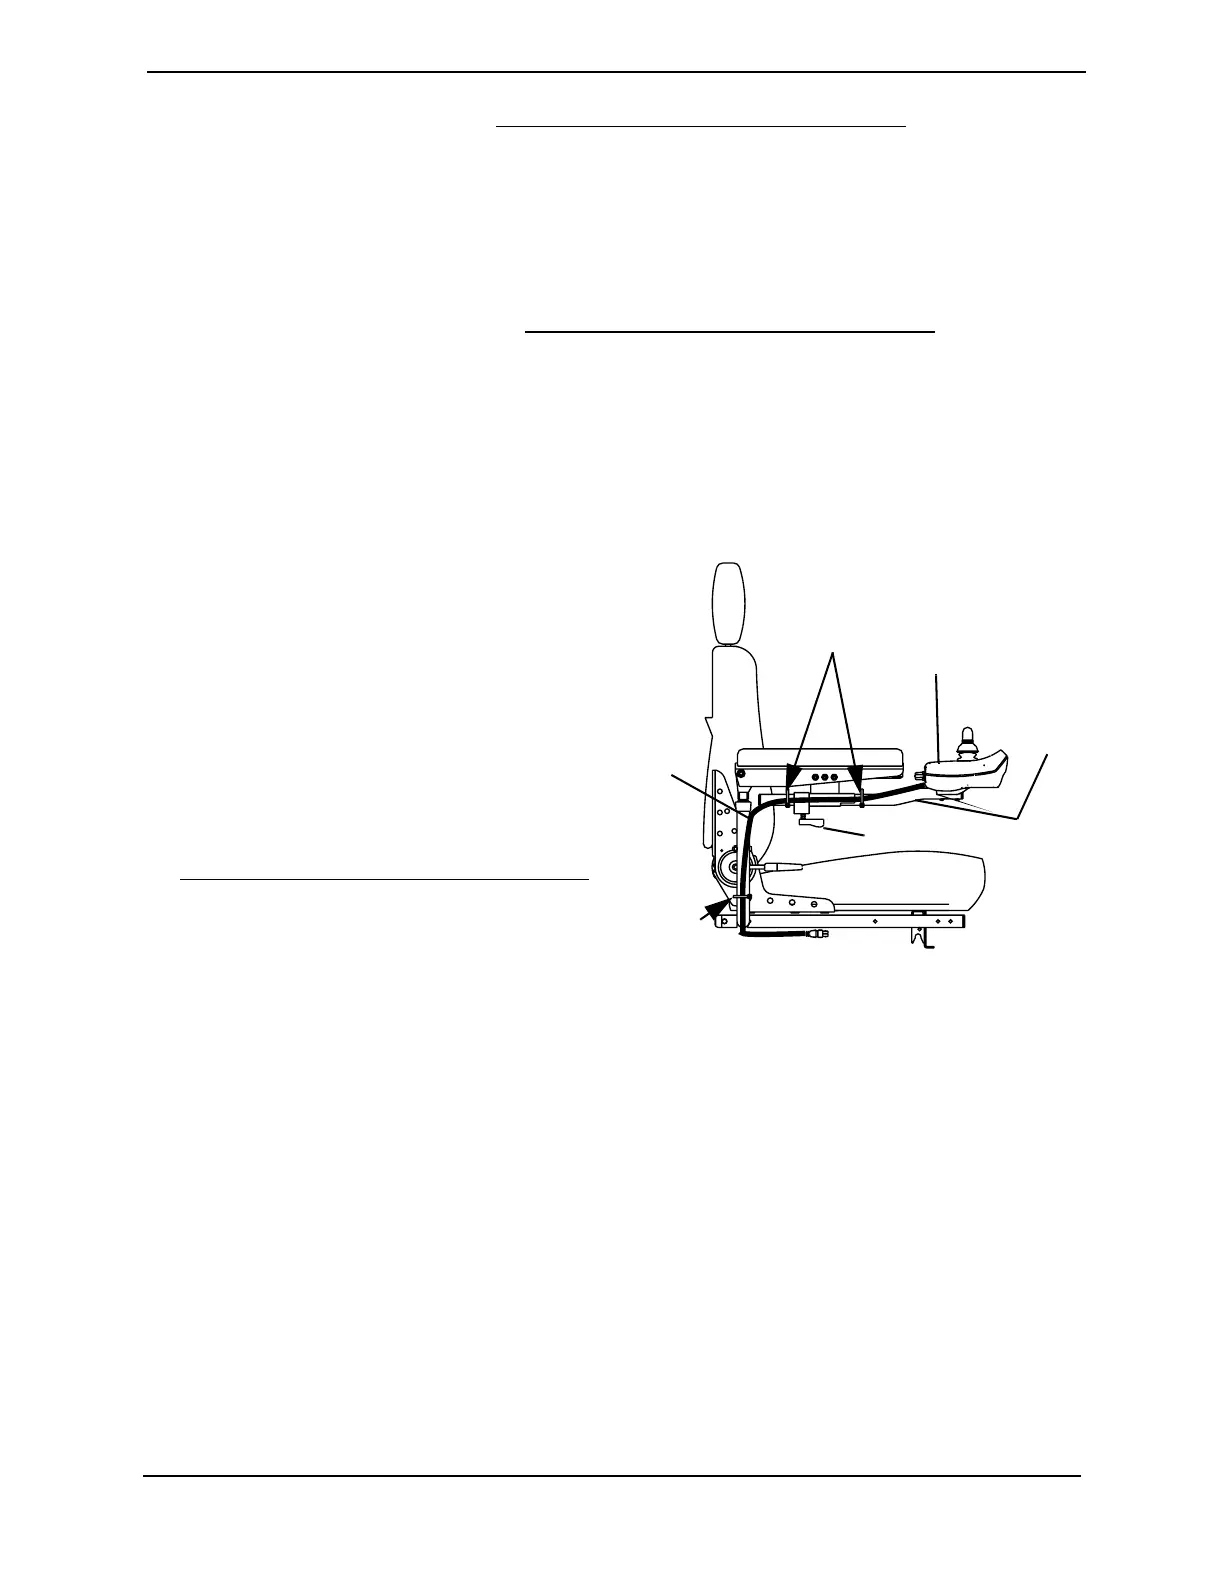
NOTE: For this procedure, refer to FIGURE 12.2.
Removing
1. Disconnect the joystick. Refer to Disconnecting/Connecting the Joystick
on page 78.
2. Cut the tie-wraps that secure the joystick cable to the arm.
3. Loosen the adjustment lock lever to release the joystick mounting tube from the
mounting bracket. Refer to FIGURE 12.2.
4. Remove the joystick and joystick mounting tube from the mounting bracket.
Installing
1. Slide joystick mounting tube through
the mounting bracket to the desired
position.
2. Tighten the adjustment lock lever to
secure the joystick mounting tube to
the mounting bracket on the other arm.
3. Tie-wrap the joystick cable to the arm
as shown in FIGURE 12.2.
4. Connect the joystick. Refer to
Disconnecting/Connecting the Joystick
on page 78.
FIGURE 12.2 Removing/Installing the
Joystick - Standard Seat
Installing/Removing the Joystick Mounting Bracket
(Office Style Seat Only)
NOTE: For this procedure, refer to FIGURE 12.3.
Installing
1. Remove the two (2) armpad mounting screws that secure the armpad to the arm. Refer
to FIGURE 12.3.
2. Install the mounting bracket on the arm using the two (2) bracket mounting screws.
3. Secure the armpad to the arm using the two (2) armpad mounting screws. Refer to
FIGURE 12.3.
ie-wrap
HERE
Tie-wrap
HERE
Joystick
Cable
Joystick
Joystick
Mountin
Tube
Adjustment Lock Lever