Observe the line which is being extruded on the print surface. Go to the LCD menu and
choose the Live adjust Z option. A new menu will show up where you can tune the nozzle
height live during the test print. The point is to lower the nozzle until the extruded plastic
sticks nicely to the bed and you can see it is being slightly squished. Set value should not
exceed -1 mm, if you have to adjust it more, move the probe slightly higher. Loosen
the two screws on the probe holder to make adjustments. By rotating the probe counter
clockwise, it will raise at 1mm per turn. It is very handy for precise adjustments, but it can
also be pushed in and out when set screws are loosened completely. Then rerun Calibrate Z
followed by the V2Calibration.gcode again.
Pict.
8
-
The
properly
tuned
first
layer
6.3.9.1 Bed level correction (kit only)
A bed level correction is an advanced feature introduced in the firmware 3.0.6 and is
designed to allow advanced users to correct for the slightest imperfections in the first layer.
This feature can be found in Calibration - Bed level correction. For example if the first
layer seems to be ever so slightly more squished on the right side, you can virtually raise the
nozzle by +20 microns on the right side. Settings are available for Left, Right, Front and
Back. The limit is +-50 microns and even +-20 microns can make a huge difference. When
you are using this function, do small incremental changes. Negative value will act as
lowering the bed in the selected direction.
6.3.10 Fine-tuning the first layer
6.3.10.1 Print prusa logo
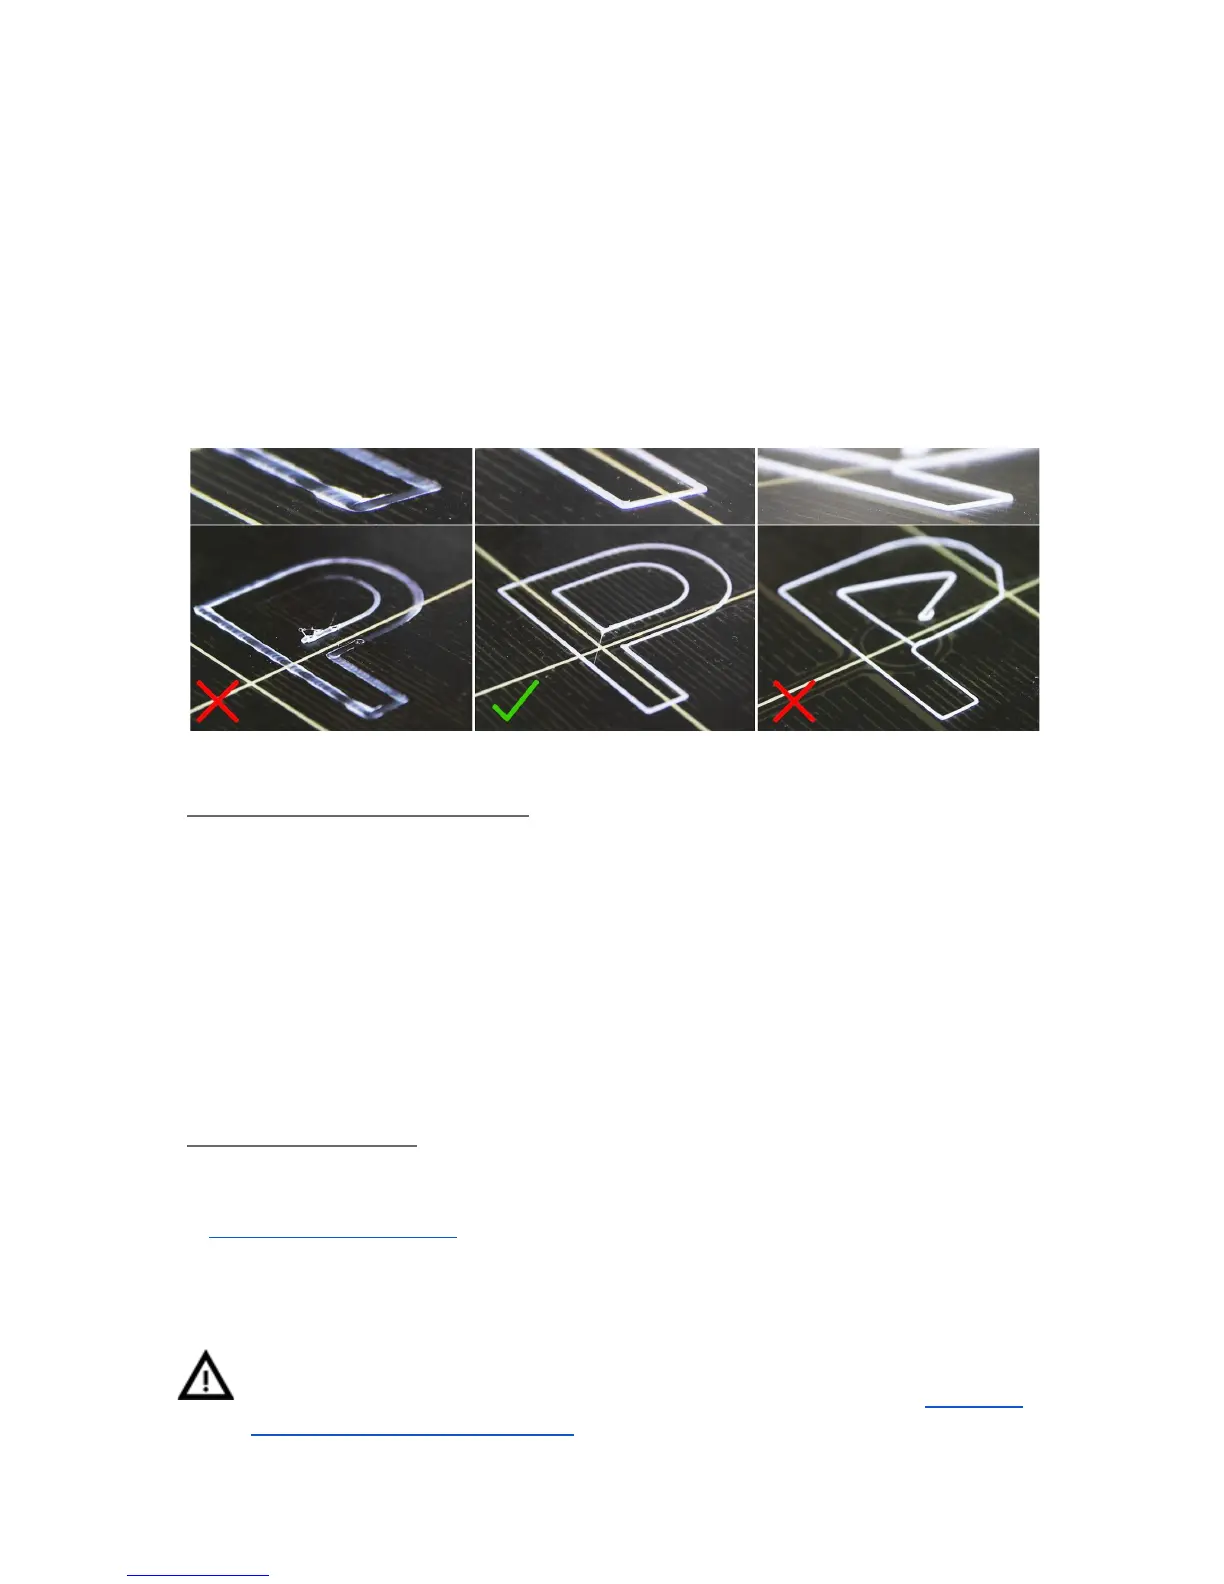
After finishing the calibration gcode, it is a good idea to print a simple object. The Prusa
gcode from the supplied SD card is a great example. The Live adjust Z function (described
in 6.3.9. First layer calibration) works during every print, so you can finetune at any point.
You can see the properly tuned first layer on the images below.
Calibration might be slightly different for multiple materials. It is a good practice to
check the first layer and adjust accordingly with Live adjust Z when switching
between different types of filament. You can also try experimental feature 8.2 PINDA
probe calibration/ Temp. calibration.
23