Pict.
16
-
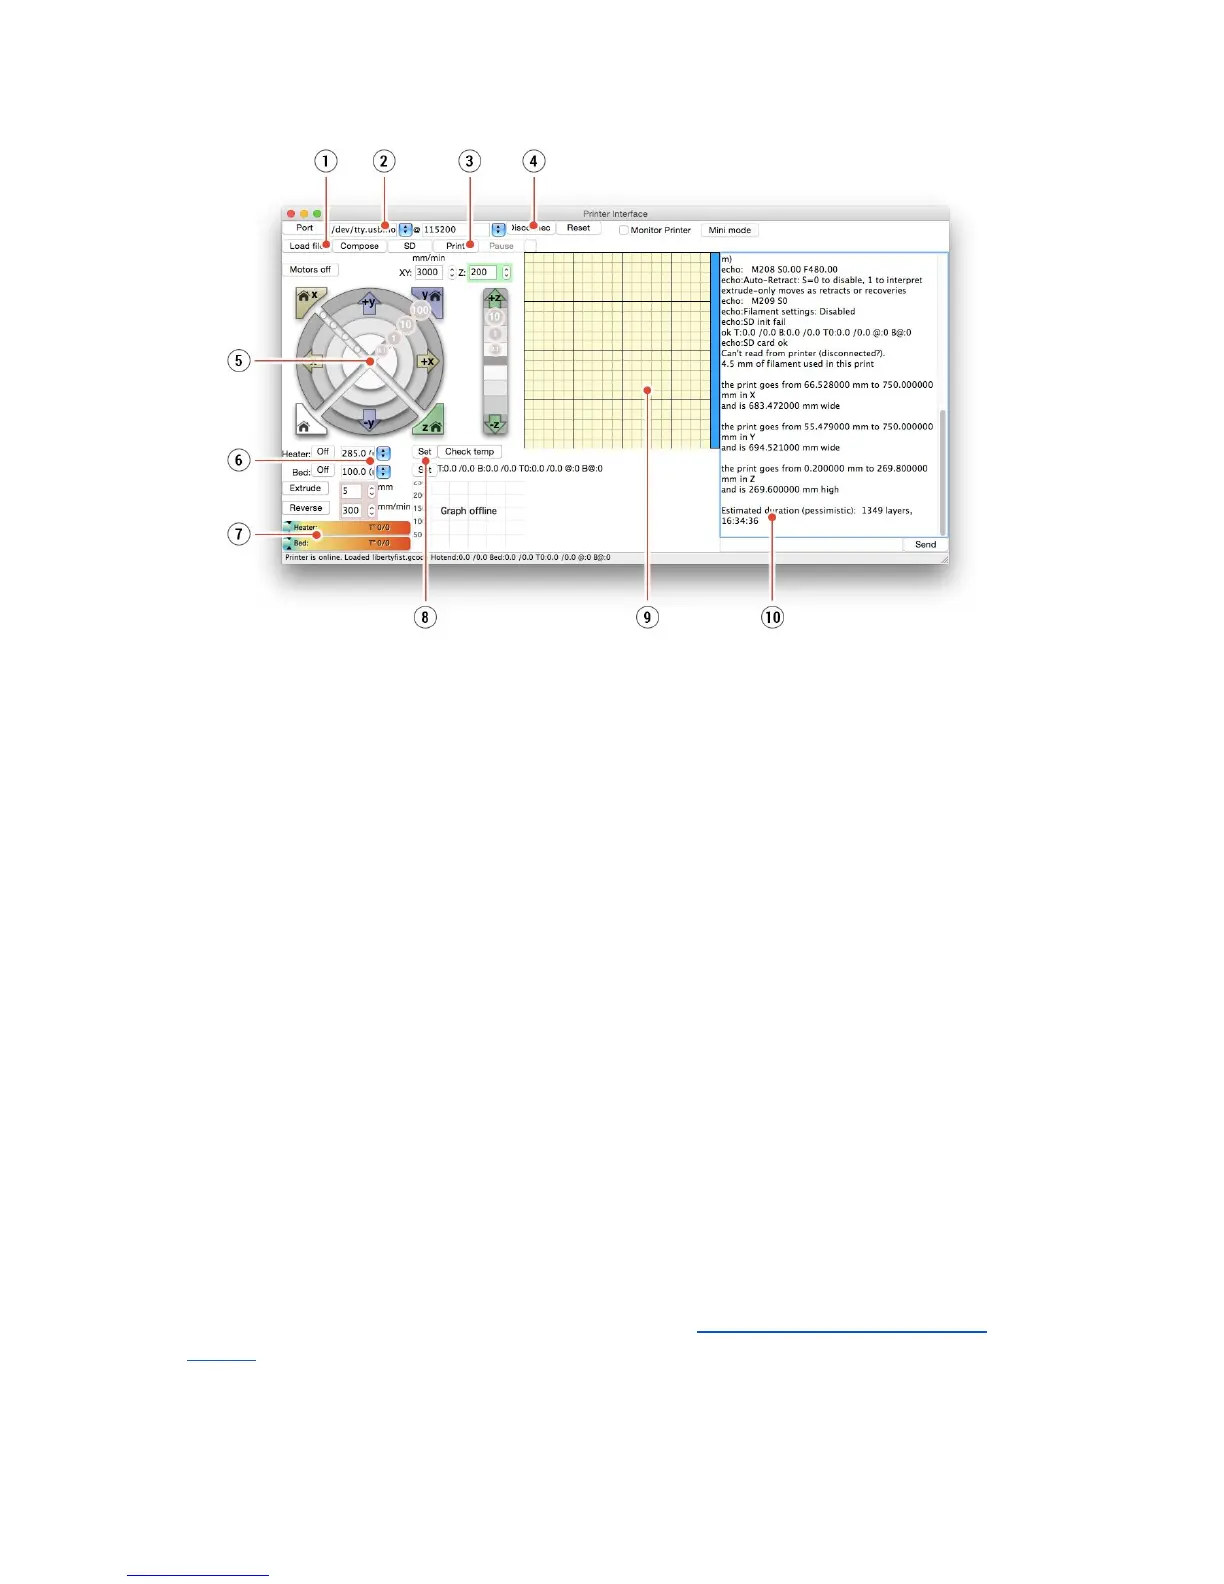
Pronterface
1. Load file button is used to load the desired model.. Model must be in *.gcode file
format.
2. Choose the port printer is connected to computer. (mostly /usbmodem
for Mac,
COM1, COM2, etc for Windows PC).
3. Print button starts the printing process.
4. Disconnect button disconnects the printer from the computer.
5. Printer controls. Here you can manipulate the printer axes.
6. Setting the nozzle and bed temperatures.
7. Thermometer.
8. Confirming the set temperatures, heating start.
9. 2D print process preview.
10. Info panel. Estimated print time, axis position and other info is displayed after loading
the model.
7.3 Printer addons
7.3.1 Different nozzles
E3D, a UK based company, supplies hotends for the Original Prusa i3 MK2 has whole
ecosystem of upgrades and addons. We support some of them. You have to use proper
preset settings for different nozzles in Slic3r or PrusaControl.
You can check out how to change the nozzle in section 12.4 Replacing / changing the
nozzle.
32