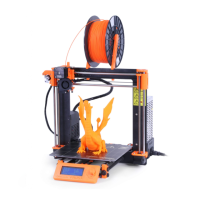
● Connect the printer to the computer with the USB cable.
Pict.
15
-
You
can
find
USB
port
here
● Choose connection port in Pronterface (download available with the printer drivers,
see the chapter 9 Printer drivers): Mac users use /usbmodem
port, PC Windows
ports are COM1, COM2, etc.; the correct port is displayed in device manager, Linux
users connect the printer using the virtual serial port. When the printer is connected
click the Connect button. Right column shows the connection information.
● Next step is loading the model with Load model button and choosing the
model_name.gcode (no special symbols in file name).
● You can control the movement of all printer axes at the control area.
● Next you can preheat the printer and prepare it for the printing. Set the temperatures
for the nozzle (heater) and heatbed (bed) and click Set button. Printer starts heating
immediately. Always check that the temperatures set in Pronterface are correct
according to our material guide!
● You can check the actual temperatures of nozzle and bed in Pronterface.
● When model is loaded right column shows the estimated print duration: Estimated
duration (pessimistic)
31