Introduction 150821/A4 Page 21 of 110
CAUTION
Make sure the unit has been disconnected from its AC power source for at least five minutes
before proceeding.
Procedure for Changing a 1730T Instrument Fuse
Unscrew the fuse cap on the rear panel of the 1730T and pull fuse holder outward.
Once the fuse holder has been removed from the instrument snap the fuse from the holder and
replace. Make sure the new fuse is of the proper rating.
Install the fuse back into the cap holder by pushing in until it locks securely in place.
FUSEGUARD
LINE VOLTAGE
SELECTED
115V
115V
!
!
POLLUTION DEGREE 2
INSTALLATION CATEGORY
I
115V ~/230V~
50/60Hz 65W MAX
90V-125V~
T1.0AL 250V
190V-250V~
T0.5AL 250V
WARNING:
FOR CONTINUED
PROTECTION AGAINST FIRE HAZARD,
REPLACE ONLY WITH THE SAME TYPE
AND RATING OF FUSE AS SPECIFIED FOR
THE LINE VOLTAGE BEING UTILIZED.
CAUTION:
NO OPERATOR
SERVICEABLE PARTS INSIDE.
REFER SERVICING TO QUALIFIED
PERSONNEL.
230V
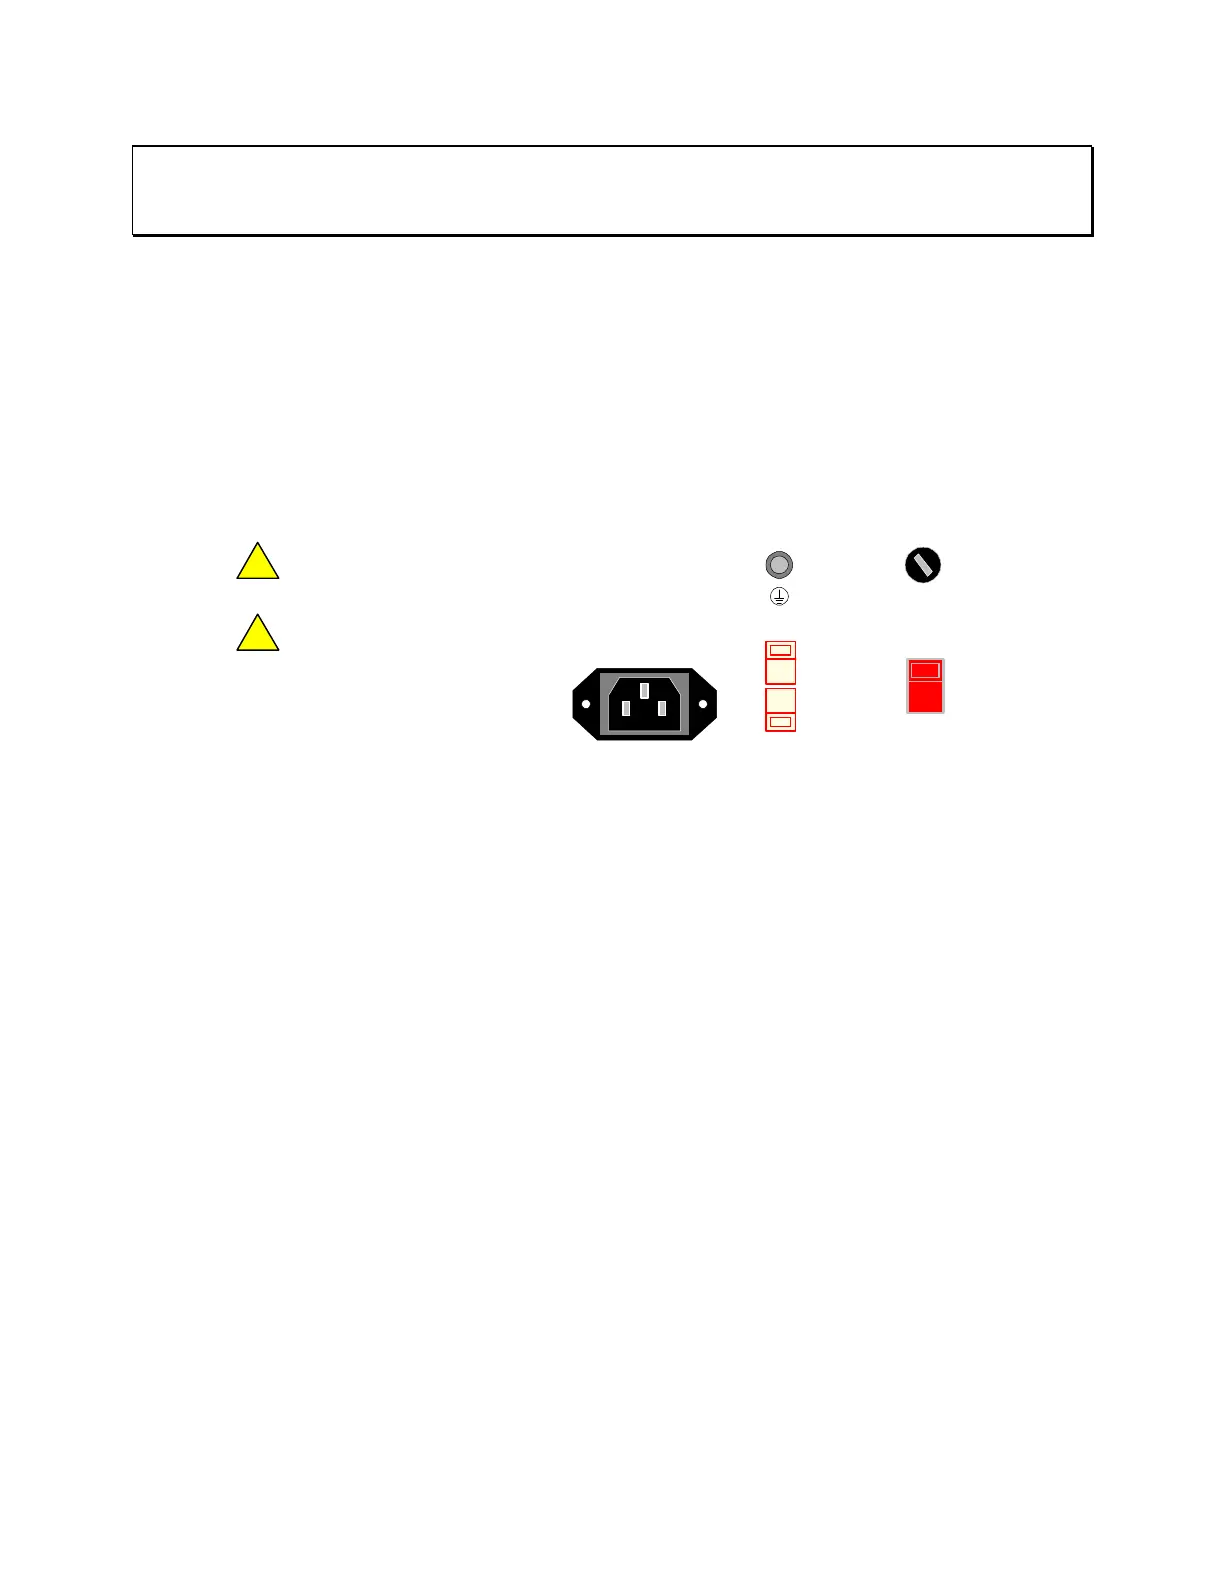
Figure 1-5: Close-Up of 1730T Rear Panel
1.4.4 Safety Inspection
Before operating the instrument inspect the fuse holder on the rear of the 1730T instrument to
ensure that the properly rated fuse is in place, otherwise damage to the unit is possible. Make
sure that the voltage selector switches are set in accordance with the power source in use. Refer
to paragraph 1.4.3 and Figure 1-5.
The 1730T instrument is shipped with a standard U.S. power cord, QuadTech P/N 4200-0300
(with Belden SPH-386 socket or equivalent, and a 3-wire plug conforming to IEC 320). Make
sure the instrument is only used with these cables (or other approved international cord set) to
ensure that the instrument is provided with connection to protective earth ground.
The surrounding environment should be free from excessive dust to prevent contamination of
electronic circuits. The surrounding environment should also be free from excessive vibration.
Do not expose the 1730T instrument to direct sunlight, extreme temperature or humidity
variations, or corrosive chemicals.