Getting Started
2 QL-800 User Guide
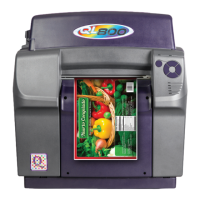
The QL-800 is designed with all the power of a high-end digital label printing press, but
it's sold at just a fraction of the price and fits on your desk or tabletop. The QL-800 is a
versatile, in-house digital color label printer that prints both labels in a range of widths
at high speeds, and in high-quality.
The QL-800 makes great-looking labels that perform well even in challenging
conditions. Your products will look appealing and professional, with bright, vivid inks
that reproduce a wide gamut of colors. Genuine QL-800 inks are available in large
capacity, high-yield separate cyan, magenta, yellow, and black (CMYK) cartridges.
Installation and Setup Overview
Refer to the installation and setup summary for an outline of the required steps.
1 Unpack the printer. See “Unpacking the Printer” on page 3.
2 Ensure all parts are included. See “Checking the Included Parts” on page 5.
3 Before installing the printer, select an appropriate location and ensure system
requirements are met.
• See “Choosing an Installation Location” on page 6.
• See “Installation Precautions” on page 7.
• See “System Requirements” on page 8.
4 Connect the power cable to the printer. Switch the printer power on. See “Powering
On” on page 8.
5 Install the printer driver.
• See “Installing the Printer Driver (USB)” on page 9.
• See “Installing the Printer Driver (Network)” on page 10.
6 Use the After Shipping wizard in the QL-800 Maintenance Utility. See “Using the
After Shipping Wizard” on page 12. This wizard will guide you through the following
actions.
• Foam support block removal - See “Preparing the Maintenance Roller” on
page 12.
• Ink cartridge installation - See “Installing Ink Cartridges” on page 13.
• Printhead installation - See “Installing the Printhead” on page 14.
7 Load media. See “Loading Media” on page 18.