EasyManuals Logo

Rational CombiMaster Plus Original Installation Instructions

Rational CombiMaster Plus
100 pages
To Next Page IconTo Next Page
To Previous Page IconTo Previous Page
Page #27 background imageLoading...
Page #27 background image
4 | Transport
80.06.083_iCombiPro-iCombiClassic_IM_en-US 27 / 100
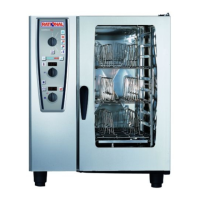
> Use the short bars for the unit sizes 6 half size and 10 half size.
> Use the long bars for the unit sizes 6 full size and 10 full size.
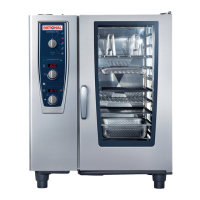
5. Screw the bar with the hexagon screws M8 with a torque of 5 Nm [3 2/3
lbf ft].
> Make sure that the screws are screwed in flush. All four screws must be
tightened accordingly.
5 Nm
[3 2/3 lbf ft]
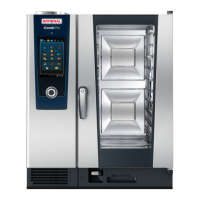
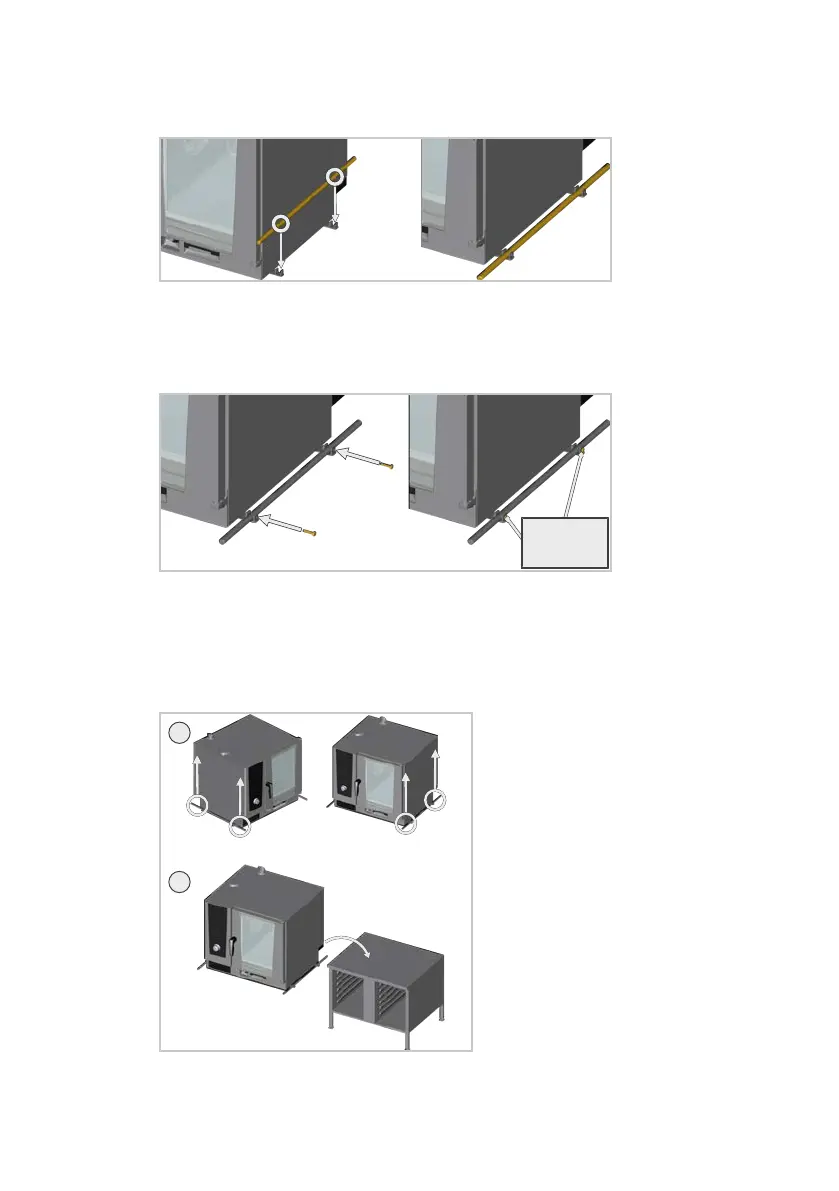
6. Transport the unit using the lifting aid and place it on the designated instal-
lation surface.
> Lift the unit evenly at the circled lifting points of the bars (1).
> Transport the unit to the designated installation surface (2) with the lifting
aid.
1
2
7. Remove the lifting aid. To do this, proceed in reverse order (Points 2–4).
8. Push the seal back into the groove provided in the base frame.

Table of Contents

Other manuals for Rational CombiMaster Plus

Questions and Answers:

Question and Answer IconNeed help?

Do you have a question about the Rational CombiMaster Plus and is the answer not in the manual?

Rational CombiMaster Plus Specifications

General IconGeneral
ModelCombiMaster Plus
ManufacturerRational
CategoryOven
Cooking modesSteam, Convection, Combination
Temperature range30°C to 300°C
Cleaning systemManual cleaning
Power ConsumptionVaries by model
Steam Generator OutputVaries by model
WeightVaries by model
DimensionsVaries by model
Control typeManual
Capacity10-20 levels (depending on model)

Related product manuals