36
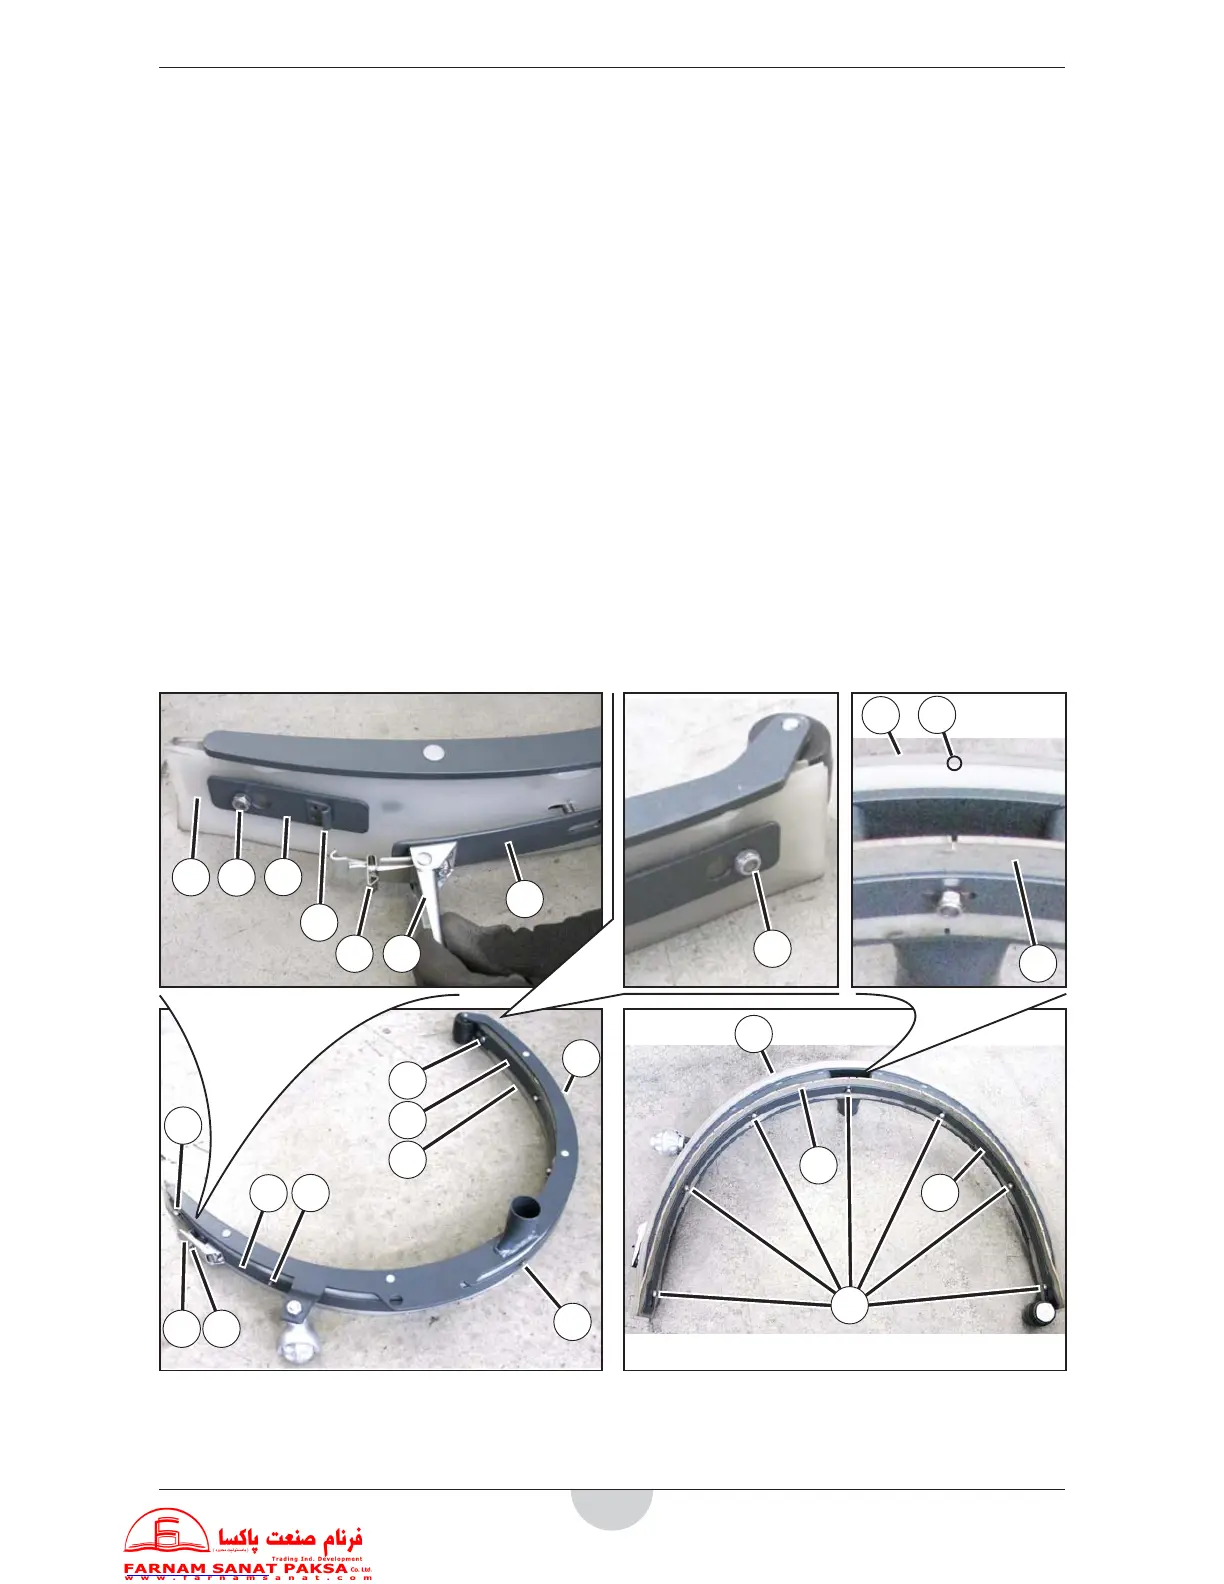
Check of squeegee rubbers
1. Disassemble and clean the squeegee, as described in the speci c paragraph.
2. Check that the front rubber (A) and the rear rubber (B) are intact and have no cuts and tears, otherwise re-
place them as described below.
Also check that the front edge (C) of the rear rubber (B) is not worn; otherwise detach the rubber and reverse
it, moving one of the other three edges (if still intact) to the front edge (C) position. Replace the rear rubber if
the other three edges are also worn, as described below.
Replacement of rear squeegee rubber
1. Disengage the safety retainer (D) and open the eccentric (E), then disengage it from the hook (I).
2. Loosen the terminal nuts (F).
3. Remove the retaining strip (G) by disengaging it from the pin nuts (F) and from the pins (H).
4. Remove the terminal strip (J).
5. Replace (or reverse) the rear rubber (B) then reassemble the removed parts, operating in reverse order to re-
moval.
Replacement of front squeegee rubber
1. Unscrew the self-locking nuts (K) on the inside of the squeegee.
2. Remove the retaining strip (L).
3. Replace the internal rubber (A), then reassemble the removed parts, operating in reverse order to removal.
Rearrangement of the squeegee
1. Reassemble the squeegee, as described in the speci c paragraph.
2. Adjust the height of the squeegee if necessary, as described in the speci c paragraph.
B
F
F
J
I
D E
G
B
A
C
F
DE
G
H
K
L
A
H
H
K
A
L
B