City Series CV40E-12 | 33
installation
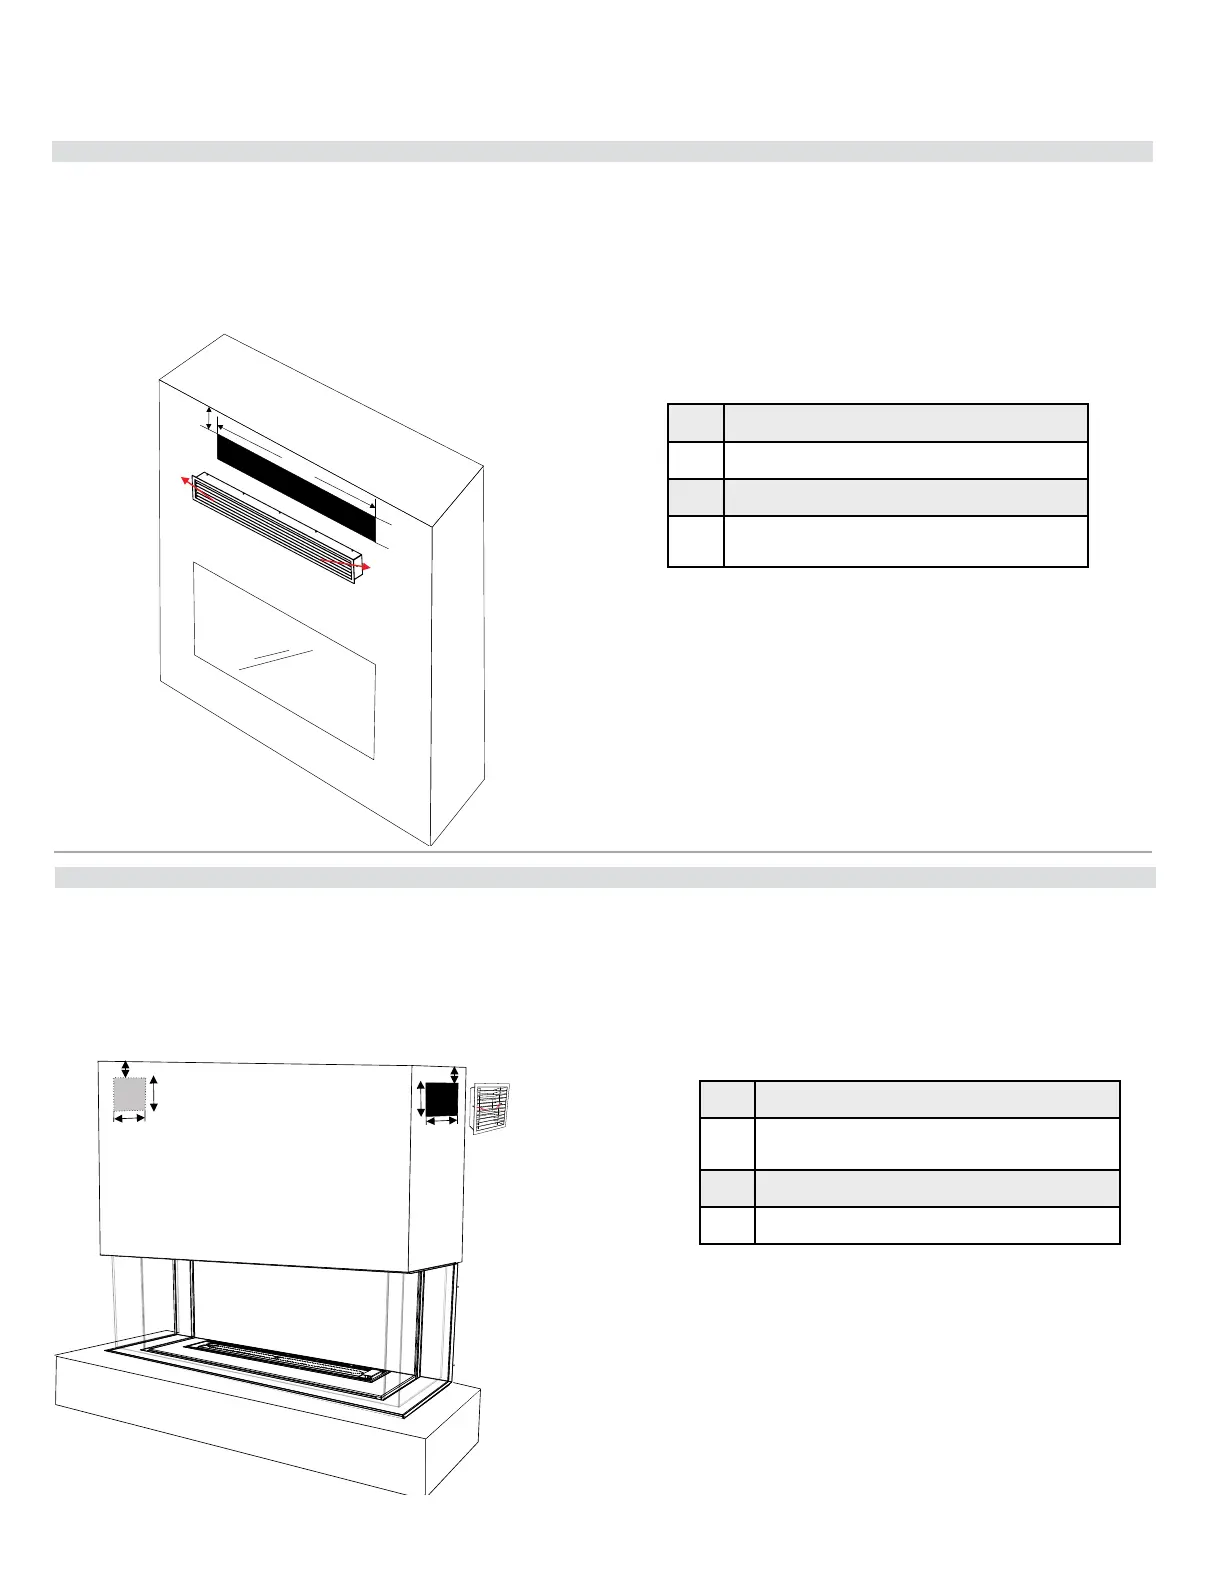
Optional Front Grill Installation - Part #656-991 (Black)
A
B
C
B
A
C
Optional Side Grill Installation - Part # 656-992 (Set of 2/Black)
Unit may not be exactly as shown,
but the drawing dipicts the process.
A
C
B
DIMENSIONS
A 39-1/8'' (994mm)
B 4-3/8'' (111mm)
C Maximum 3'' (76mm) from top of enclo-
sure.
Secure with screws from the front through the sides.
DIMENSIONS
A Maximum 3'' (76mm) from top of enclo-
sure.
B 8-5/16'' (211mm)
C 8-5/16'' (211mm)
Secure with screws through louvers to the sides.
This optional grill meets the requirement of the 120 square inches required for the enclosure in all installations and is designed to keep the enclosure cool.
In this application, both the ange and screws to secure the grills are exposed as this grill is designed to be installed after the nished facing has been placed
on the wall.
To install the front grill - frame an opening of 4-3/8'' H x 39-1/8'' W (111mmm H x 994mm W).
The nished facing material should be attached and be the same size as the framed opening to eliminate gaps.
Install the grill and secure in place with one screw on either side, installed from the front.
These optional grills meet the requirement of the 120 square inches required for the enclosure in all installations and are designed to keep the enclosure cool.
In this application, both the ange and screws to secure the grills are exposed as this grill is designed to be installed after the nished facing has been placed
on the wall.
To install the side grills - frame an opening of 8-5/16'' H x 8-5/16'' W (211mm H x 211mm W).
The nished facing material should be attached and be the same size as the framed opening to eliminate gaps.
Install the grill and secure in place with one screw on either side, installed from the front through the louvers.
Repeat steps to install the second grill to the other side of the chase.