8. Press [Start].
Saving the scanned data in a memory storage device
1. Press [Home] ( ) at the bottom of the screen in the center.
2. Press the [Print/Scan(Memory Storage Device)] icon.
3. Press [Scan to Storage Device].
4. Insert a memory storage device in the media slot.
For details about how to insert a memory storage device, see "Inserting/Removing an SD
Card" or "Inserting/Removing USB Flash Memory Device", For First-time Users.
5. Press [USB] or [SD Card], depending on the type of the storage device that you are
using.
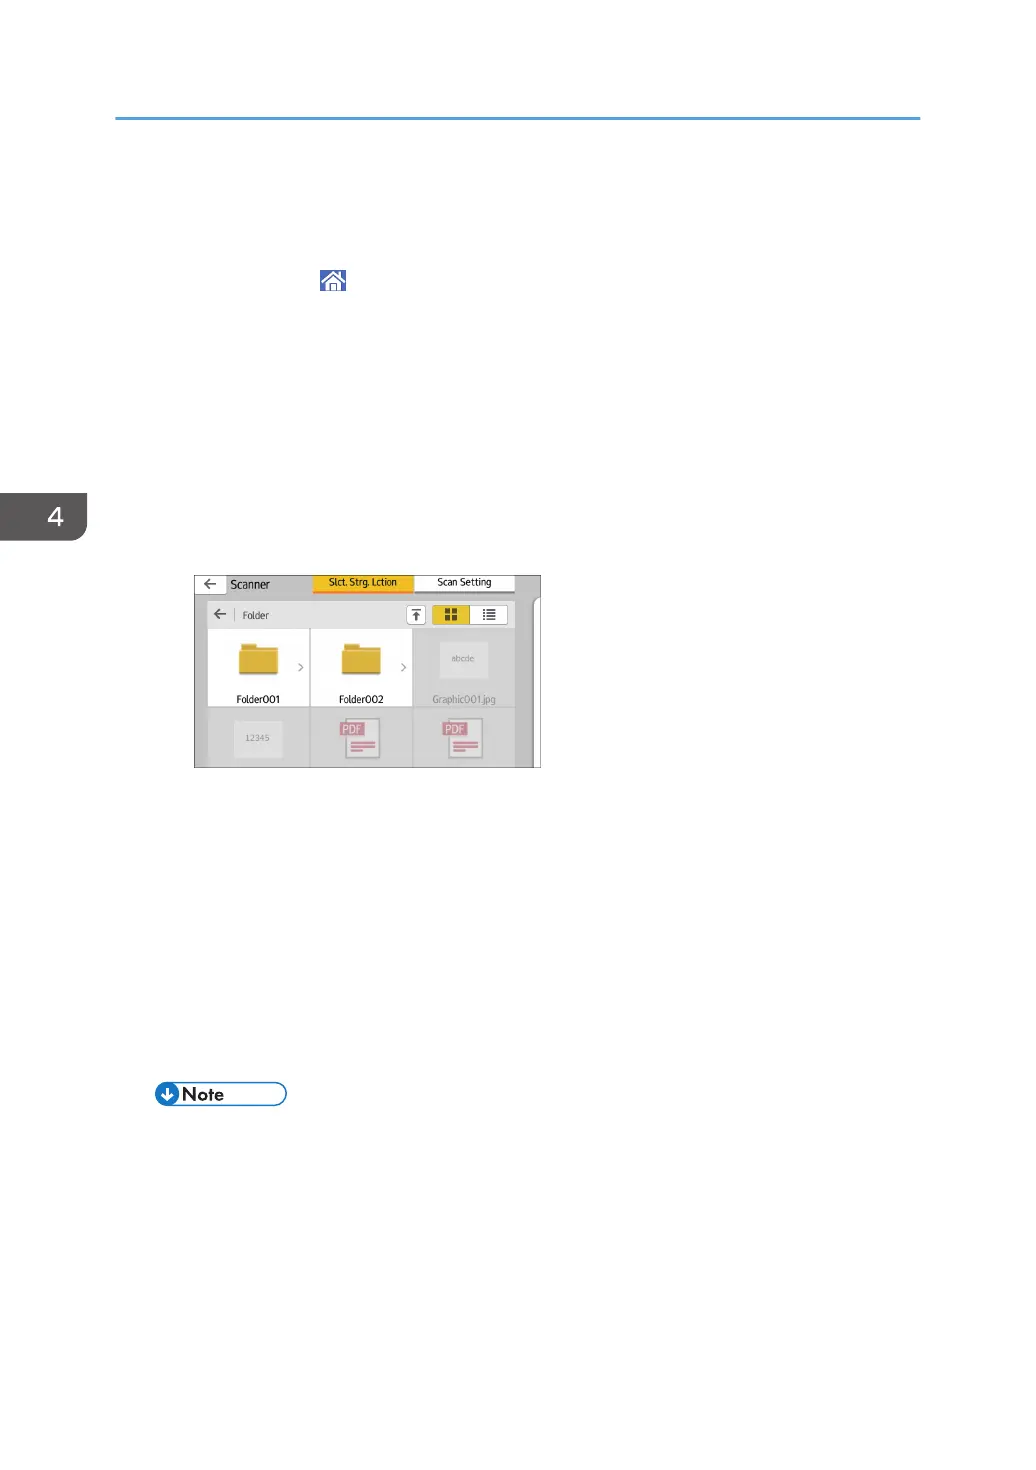
6. Specify the location to save the scanned data.
7. Place the original.
8. If necessary, press [Scan Setting] to change the settings such as the file type or scan
resolution.
9. To see the scanned image before saving it to a file, press [Preview].
10. Press [Start].
11. Press [Finish Scan] after scanning of the original has been completed.
If there are more originals to be scanned, place the next original, and then press [Scan Next
Original].
12. When the preview screen appears, check the scanned image, and then press [Save].
• If the file name is not specified in [Scan Setting], the scanned image is saved under the name
that conforms to the following naming rules:
• For single page format:
Transmission date and time (YYYYMMDDHHMMSSMMM) + 4 digit serial page number
(_nnnn) + extension (.tif/.jpg/.pdf)
4. Print
144
 Loading...