Installing the Wireless LAN interface board
• Before beginning work, ground yourself by touching something metal to discharge any static
electricity. Static electricity can damage the interface units.
• Do not subject the Wireless LAN interface board to physical shocks.
1. Check the contents of the package.
2. Turn the machine off and unplug the power cord.
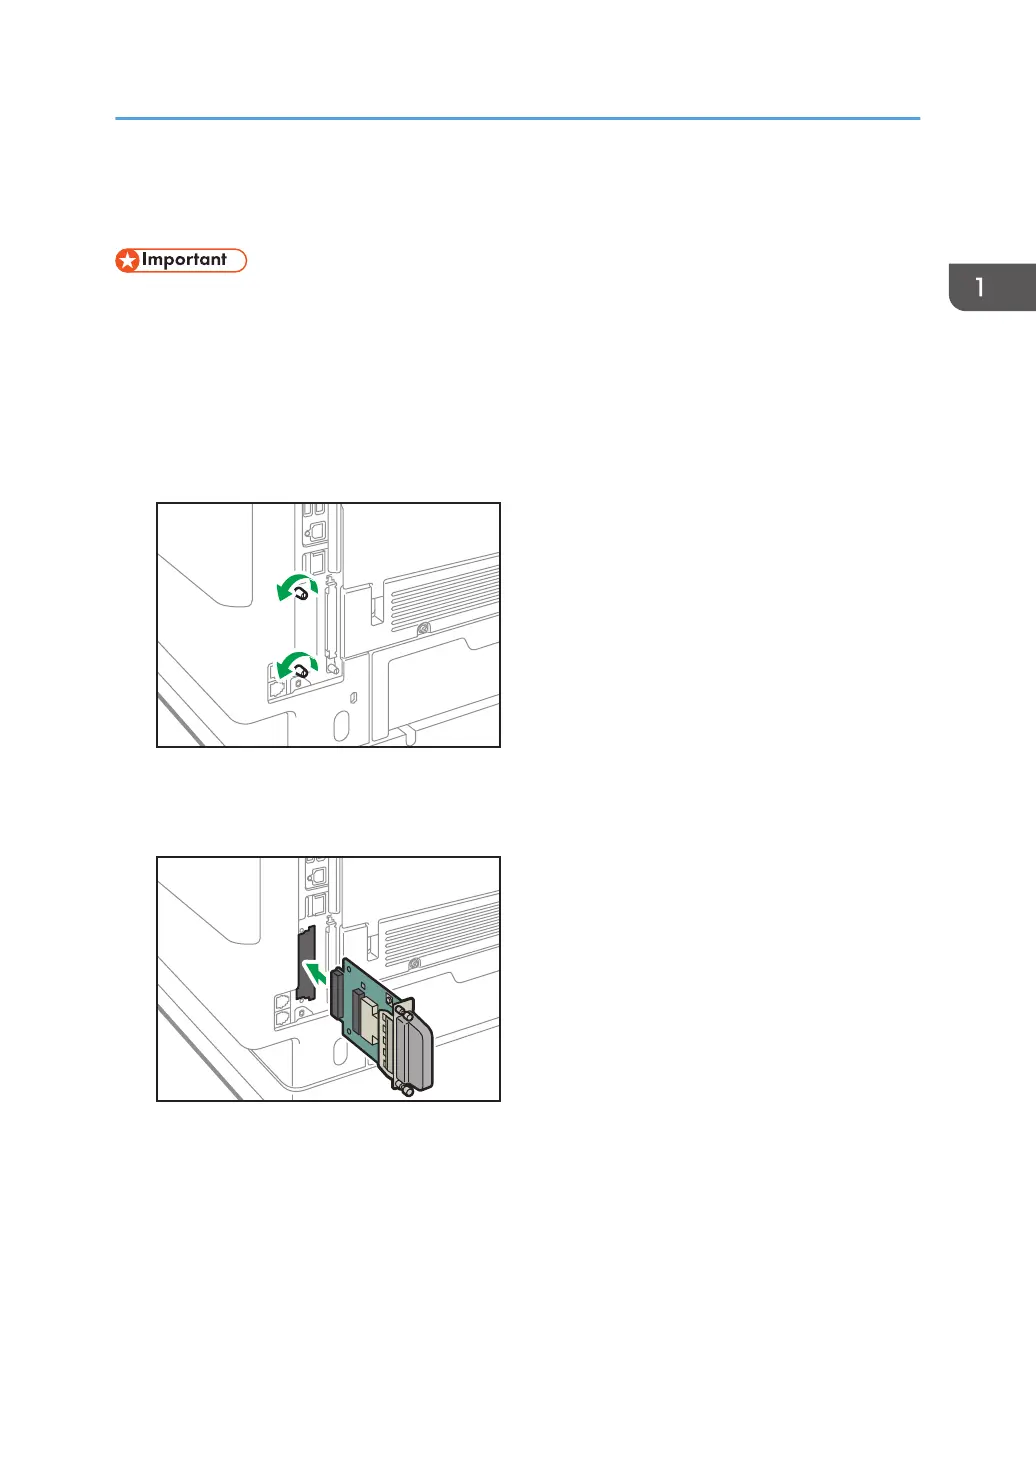
3. Loosen the two screws and remove the slot cover.
The removed cover will not be reused.
4. Fully insert the interface board.
Confirm that the interface board is firmly connected to the controller board.
5. Tighten the two screws to secure the interface board.
6. Plug in the power cord, and then turn on the machine.
7. Print the configuration page to confirm that the board was attached correctly.
After installing the Wireless Interface board, see page 20 "Setting Wireless LAN" to specify the
wireless LAN settings.
Installing the Wireless LAN interface board
47
 Loading...