4. Click [SmartDeviceMonitor for Admin].
5. Click [Next].
The software license agreement appears in the [License Agreement] dialog box.
6. After reading through its contents, click [Next].
7. Follow the instructions on the screen.
A message appears when the installation is completed.
8. Click [OK].
A message about restarting the computer may appear. Restart the computer to complete installation.
• Auto Run may not work under certain operating system settings. In this case, launch “Setup.exe”
located on the CD-ROM root directory.
• If you are required to restart the computer after installing SmartDeviceMonitor for Admin, restart the
computer and continue the configuration.
Changing the Network Interface Board Configuration
Follow the procedure below to change the network interface board configuration using
SmartDeviceMonitor for Admin.
1. Start SmartDeviceMonitor for Admin.
2. On the [Group] menu, point to [Search Device], and then click [IPv4], [IPX/SPX] or [IPv4
SNMPv3].
A list of machines using the selected protocol appears.
Select the protocol of the machine whose configuration you want to change.
If you are using IPv4 SNMPv3, enter the user authentication.
3. In the list, select a machine whose configuration you want to change.
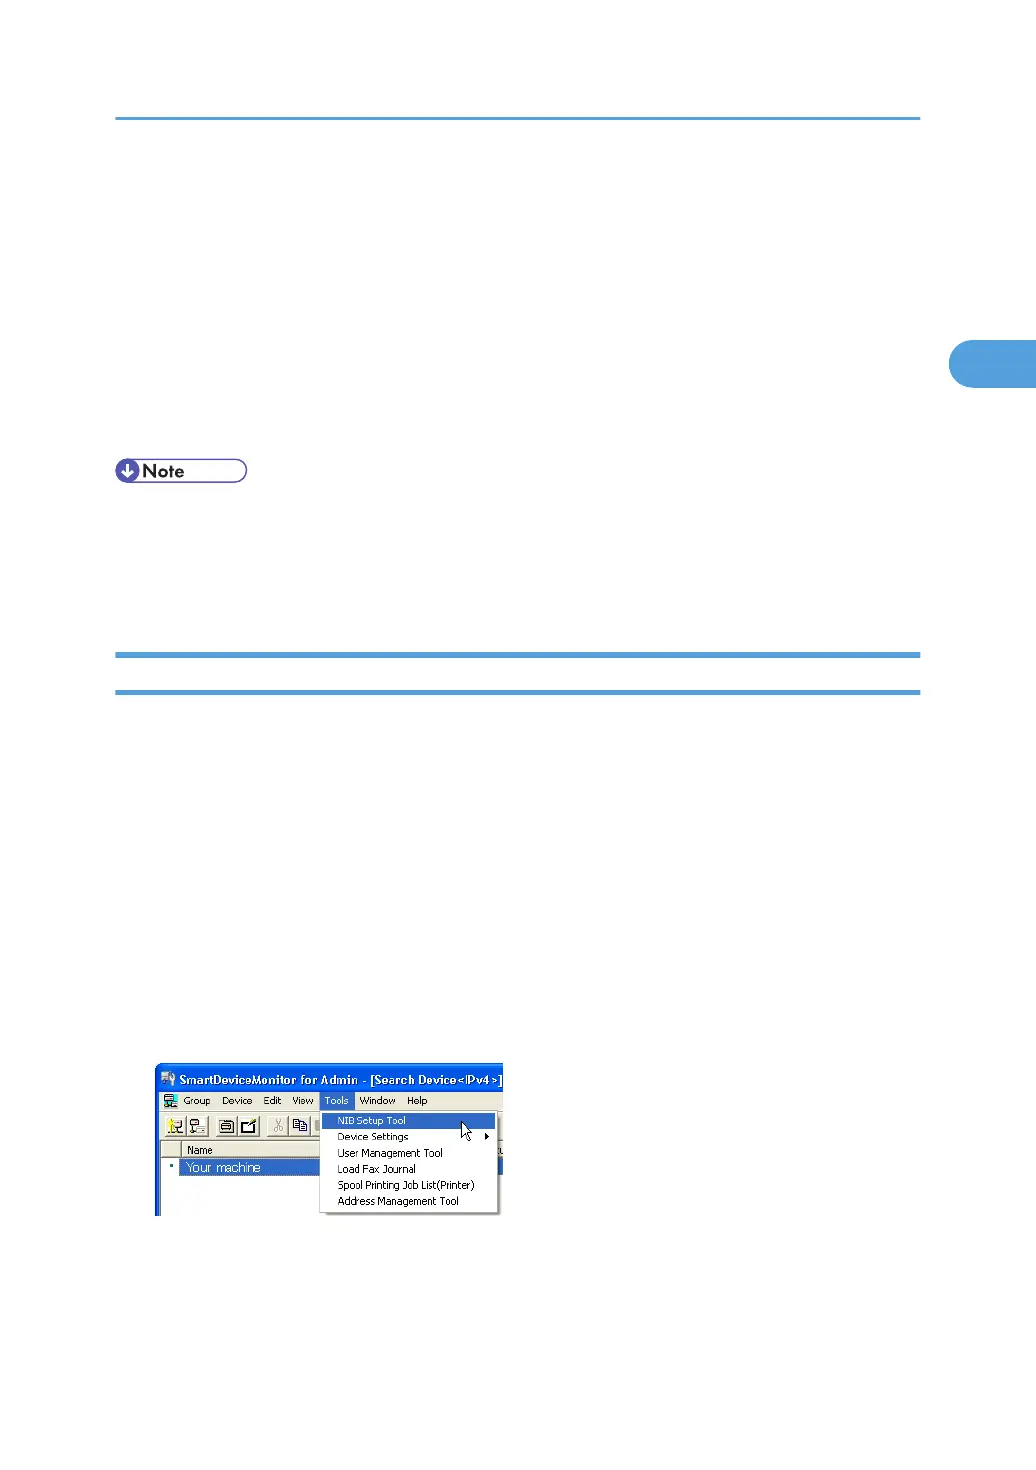
4. On the [Tools] menu, click [NIB Setup Tool].
A Web browser opens and the window for entering the login user name and password for the Web
Image Monitor administrator appears.
NIB Setup Tool starts. Click [Web browser], and then click [OK].
Using SmartDeviceMonitor for Admin
37