18
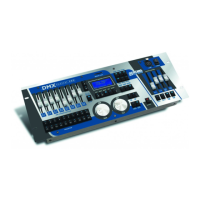
SELECT DEVICE
Device No.: 01/05 Ordinal number of the found projector /total number of the found projectors
Device ID: FFFF ID (identification number) of the found projector
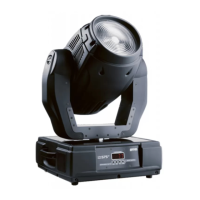
You need know the IDs for all projectors connected to DMX output No.1(No.2).These values you find in projector's
menu of the current projectors: A001---->SPEC--->Code.The projectors have to be from XT-series or AT-series
and include master/slave operation.If you use a copy of ROBE projector,be sure that you did not change the
names of the channels (e.g. channel name GOBO you change to R.GOBO).
3.Use <UP>,<DOWN> to select the projector (according to its ID) to which you want to send data and press
<ENTER>,next menu appears:
SELECT FUNCTION
Remote config. Menu for controlling the selected projector
Upload program Menu for uploading programs to the selected projector
4.Use <UP> , <DOWN> to select the "Upload program"menu and press <ENTER>.The following screen appears:
UPLOAD PROGRAM
Source prog.: 001 Number of the source program (max.of 50 steps) in the controller
Target prog.: 001 Number of target program in the projector,which will be overwritten
Use <UP>,<DOWN> or TILT wheel to select the source program (if program contains a loop,only steps from No.1
to step which included sign Loop in "Sce" field,will be sent) for the current projector. Press <LEFT> and use
<UP>,<DOWN> to select the number of the target program (No.1- 3) in the projector and press <ENTER>.The
message appears on the display:
Select device This message allows you to select the projector included in previously selected
from upload program "whose" program will be uploaded. E.g. In step 3 you have selected
program No.10.There are 5 active projectors in this program and you wish to
upload program of projector No.3 to the selected projector .
5.Press the respective PROJECTOR SELECT button and the data transfer begins. Message "UPLOADING
PROGRAM" appears during data transfer.After data transfer last message appears:
Program uploaded
Press <ENTER>.
10.Operating the memory card
Important shows should always be saved on the memory card.Only in this way you can avoid that data are lost
due to misuse or accidental deletion.The controller uses a MultiMedia Card (MM Card). The capacity of the
MultiMedia Card (16,32,64,128MB) is enough to save all scenes,programs,records,chasers,colour/gobo
macros,effect names and assigning projectors to the projector buttons.Data are saved to the banks on the
MultiMedia Card.The number of the banks depends on the capacity of MM Card (32 MB MM Card contains 60
banks).
10.1.Saving data to the memory card
1.Press <ESC> several times until the display shows the initial screen.
2.Press <MENU> and use <UP>,<DOWN> to scroll to the "MM Card Menu" menu ("Setup" ==> <ENTER>==>
"MM Card Menu" ==> <ENTER>).The following message appears on the display:
MM Card Menu
Insert MM Card
Press Enter
Insert a MultiMedia Card into the MEMORY CARD slot.
When inserting the MultiMedia Card to the slot, its skewed side has to aim at POWER switch.
Maximum memory capacity of used MultiMedia Card can be 128MB.
Press <ENTER>.The following menu appears:
 Loading...