9
5.Operation
5.1.Browsing the menu
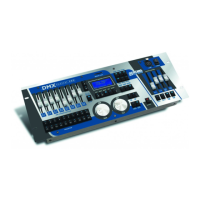
The DMX CONTROL 480 handles 20 independently controlled projectors with a maximum of 24 channels per
projector and with a regular DMX 512 signal output.
Connect built DMX serial link to the controller's output(s).Connect the controller to the mains and switch it on,the
initial screen appears:
Robe
Lighting
DMX Control 480
Now by pressing the MENU button you access the main "MENU" where you can scroll to the desired submenu.
Needed buttons and their main functions:
<UP>,<Down> - the buttons for browsing the menu items or editing values.
<LEFT>,<RIGHT> - the buttons for the movement between editable items.
<ENTER> - the confirming button (for saving the changes you have made)
<ESC> - the escape button (for returning to the previous menu without saving the changes
you have made).
<MENU> - the button accesses the main menu.
PAN wheel,TILT wheel - the rotating wheels for adjusting the values of displayed items
Special buttons and their functions will be described in respective sections.
Caution: When you turn the device on, the controller is in blackout-mode (Blackout-LED shines).
The controller will be locked by pressing the CHANNEL RANGE/LOCK button.We suggest you change the
password after your purchase.This will prevent all anauthorized people from tampering with your programs
or running your fixtures.
Only those buttons are active where the LED shines on or flashes.If you press any others,nothing will hapen.
5.2.Menu map
Make Scene
Make Program
Make Record
Make Chaser
Make Group
Setup
Config unit
Config DMX
Rename effect
LCD Adjust
MM Card Menu
-Load data
-Save data
Rconfig DMX1
-Remote confi.
-Upload program
Rconfig DMX2
-Remote confi.
-Upload program
PC Connection
User setting
Set password
Factory setting
 Loading...