INFORMATION ON ADJUSTMENTS
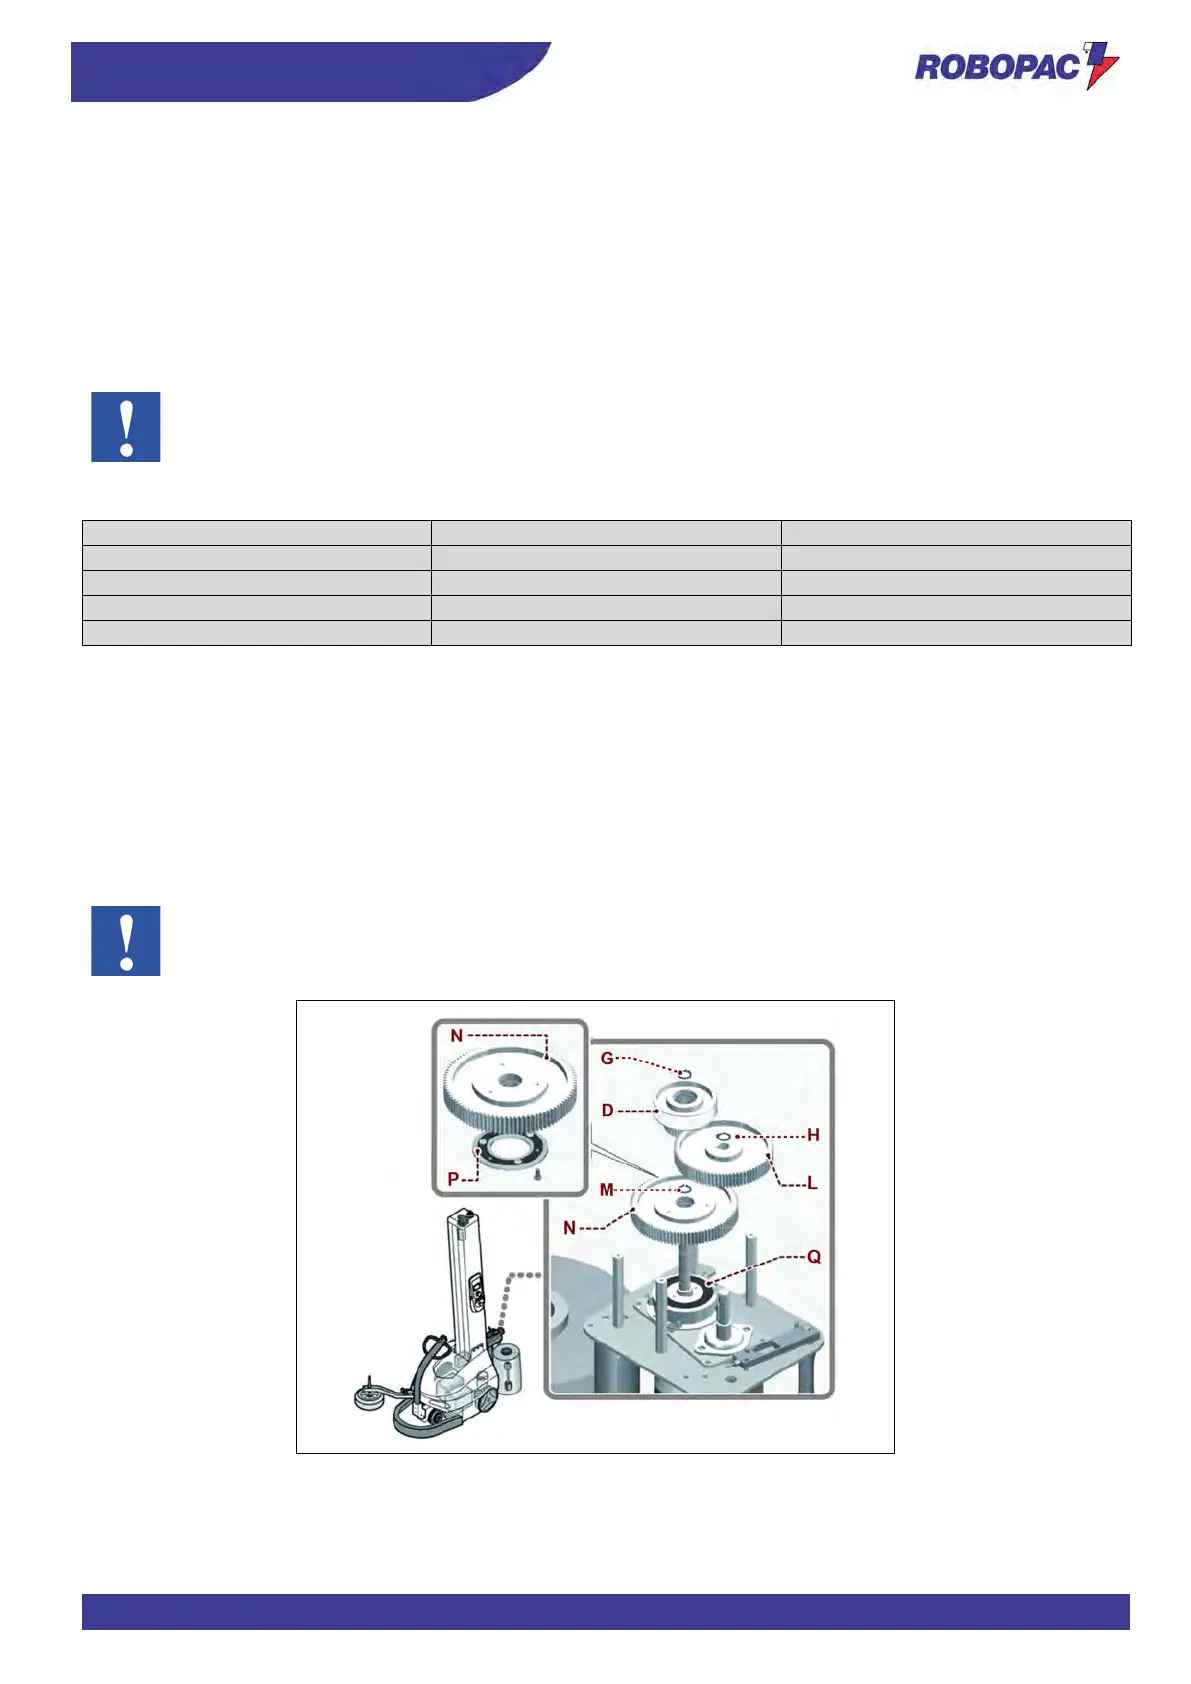
7.
Remove the retaining ring (G).
8.
Remove the pulley (D).
9.
Remove the retaining ring (H).
10.
Remove the gear (L).
11.
Remove the retaining ring (M).
12.
Remove the gear (N).
13.
Loosen the screws and remove the disc (P) from the gear (N).
14.
Select the set of gears (L-N) relating to the concerned pre-stretch percentage (see table).
The table indicates the pre-stretch values which can be obtained with the relevant transmission gear set.
Set the pre-stretch according to the film resistance and quality in order to obtain a low consumption.
Pre-stretch values
(∗) See spare parts catalogue.
15. Fit the disc (P) and correctly fasten it to the gear (N) of the new gear ratio.
16. Fit the gear (N) of the new transmission gear set.
17. Position the gear with the disc side (P) coupled with the clutch (Q).
18. Fit the retaining ring (M).
19. Fit the gear (L) of the new transmission gear set.
20. Fit the retaining ring (H).
21. Fit the pulley (D).
22. Fit the retaining ring (G).
During reassembly, make sure that coupling tabs are correctly engaged.