INFORMATION ABOUT THE USE
6.5. WRAPPING START AND STOP
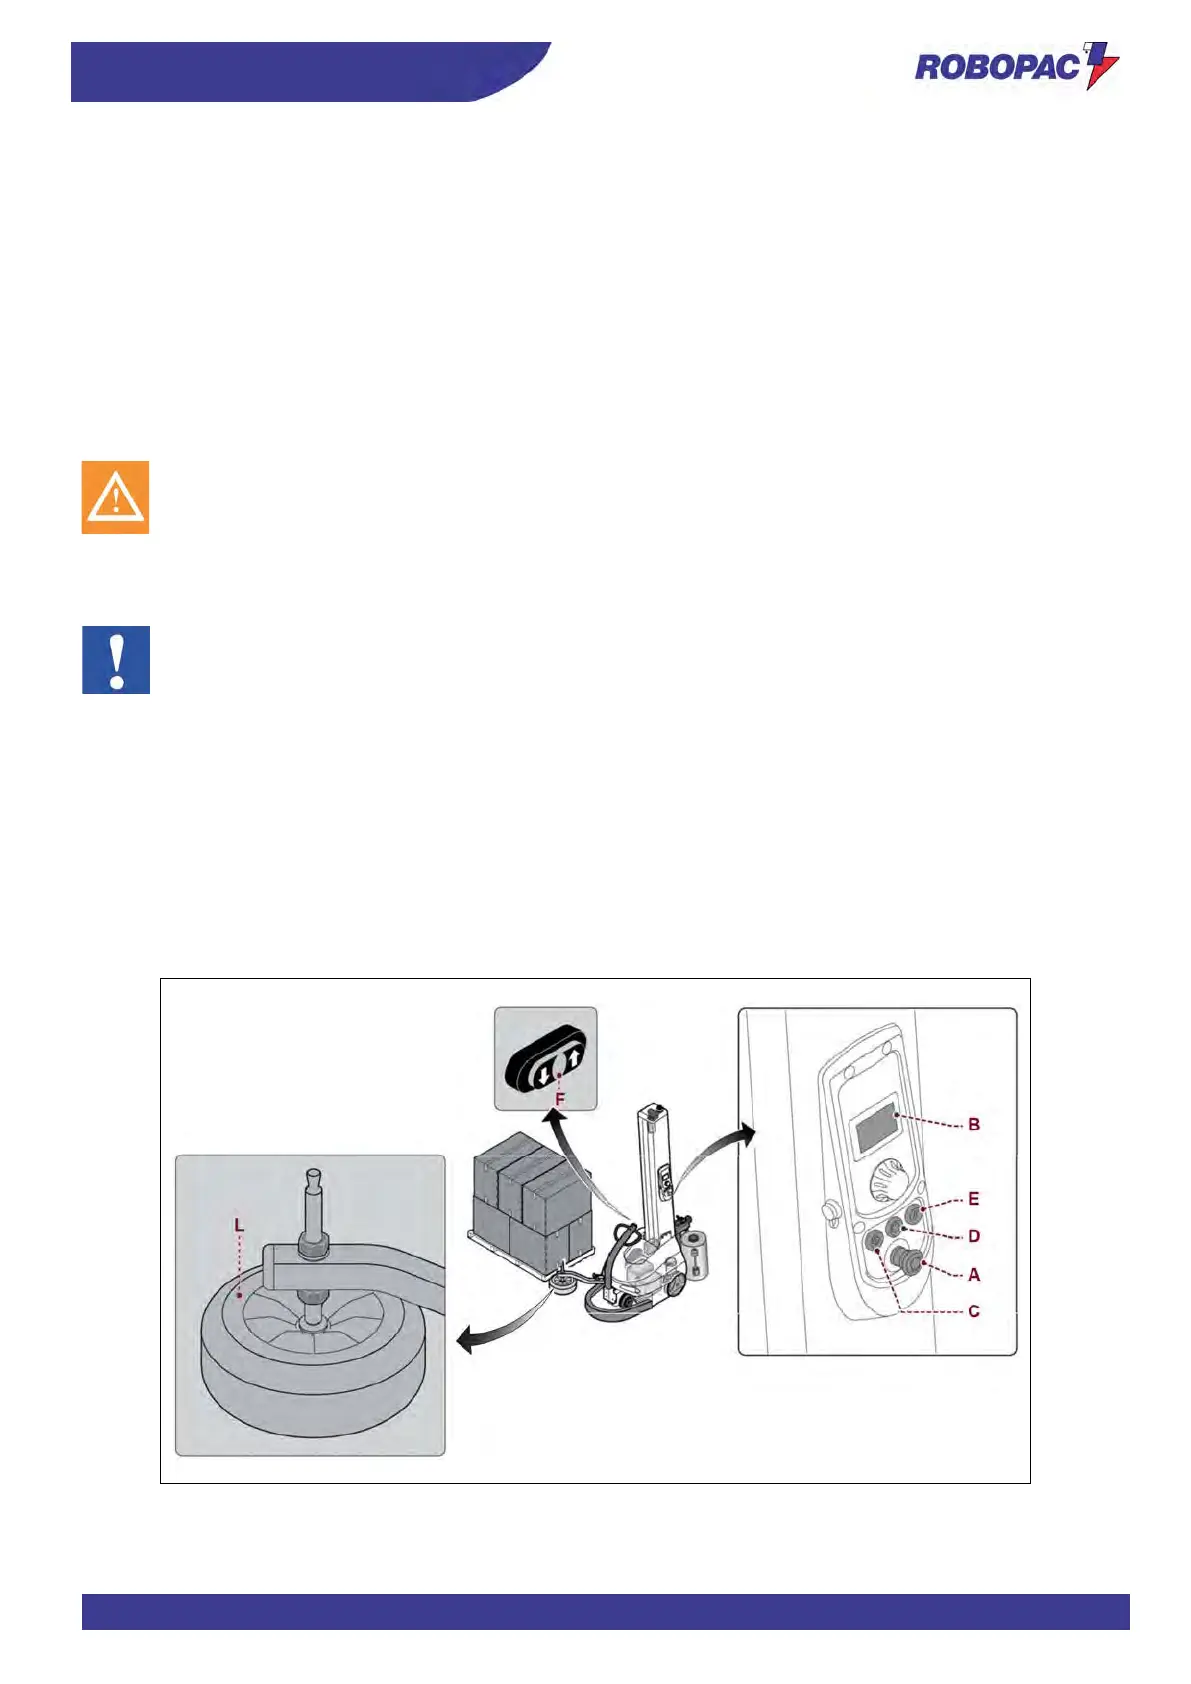
Proceed as follows.
1. Press the button (D) to enable the power supply of controls.
The digital display (B) turns on.
2. Press the button (E) to reset the machine.
3. Use the buttons (F) to move the machine closer to the pallet, until the feeler wheel (L) leans against the pallet.
4. Check that the feeler wheel (L) is aligned with the pallet and not with the product.
Adjust the feeler wheel height.
(See “Feeler wheel height adjustment”).
5. Make the film adhere to the pallet.
6. Set the wrapping mode.
For more details, see the paragraph “Description of user interface”.
Do not stretch or pre-stretch the film excessively and do not wrap the product with too many wrappings in
order to prevent damaging the packages and the products contained in them.
7. Press the "Cycle Start" button (C).
The machine performs the wrapping and, at the end of the set cycle, it stops automatically.
8. Cut the film (manual or automatic cutting).
If there is the optional automatic cutting unit, this phase will be automatically performed.
Information valid only for “feeder cycle” wrapping mode.
− When the machine stops in the pallet upper section, position the TOP sheet (do not cut the film).
− Press the "Cycle Start" button (C).
The machine performs the wrapping and, at the end of the set cycle, it stops at the pallet base.
At the end of the wrapping phase, the machine can be stopped in “stand-by” mode or switched off.
− When the machine is in “stand-by” mode and it is not used for more than 15 minutes, the “energy saving”
operating status is automatically activated.
To restore the machine operation touch the display.
If the “Energy saving” function is active for more than 15 minutes, the machine automatically switches off.
− Press the button (D) to switch off the machine voluntarily.