INFORMATION ABOUT THE USE
6.3. DESCRIPTION OF USER INTERFACE
The user interface is equipped with a multi-function selector, which is used to view and set the machine functions, and
a display, which shows recipes, parameters, etc.
To view and/or set the functions, turn or press the multi-function selector.
Functional logic diagrams show the navigation modes.
The illustration corresponding to each view shows the abbreviation which indicates the activation mode.
− Abbreviation "R":
turn the control to access the views or to modify the values.
To modify the values, press the control, turn it until the concerned value is displayed and press it again to save
it.
− Abbreviation "P":
press the control to activate the selected function.
− Abbreviation "PP" (Prolonged pressure):
press the control and keep it pressed for about 2 seconds to access the second level options available for some
functions.
Meaning of the colours on the page edges:
− Yellow: machine in “Stop” mode with locked values (padlock function).
− Green: machine in “Stop” mode with editable values.
− Purple: machine in “Manual” mode.
− Blue: machine in “Reset” mode.
− Orange: machine in automatic “Run” mode.
− Red: machine in alarm mode.
− White: parameter value edit pages.
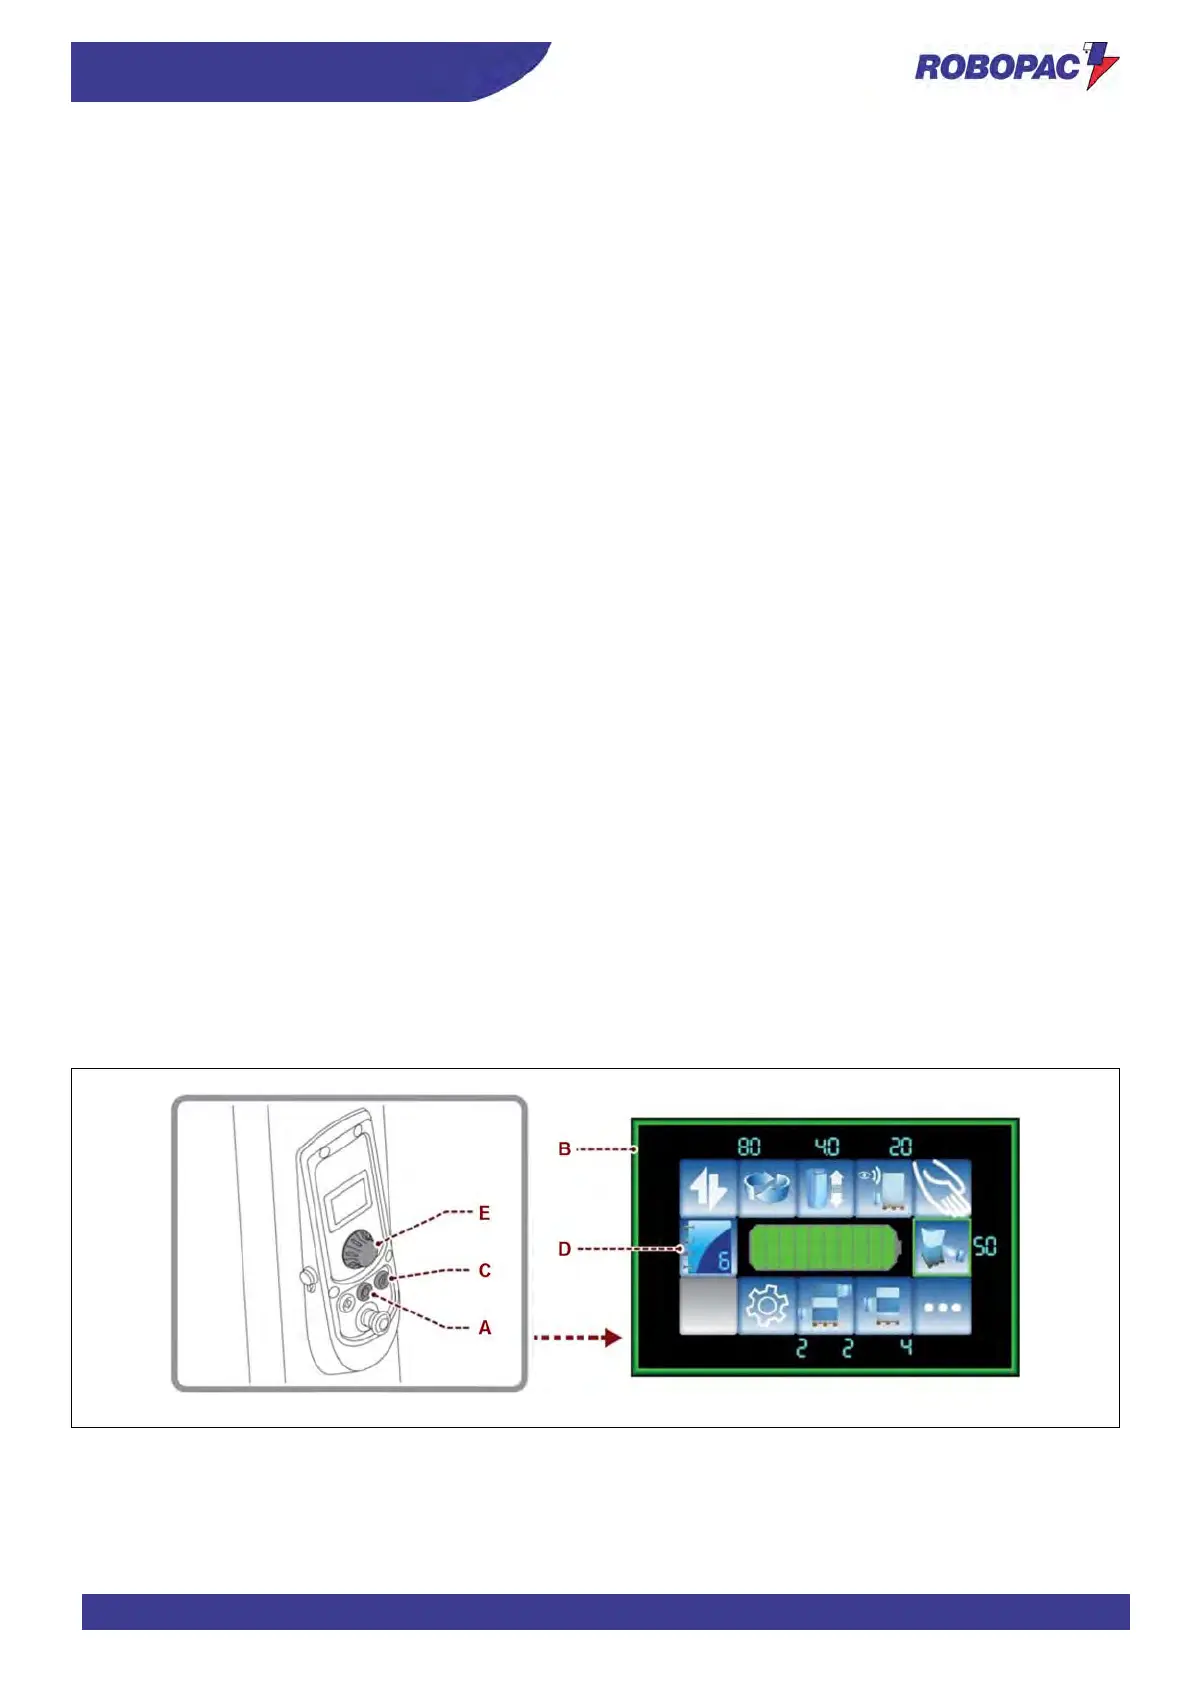
6.3.1. USING THE PANEL
1. Press the button (A) to enable the power supply of controls.
2. When machine is ready, the main page is displayed (B).
3. Press the “Reset” button (C).
4. Press the “START” button to enable the automatism and accept the recipe displayed, or touch the (D) key to
choose the recipe.
5. Choose the recipe (the type of processing desired) and confirm it by pressing the multi-function key (E) (See
“Description of user interface”).
6. The machine is ready to run in automatic mode all the cycle parameters displayed on the main screen (See
“Wrapping start and stop”).