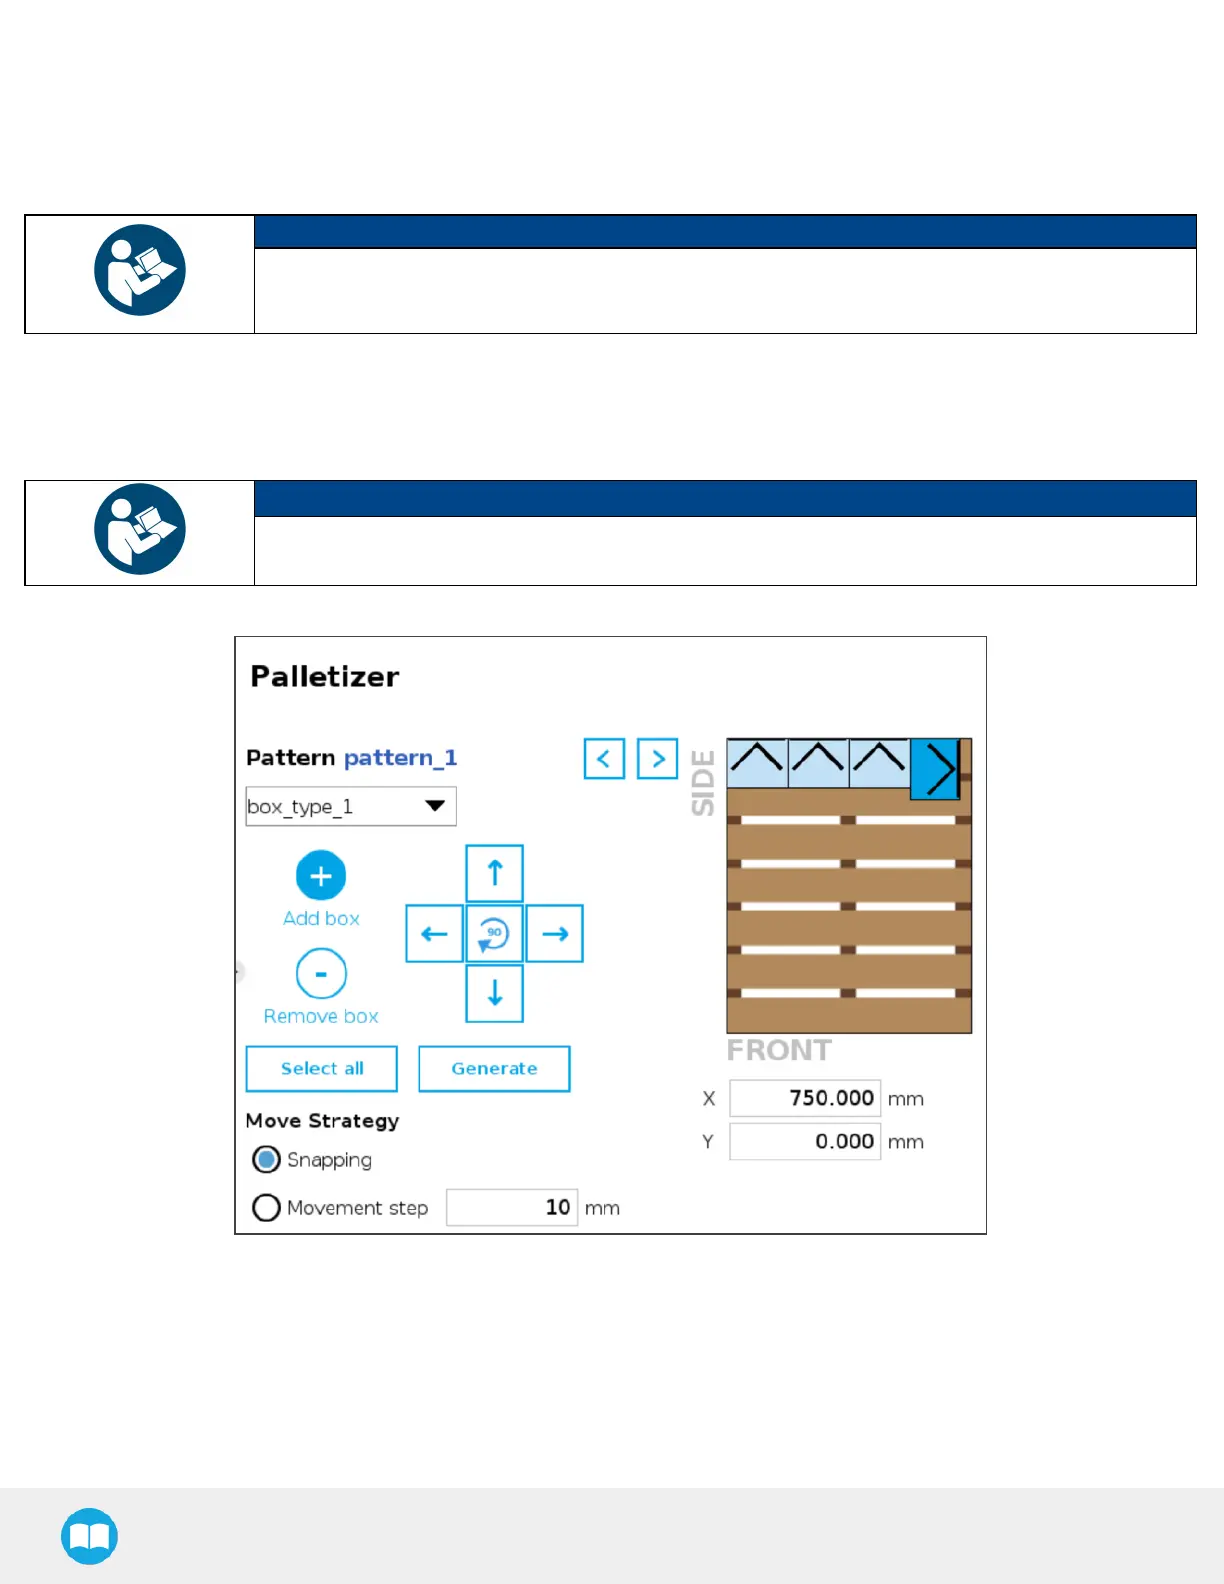
4. Add box
Tap the plus(+)button to add a box.
The first box will automatically be placed at the origin (0,0)of the layer (i.e., top left corner on the pallet).
The newly added box will feature a dark blue color, meaning it is the active box.
NOTICE
The user can select any box placed on the virtual pallet by tapping on it.
The selected box thusbecomes the active box.
Any box added afterwardswill feature a red color, meaning it overlapsa box.
Using the arrowson the screen, the user can move it around so that it doesnot overlap other boxes, and ultimately place it where
it belongs on the pallet.
NOTICE
If the Set label orientation option hasbeen selected in the Box menu, the boxesplaced on the virtual
pallet will each display an arrow pointing at the side of the box on which the label is affixed.
Fig. 5-24: Pattern Menu With BoxesShowing Label Orientation
5. Remove box
Tap the minus (-)button to remove the active box.
6. On-Screen movement pad
Tap the directional button that corresponds to the direction in which the box needsto move (up, down, left, right).
96