2-4 Installing the Adapter
PowerFlex® 755 Drive Embedded EtherNet/IP Adapter User Manual
Publication 750COM-UM001A-EN-P
Connecting the Adapter to
the Network
1. Remove power from the drive.
2. Remove the drive cover.
3. Use static control precautions.
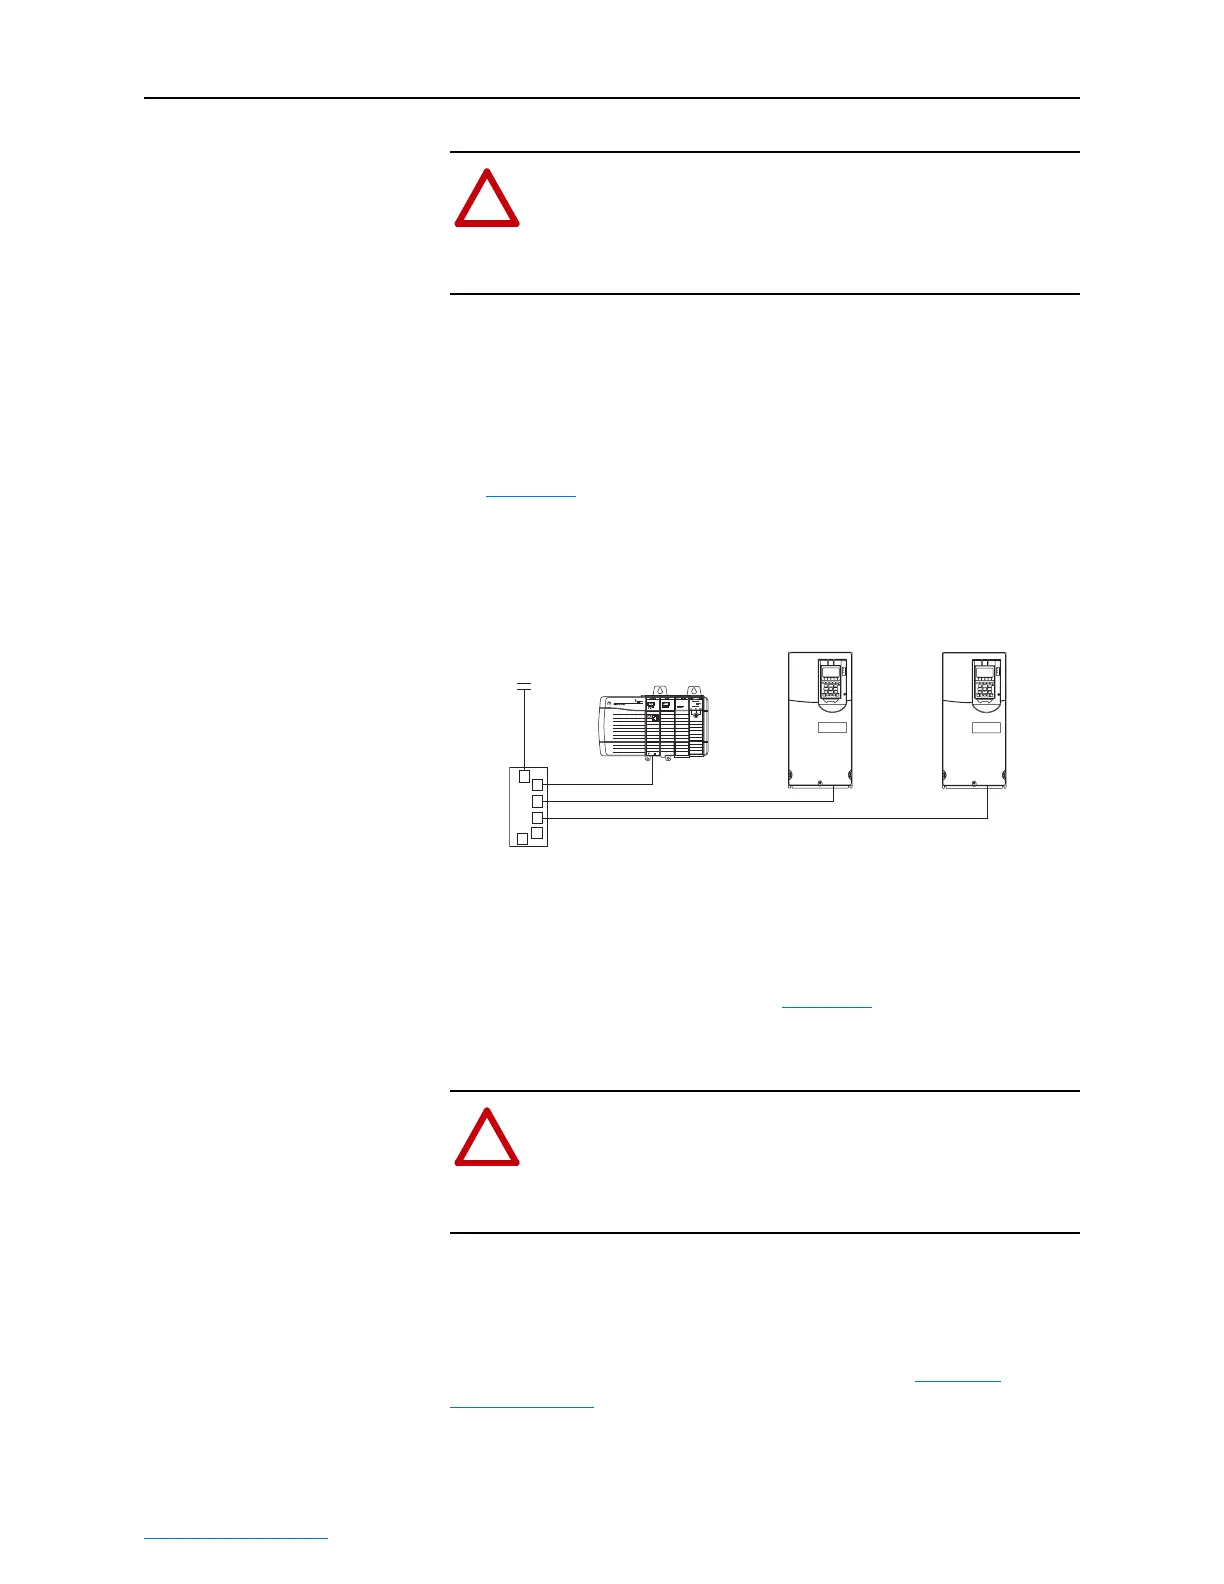
4. Connect an Ethernet cable to the EtherNet/IP network. See
Figure 2.2
for an example of wiring to an EtherNet/IP network.
Figure 2.2 Connecting the Ethernet Cable to the Network
5. Route the Ethernet cable through the bottom of the PowerFlex 755
drive, and insert the cable’s plug into the embedded EtherNet/IP
adapter’s mating socket (item 3 in Figure 1.1
).
Applying Power
Install the drive cover, and apply power to the drive. The embedded
EtherNet/IP adapter receives its power from the drive. When you apply
power to the embedded EtherNet/IP adapter for the first time, its
“ENET” status indicator should be solid or flashing green after an
initialization. If it is red, there is a problem. Refer to Chapter 7
,
Troubleshooting
.
!
ATTENTION: Risk of injury or death exists. The
PowerFlex drive may contain high voltages that can cause
injury or death. Remove power from the drive, and then
verify power has been discharged before connecting the
embedded EtherNet/IP adapter to the network.
Router
(optional)
Switch
Controller
(ControlLogix shown with
1756-ENBT Bridge)
PowerFlex 755 Drives
(each with embedded
EtherNet/IP adapter)
EtherNet/IP
!
ATTENTION: Risk of equipment damage, injury, or death
exists. Unpredictable operation may occur if you fail to verify
that parameter settings are compatible with your application.
Verify that settings are compatible with your application
before applying power to the drive.
 Loading...