36
RootWave Pro User Guide
Getting started
If RootWave Pro was shipped to you in a crate, then carefully unpack
each of the items and check against the items listed in ‘Table 1’ on
page 24.
• We recommend that you keep the box that
RootWave Pro was delivered in, for storage and
transportation.
In addition, you will need the components listed in ‘Table 8’ on page
37 and may need the equipment listed in ‘Table 9’ on page 38
depending on the weeds being treated and operating environment.
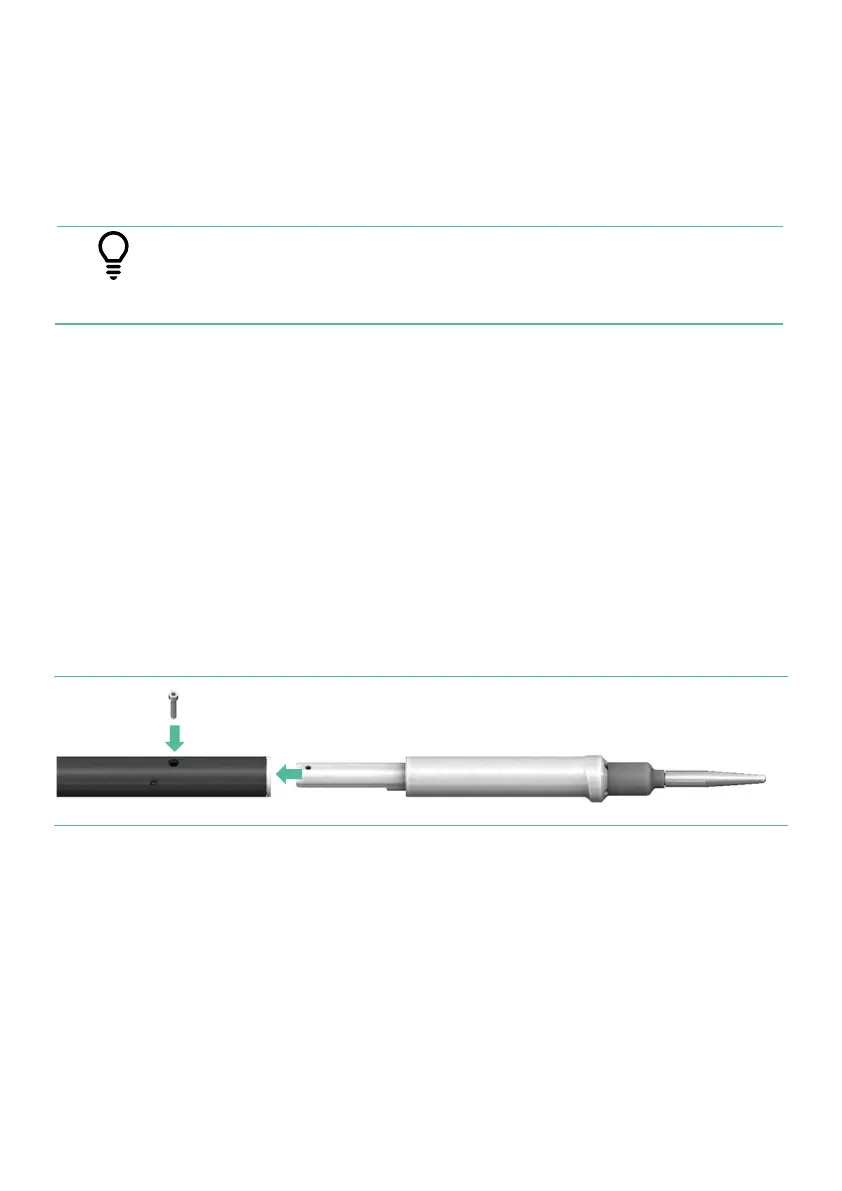
Setting up the Treatment Lance
Before you can use the Treatment Lance you must fit the Electrode
Module.
To fit the Electrode Module, align it with the socket and at the end
of the Treatment Lance shaft and push it fully home. Then, using a
3mm hex key, screw the locking screw fully home (the screw head
will be flush with the shaft’s surface).
Figure 8 Fitting the Electrode Module to the Treatment Lance
If you are unsure of whether your Electrode Module is correctly
fitted please contact your RootWave Pro supplier.
Before you can use the Treatment Lance, you must also fit the
lanyard by attaching it to the loop by the voltage selector switch.