NiteHAWK Internet Jukebox Installing Hard Drive & Testing
22022602 2-1
Section: 2 Installing Hard Drive & Testing
INSTALLING THE HARD DRIVE
The system will not operate without a Hard Drive installed. These are sold separately and
are available with several preloaded music genres - Country, Hard Rock, R&B/Soul, etc.
Hard drives are available from your distributor-order P/N 221950XX.
CAUTION!
Hard drives are extremely sensitive to physical mishandling. Always keep the
hard drives protected from accidental falls, banging, dust, or liquids.
!WARNING!
Never install or remove a hard drive when the unit is powered ON. As an extra
precaution, always unplug the CC (Core Computer) from the power source
before removing or inserting a hard drive.
The following steps should always be followed when installing a hard drive in the jukebox:
1. Unlock the jukebox and open the front door.
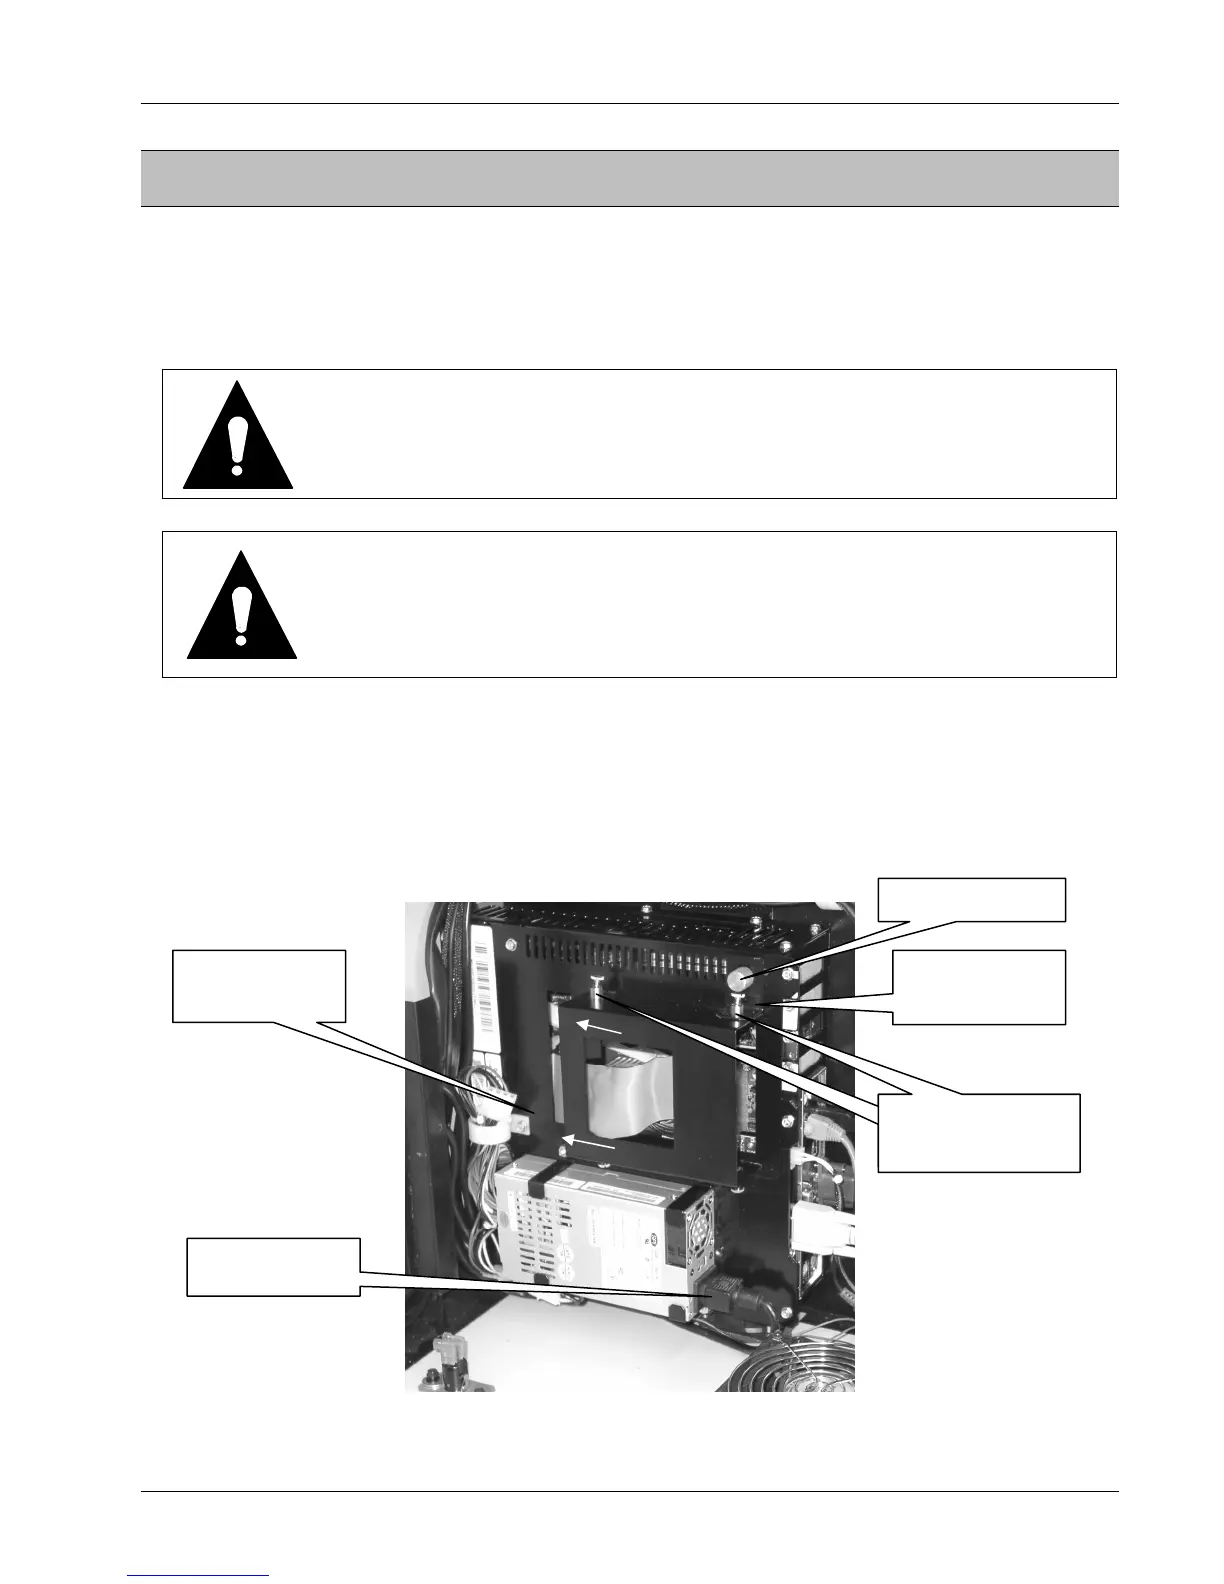
2. Unplug the power cord at the ATX Power Supply from the power supply. Loosen the
thumbscrew and slide the Hard Drive Clamp up to clear the spring loaded screw.
Refer to Figure 2-1
3. Slide the hard drive housing to the left to release it from the slots in the computer
core housing.
Figure 2-1 – Hard Drive Housing
POWER CORD
THUMBSCREW
SPRING-LOADED
SCREW
SPRING-LOADED
SCREW
HARD DRIVE
CLAMP
HARD DRIVE
HOUSING