Installing Hard Drive & Testing NiteHAWK Internet Jukebox
2-4 22022602
TESTING THE UNIT
Once the jukebox is powered on and the user interface is running (see Figure 2-7 - Jukebox
User Interface), try the following procedures before moving and installing the unit at the
venue:
Touchscreen
NOTE: Every time a hard drive is installed in a core computer, the touch-screen should be
calibrated.
The following procedure describes how to calibrate the touch-screen:
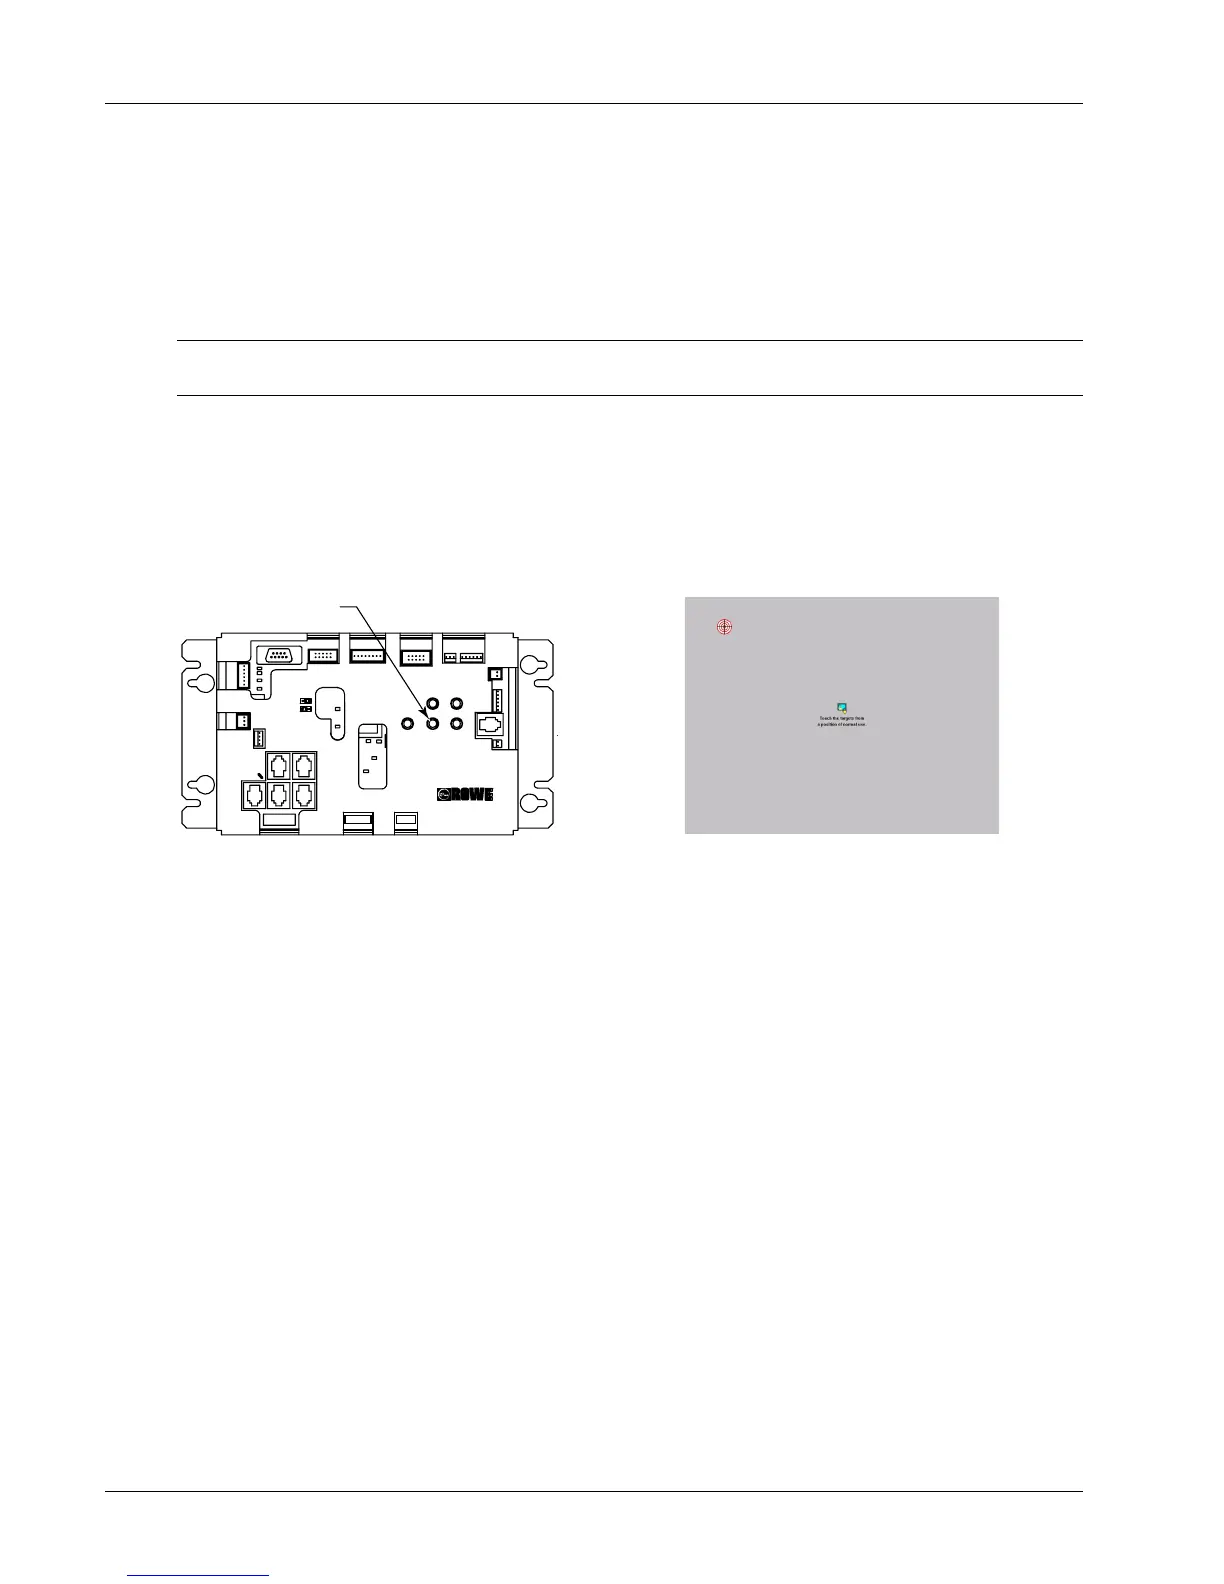
1. Press the “Calibrate” button on the Rowelink Controller (Figure 2-5) Press the
button in once to launch the calibration program. This will override the Jukebox
application while the calibration program runs. (See Figure 2-6) for a picture of the
calibration program interface.)
2. Follow the directions on the screen, touching the center of the targets, then touching
“YES”.
Calibrate
TB1
ROWELINK
P6
P7
P9
P5
P8
P10
POWER OUT
P23
P14
POWER IN
POWER IN
12 VDC
24 VDC
24 VAC
5 VDC
RS232
P22
CC RL RX
CC RL TX
P21
COIN
ACCEPTOR
P20
COIN
SWITCHES
P19
BILL
ACCEPTOR
POWERCALIBRATESERVICE
REJECT
ROWELINK CONTROLLER
409260XX
P3
AMP MUTE
P11
IR DETECTOR
P12
SW'S
P17P18
COUNTER
MDB
BILL
ACC.
POWER
P16
CRDT STATUS
KID RL TX
CRDT RL TX
IR RCV
1000 W
250 W
P15
REJECT
P4
FAN CKTS
P2
VIDEO SW
Figure 2-5 – Rowelink Controller
Figure 2-6 – Calibration Screen
3. If you’ve installed a Hard Drive which had previously been connected to the AMI
Network, skip ahead to Step 4. If you are installing a new hard drive open the
jukebox door again and press the “Service” button on the Rowelink Controller (See
Figure 2-5) Close the door and touch “Location/System Setup”, the “Enable/Extend
Features”. Using the on screen keyboard, enter the Trigger Code written on the
Card which was included with your new Hard Drive. Touch ENTER to complete the
process - the message “Valid Trigger Code Entered” will be displayed on the screen.
Press “Main Menu” and then “Exit Service Mode”. The system is now prepared for
connection to the AMI Server.
4. Make sure that the door is locked.
Credit Test
Insert a dollar bill into the Bill Acceptor and ensure that the increment in credits corresponds
with the pricing scheme for the jukebox. See Bill Acceptor settings on page 5-4 for the
factory settings of the Bill Acceptor.
Insert quarters into the Coin Acceptor and ensure that the increment in the credits
corresponds with the pricing scheme for the jukebox.