Adding Microphones NiteHAWK Internet Jukebox
4-2 22022602
All of the following steps must be done to navigate properly through the Audio setup menus as you add
microphones to your jukebox system. If you need to start over from the beginning of a step, touch Undo or
Main Menu
. Do not skip steps.
Step 1. Attach the microphone(s), and cables as shown in Figure 4-1.
Step 2. To test the microphone the jukebox should be at the location with all extension speakers installed.
Set the volume control on the Rowe custom microphone, or the Paging MIC Adapter, to maximum
and do test pages with no music playing and with a song playing. If necessary change the levels by
setting the "Microphone Volume During Paging", the "Audio Volume During Paging", and the
microphone "TYPE" for paging as described In Step 3. If levels are as desired go To Step 4.
Step 3. Adjusting Paging Levels
• Push the SERVICE
button on the Rowelink Controller to enter the Main Menu.
• Touch HARDWARE SETUP
.
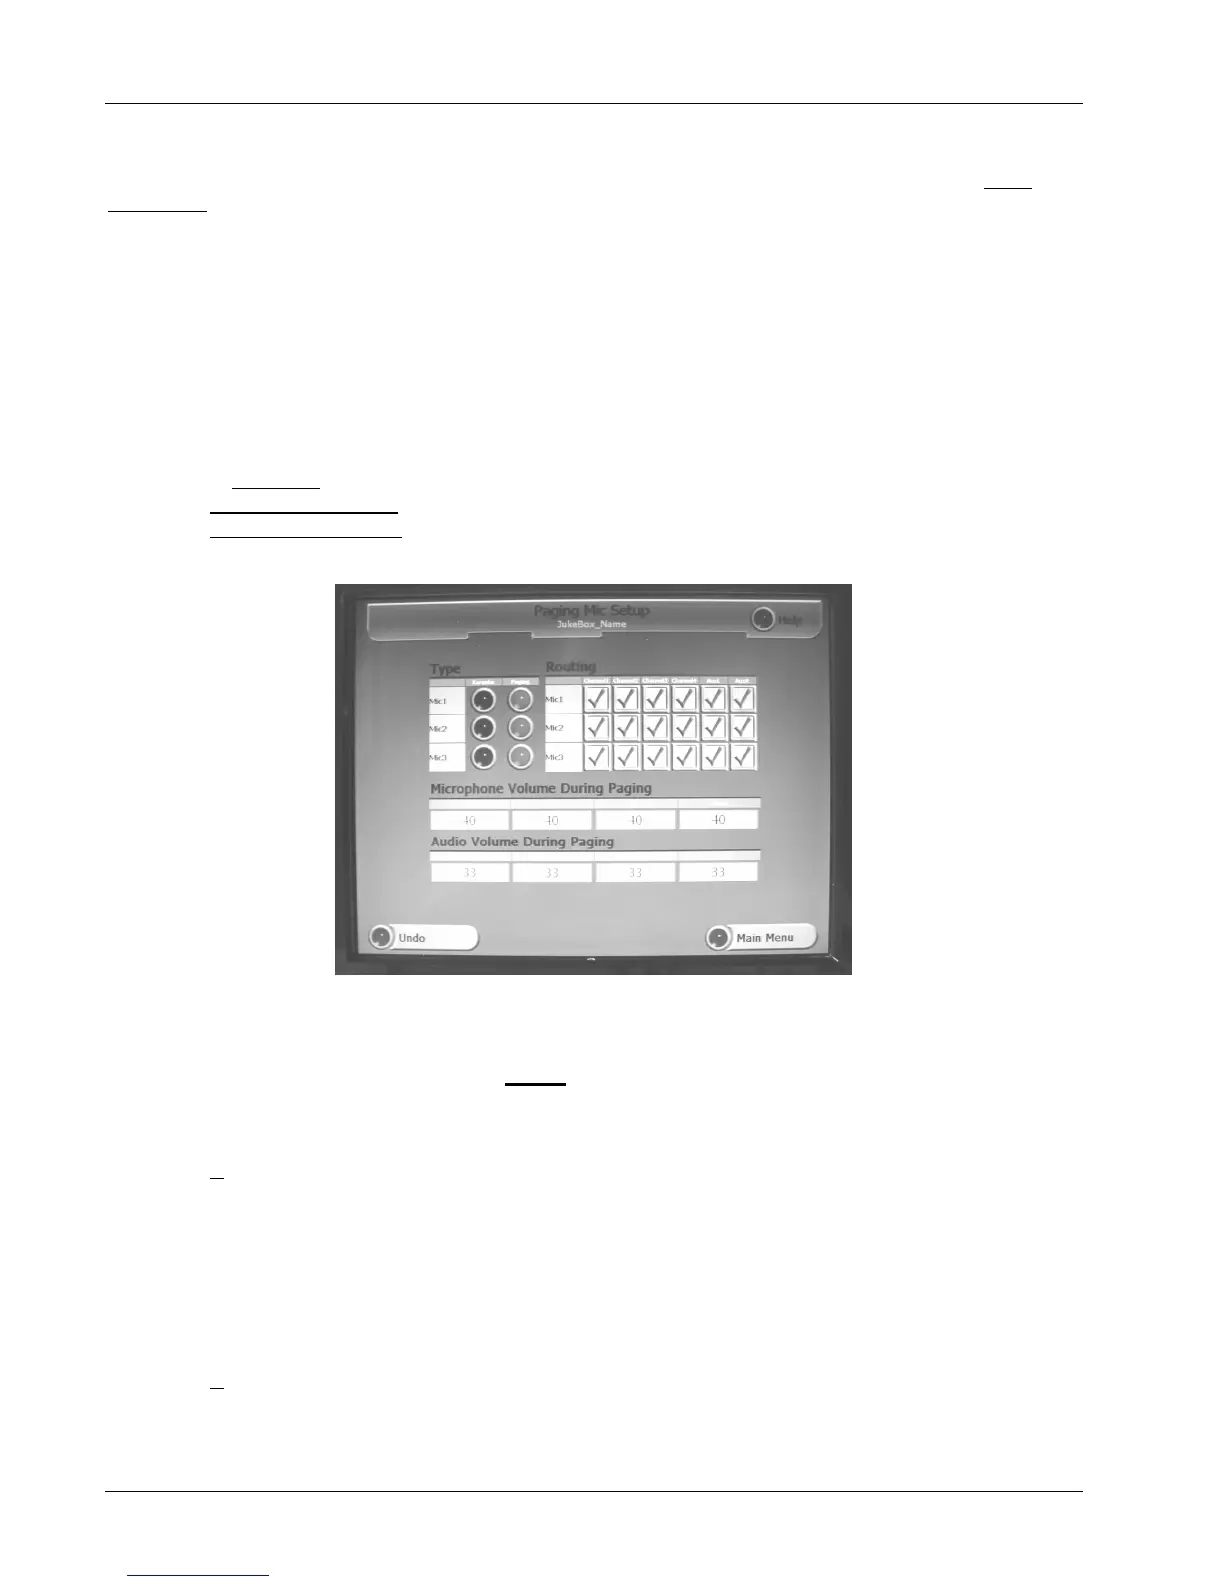
• Touch PAGING MIC SETUP
to view the Paging Mic Setup screen (see Figure 4-2). Make sure all MIC's
in the Type column are set to "PAGING" indicated by BLUE buttons.
Figure 4-2 - Paging Microphone Setup Screen
• The "Microphone Volume During Paging" is factory set to 40 for all microphones and is the recommended
setting. It can be set higher or lower but do not
set higher than 45 ( If set higher than 45, the amplifier
can shutdown for 5 to 15 seconds if the input level is very high. To set the level:
• Touch the box showing the current "Microphone Volume During Paging" setting.
• Touch C
on keypad to clear the present value, enter the new value on the numeric keypad, and then
touch Ok.
If there is a song playing during paging, the music level drops to the "Audio Volume During
Paging" settings. They are factory set to 33, and can be set anywhere from 0 to 63. Set to 0, if
you do not want any music to be heard during a page. Set to 63, if you want the minimum 6db
reduction of the music level. To change the "Audio Volume During Paging" settings:
• Touch the box showing the current "Audio Volume During Paging" setting.
• Touch C
to clear the present value, enter the new value on the numeric keypad, and then touch Ok.