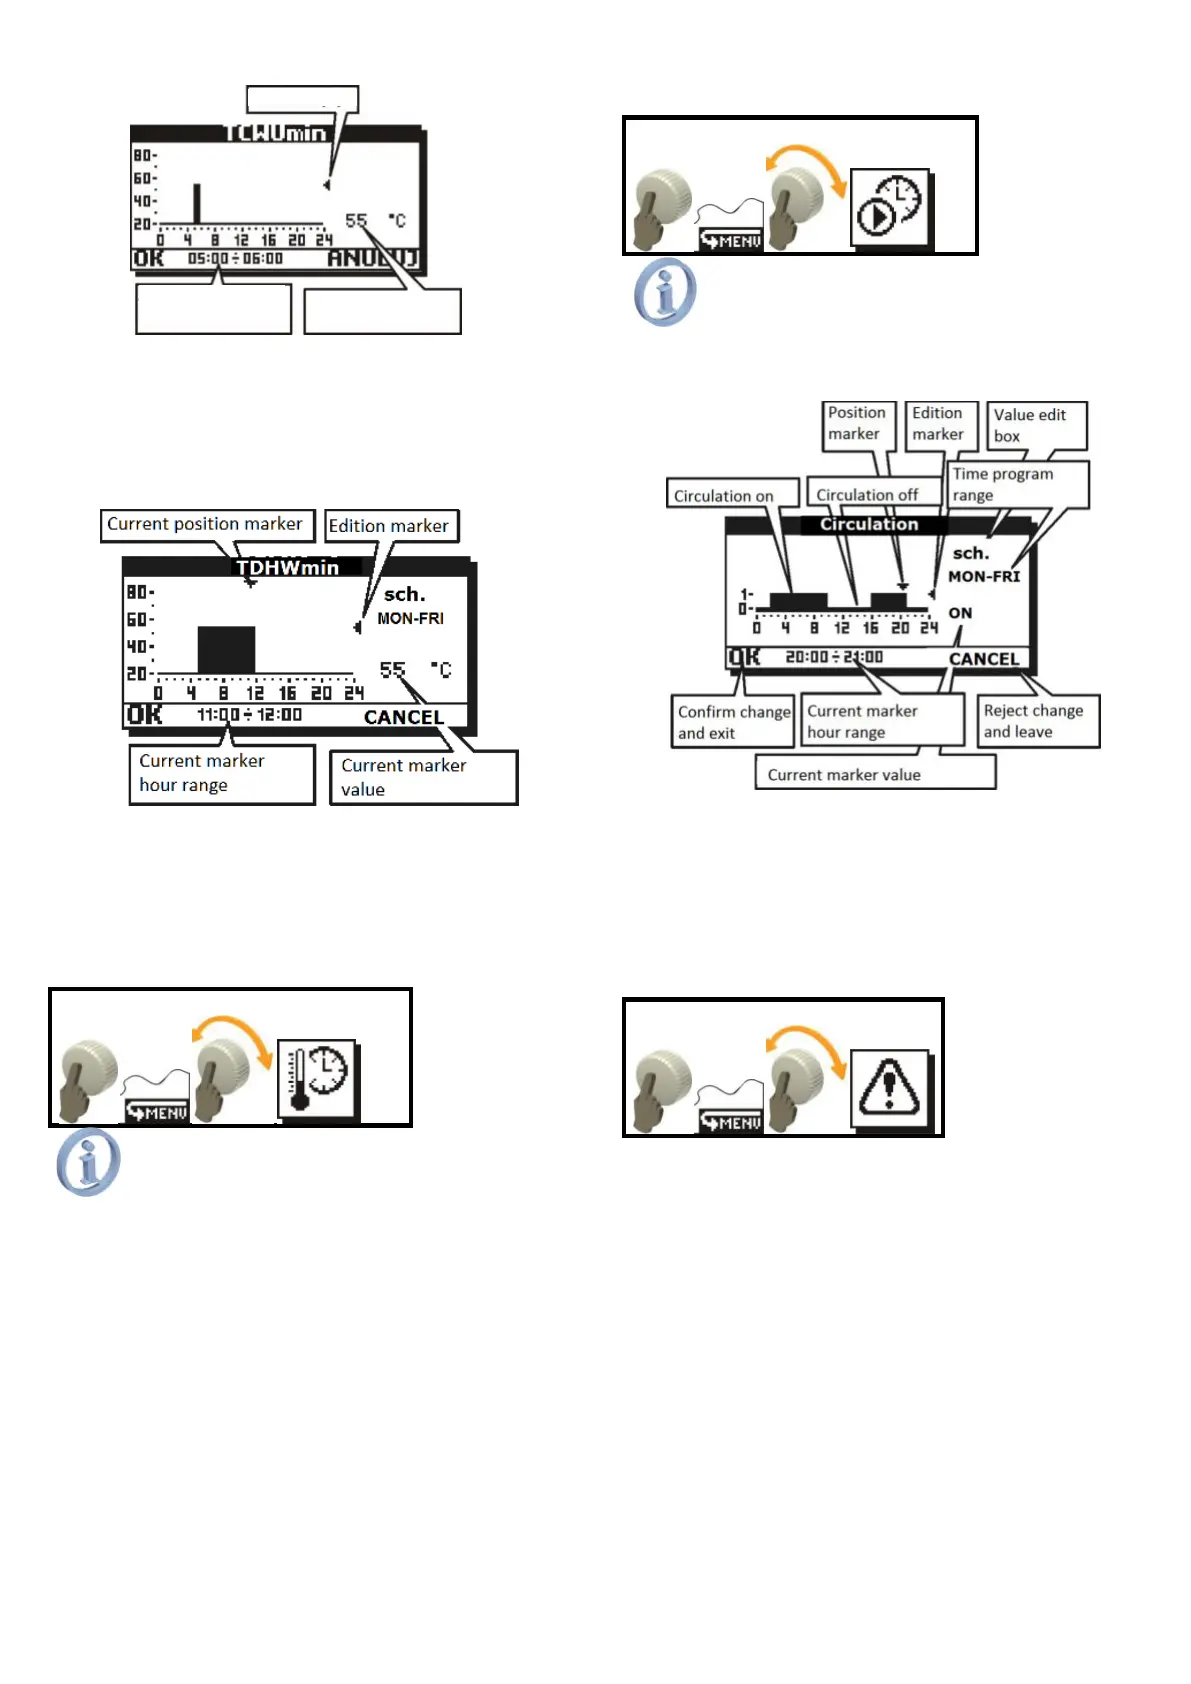
Fig. 8.4 Setting edition marker
When you set temperature and pressed
the knob, both edition marker and position
marker will be displayed on the screen, and you
may turn the knob to copy the value to adjacent
positions. Press again the knob to move to the
position marker.
Fig. 8.5 Setting value movement
Select OK and press the knob, while in position
marker mode, to confirm changes made in
schedules. Activate CANCEL to exit without
saving changes in schedules.
8.2. Room temperature
The position changes its destiny only in
scheme M.
Time program Room temp. is the
temperature set by the CT7 room temperature
sensor below which the sensor will influence on
the controller that will control the CH pump.
When switch off the temperature value in
value edition box, the time program will be set
off and the influence of the room thermostat on
the regulator, and the controller will use stable
value for Room temp. parameter (single
temperature value all the time). During edition it
may be seen that the temperature has the same
value all along the diagram.
Changes in time programs for Room temp. is
done in the same way as shown in the example
of scheduling settings TCWUmin.
8.3. Circulation
Item available only in schemes B, C, D, E,
G, H, J, K, L, M, O.
Changes in circulation time programs are
introduced the same like it was demonstrated for
TDHWmin schedule settings.
Fig. 8.6 Menu structure
Possible settings in value edit box are
YES, NO AND sch. Value YES will enable
constant circulation. Value NO will disable
circulation. Value sch. will activate time program
for circulation.
9. MENU ALARMS
The controller may alarm on any
irregularities in operation.
The controller has an intelligent alarm
function. It means that the controller recognizes
type of alarm condition and takes respective
remedy actions accordingly to the conditions. For
instance, if the sensor of reservoir extra heating
with a heater fails, the controller prevents extra
heating for the reservoir. Despite of alarm, the
solar circuit will continue correct operation and
the controller will not let the reservoir to be
overheated.
Type of action taken by the smart alarm
depends on the alarm type and on the solar
application.
When in the main screen in the screen
bottom ALARM! sign starts blinking (Fig. 5.2), it
means alarm situation. Now, entering through
Current marker
hour range