6 Installation of Options
103
CL4NX/CL6NX Service Manual
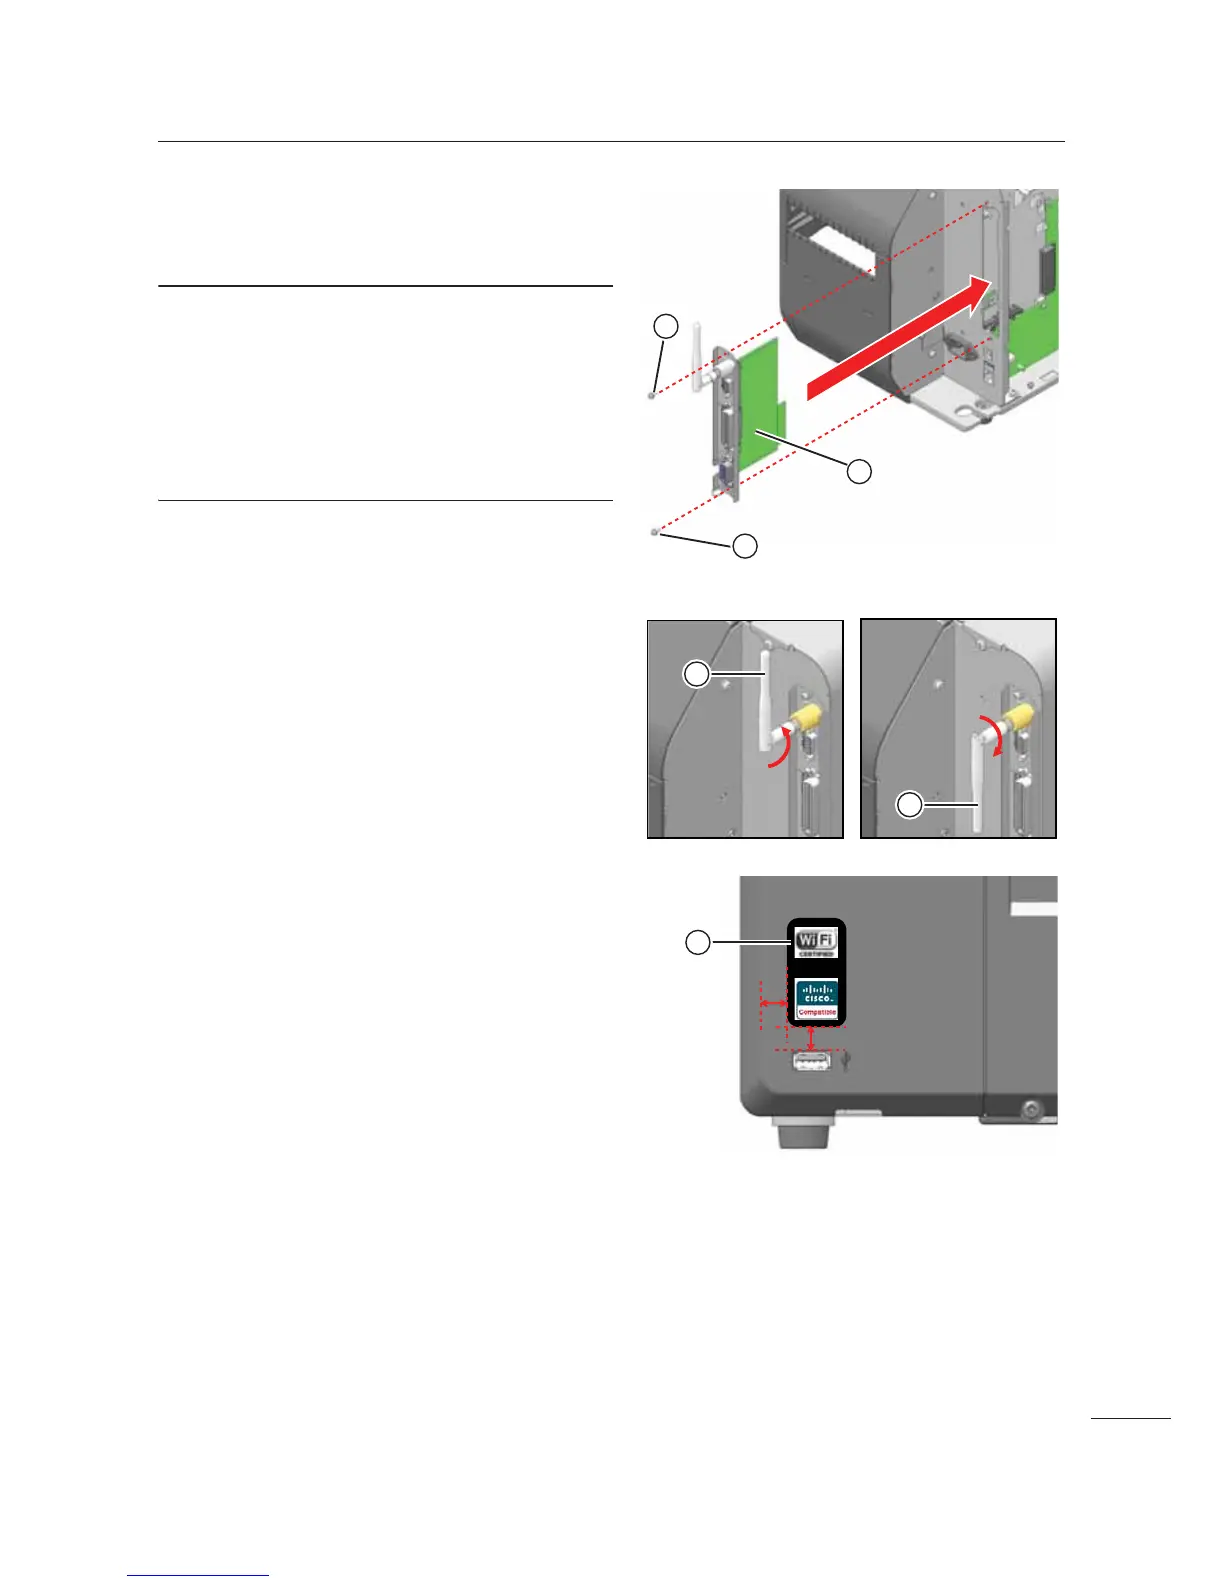
8 Attach the interface combo board 3
with the wireless LAN installed, to the
printer and tighten two screws
..
Note
• Make sure that the interface board is aligned and
inserted into the slot. So as not to scrape the board
against the top metal catches inflicting damage.
• When using the wireless LAN, adjust the antenna
, facing upward.
When transporting the printer, make sure that the
antenna
, is facing downward.
9 Paste the WIFI/CCX Sticker " on the
front left bottom corner of the printer as
shown.
2

 Loading...


