5 Replacement
80
CL4NX/CL6NX Service Manual
5.6
Replacing the KB PCB
Required tool:
• Phillips screwdriver (JIS #2 or equivalent)
1 Make sure that the printer is in power off mode, then disconnect the power cord from
the AC outlet.
2 Remove the front covers.
Refer to Section 5.1.2 Remove the Front Covers.
3 Remove the left housing cover.
Refer to Section 5.1.1 Remove the Left Housing Cover.
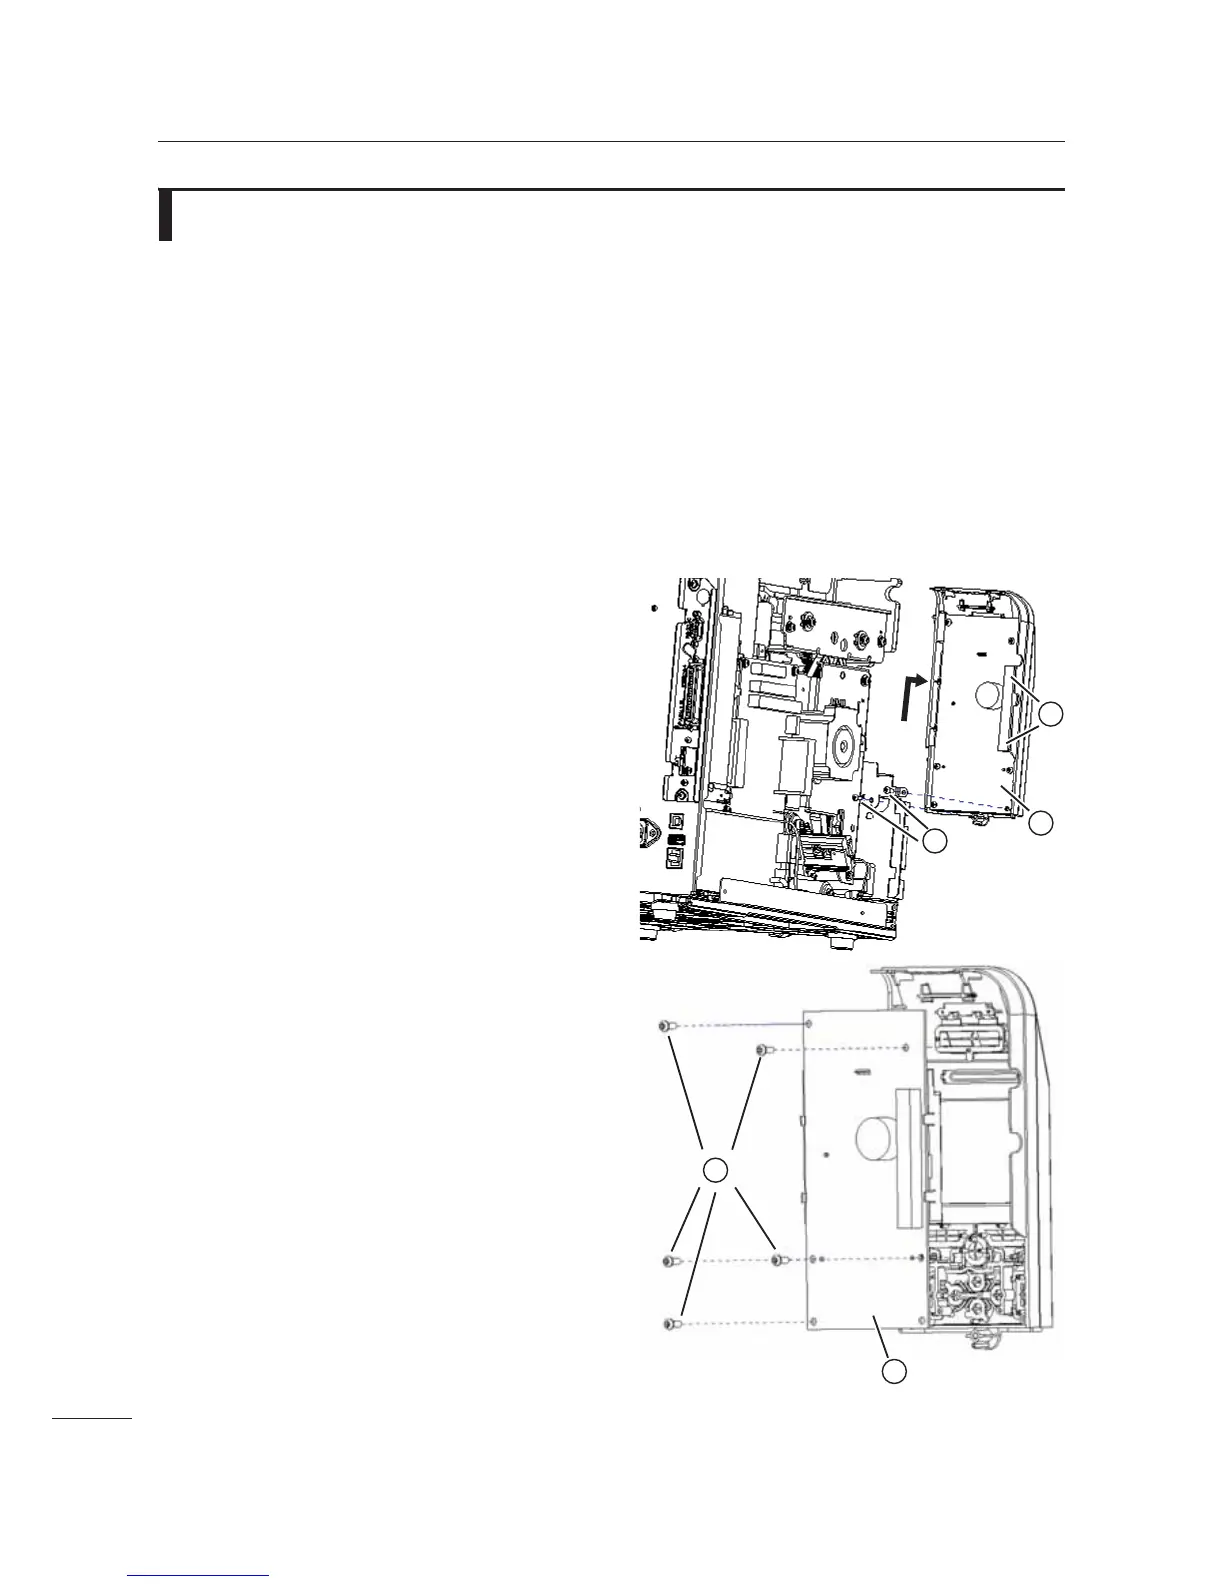
4 Disconnect two connectors . and
remove two screws
3, then slide
upward to remove the
operator panel
$.
5 Remove five screws / and replace the
KB PCB 1.
6 Perform the assembly with the reverse
procedure.
After the replacement
• Adjust the LCD contrast.
Refer to Section 4.8 Adjusting the LCD
Brightness.

 Loading...


