4 Checking and Performing Printer Adjustments
41
CL4NX/CL6NX Service Manual
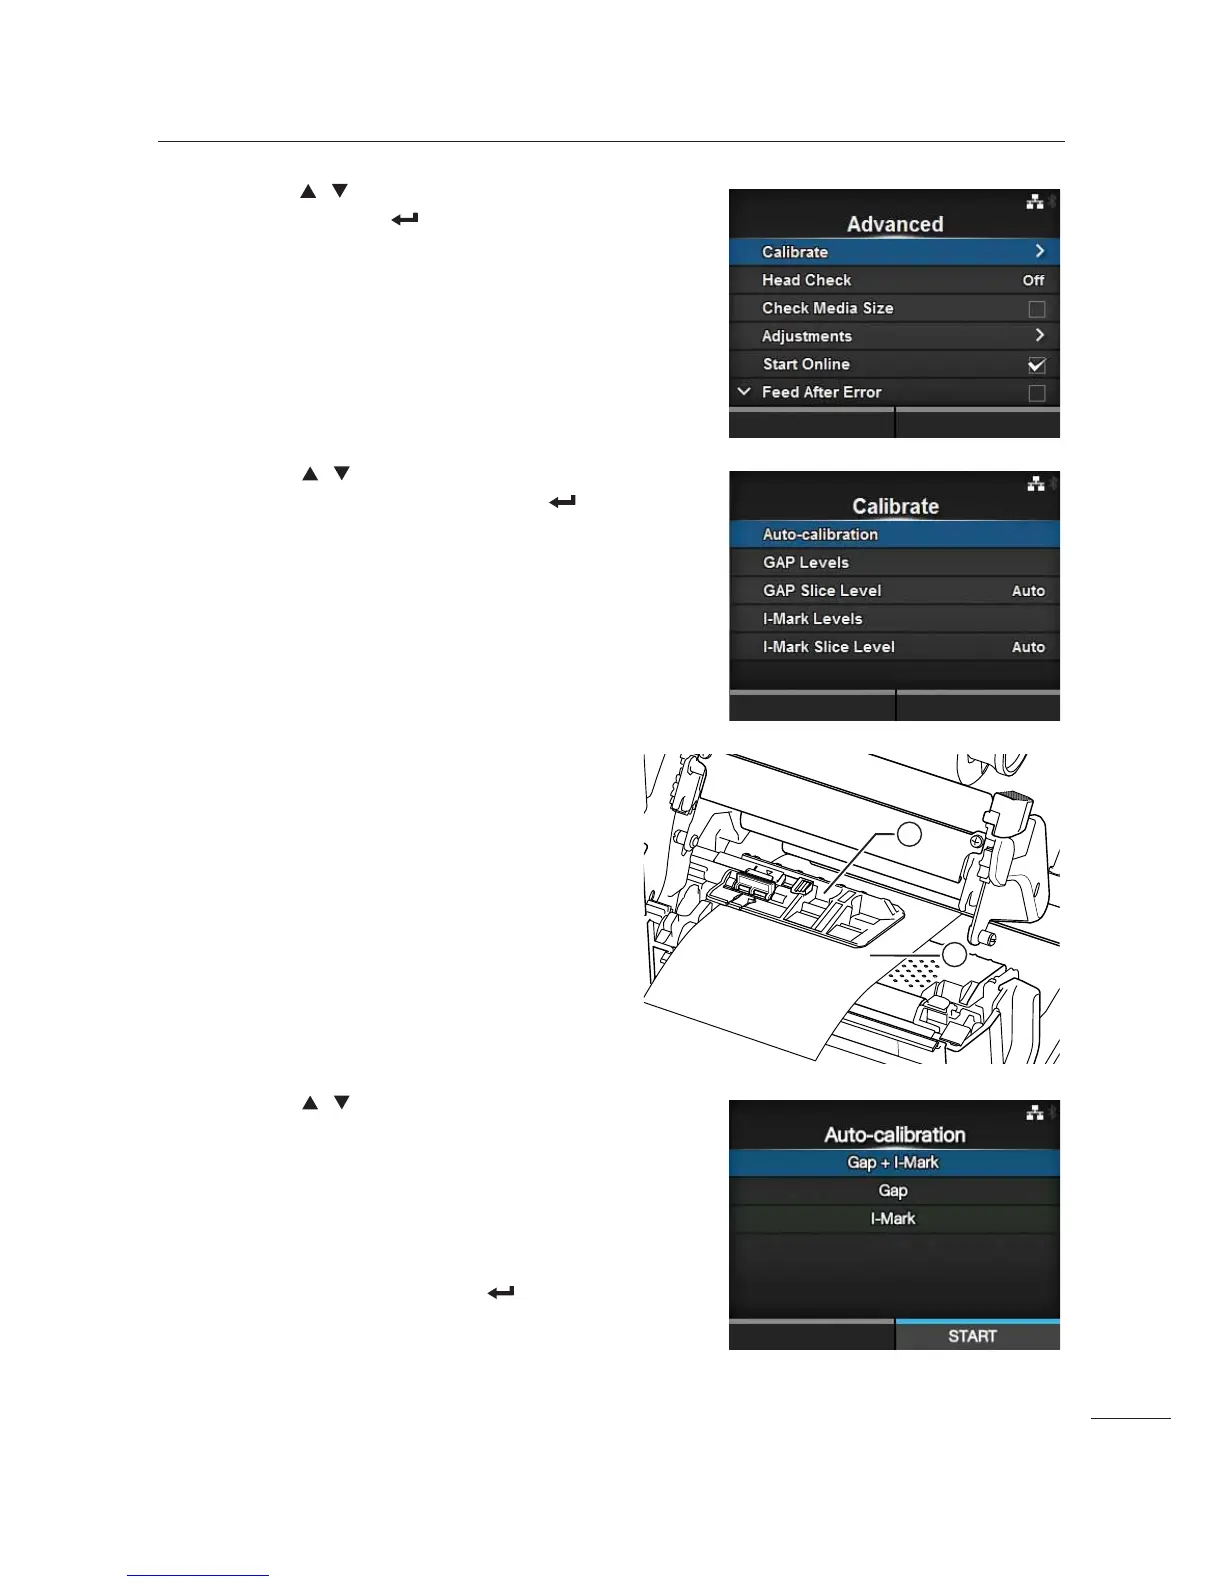
6 Press the / buttons to select Calibrate
and then press the button.
7 Press the / buttons to select
Auto-calibrate and then press the
button.
8 Pass the media . below the media
sensor guide 3.
If you are using labels, remove the label from the
liner. Align it so that the media sensor does not
sense the I-mark (black mark).
9 Close the print head.
To get the correct adjustment result, adjust after you
have closed the print head.
10
Press the / buttons to select the type
of sensor to be adjusted.
• Gap + I-Mark: Perform the adjustment for both
the Gap sensor and I-mark sensor.
• GAP: Perform the adjustment for the Gap sensor.
• I-Mark: Perform the adjustment for the I-mark
sensor.
11
Press the right soft button or button to
start the sensor adjustment.
2
1

 Loading...


