5 Replacement
75
CL4NX/CL6NX Service Manual
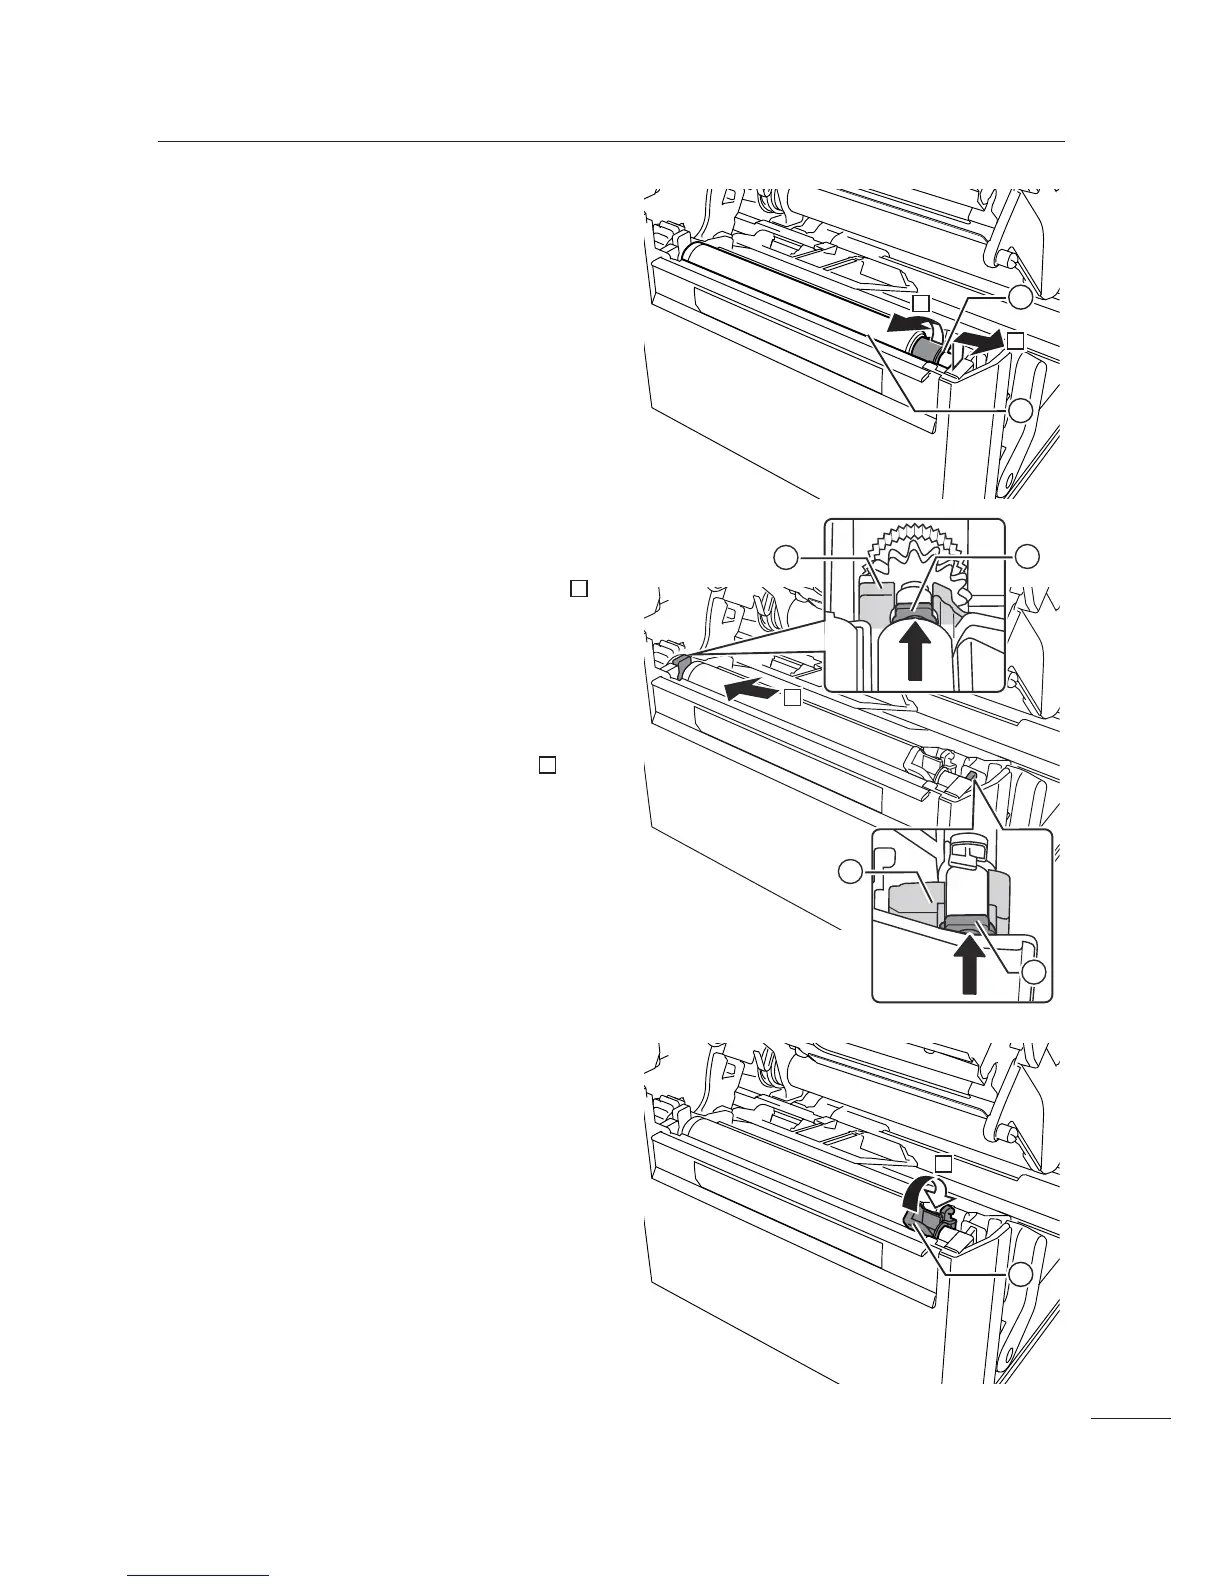
4 Lift the lever 3 to unlock the platen
roller $, then pull out the
platen roller $.
5 Install the new platen roller. Make sure
that the first tab / on the driving end of
the platen roller is pointing upward. Then
push the platen roller in the direction
so that the first tab / is fixed in the
groove 1 at the driving side.
6 Next, make sure that the second tab 4
on the driven end of the platen roller is
pointing upward. And then push the
platen roller again in the direction so
that the second tab 4 is fixed in the
groove 2 at the driven side.
7 Turn the lever 3 back to lock the platen
roller.
8 Perform the assembly with the reverse
procedure.
After the replacement
• Check the print darkness.
Refer to Section 4.5 Adjusting the Print
Darkness.

 Loading...


