Connecting and installing the seca 452 interface module • 51
17-10-01-266-002a/07-2018B
Connecting a seca 452 interface
module
NOTICE!
Malfunction due to installation errors
If cables are strained during installation, e. g. with sharp bends or
kinked connectors, this may result in faulty displays and failure of the
display.
► Route all cables to prevent sharp bends and kinked connectors.
► Provide strain relief by routing all cables in the relevant holders.
NOTE
The following illustration of the bottom of the scale is an example. The
cable routing may differ slightly depending on the model. The principle
for the connection is the same for all models. Orient yourself on the
cable that is connected to the electronics box.
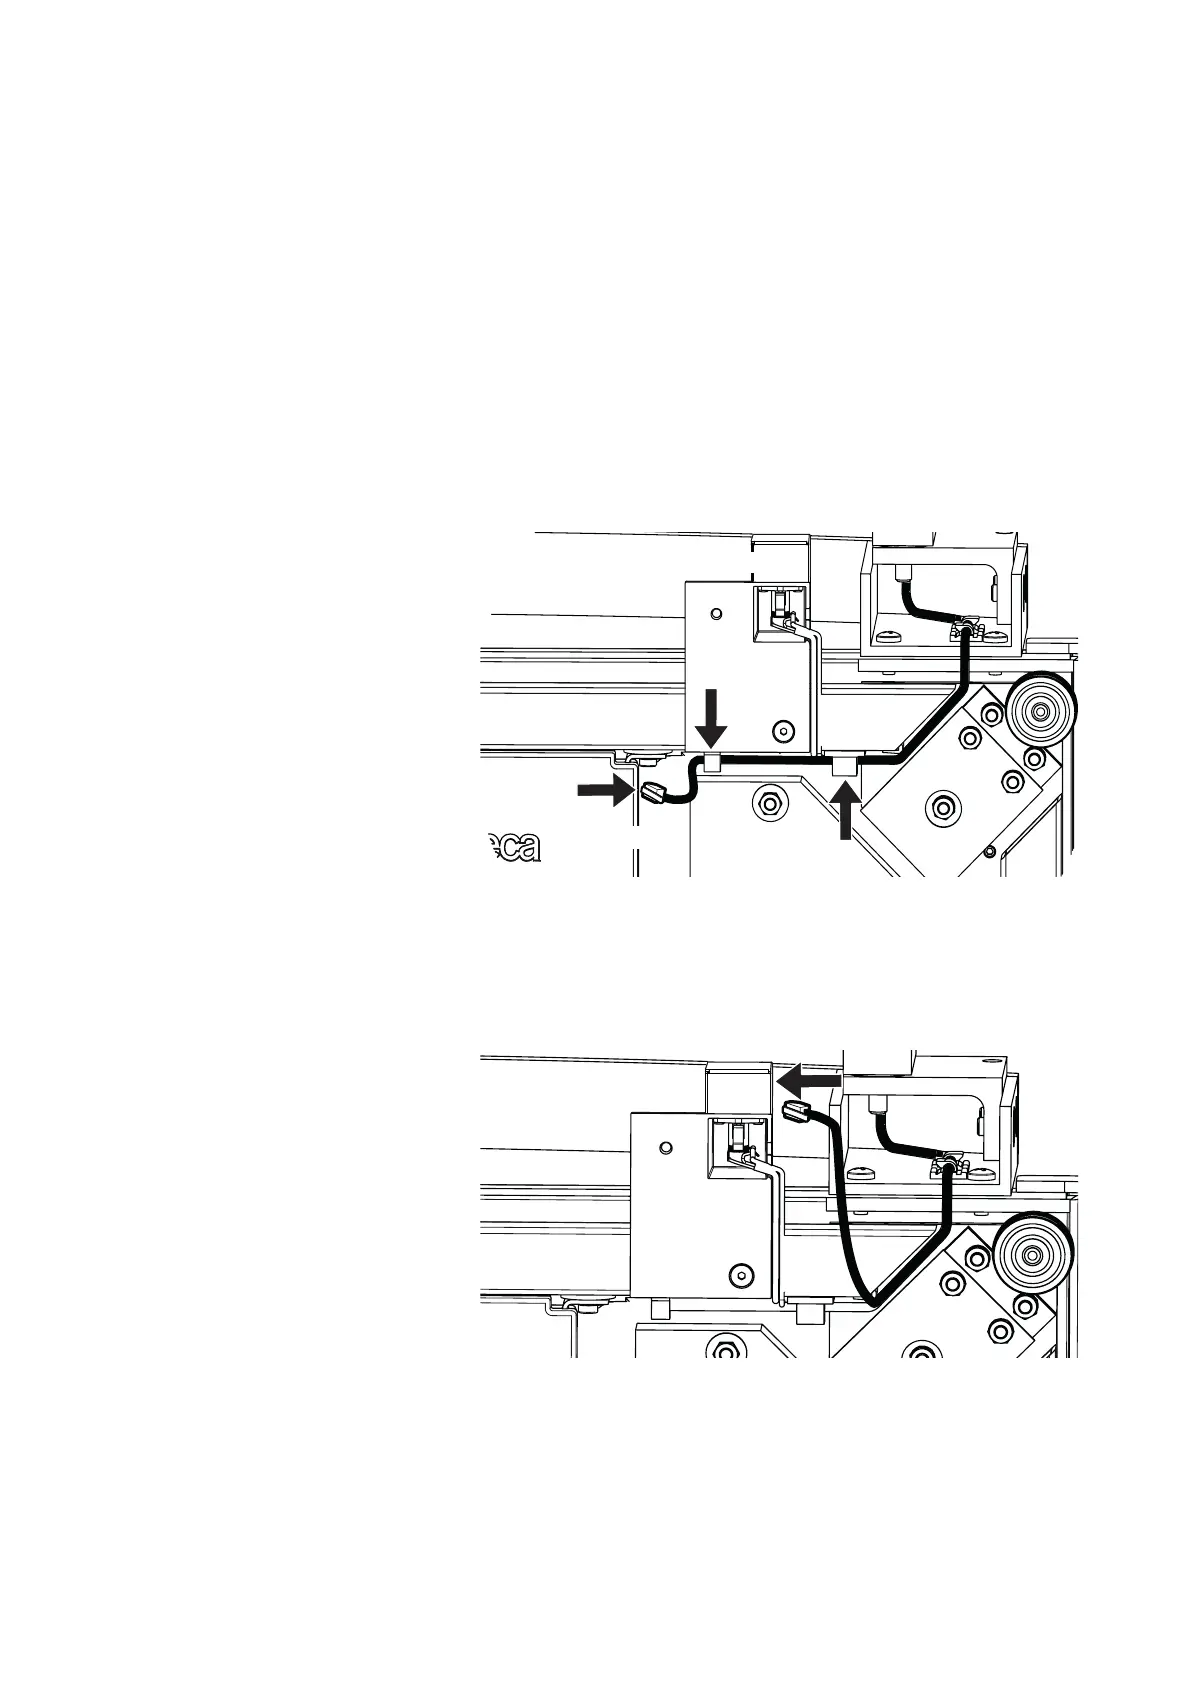
1. Connect the scale to the Y adapter:
a) Remove the display cable from the electronics box (1) and from the
cable clips (2, 3)
NOTE
For the
seca 684 and seca 685 models: The display cable in the next
step is the cable from the display column that you have already
removed from the scale in section ➔ Preparing the scale. The cable
that you have removed from the electronics box (step 1a) is not con-
nected again.
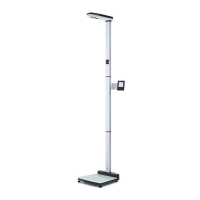
b) Connect the display cable to the upper connection of the Y adapter
1
2
3
Electronics box
Y adapter