59
GB
Timer recording
4
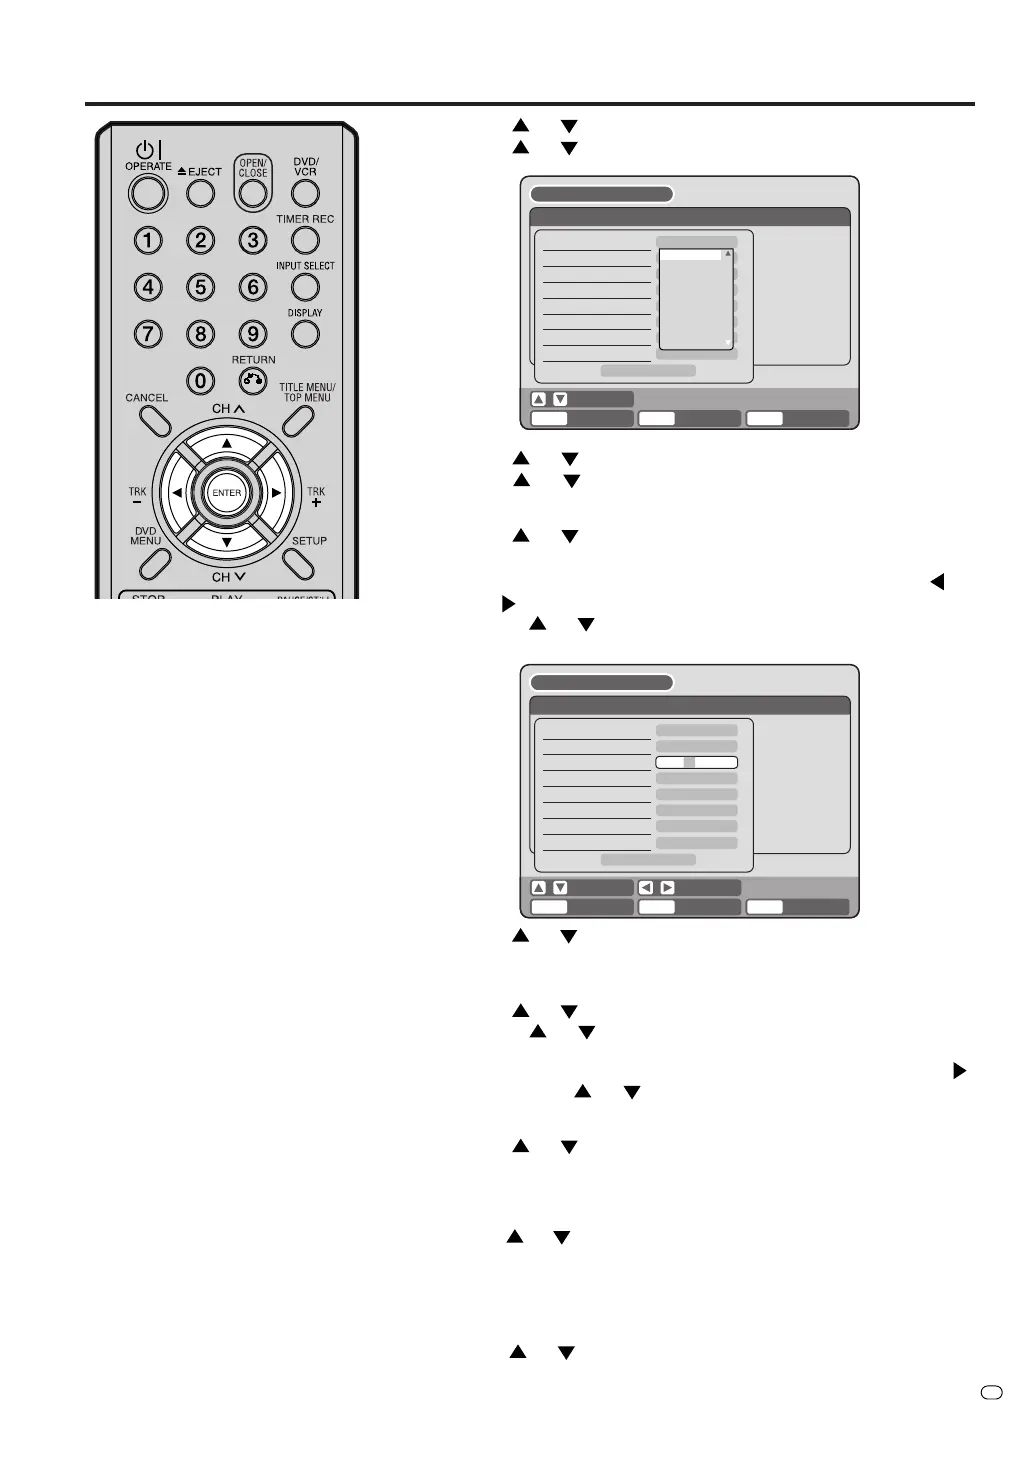
Press
or to select “TYPE” and press ENTER.
Press
or to select “ONCE” from the list and press ENTER.
NOTES:
•
If you select timer recording on a
specified date only one time, select
“ONCE” in the “TYPE” for record-
ing. You can record the same days
for every week or from Monday to
Friday using the item “TYPE”. The
items you can select are as follows:
ONCE: Recording on the selected
“DATE”
EVERY SUN: Recording every Sun.
EVERY MON: Recording every Mon.
EVERY TUE: Recording every Tue.
EVERY WED: Recording every Wed.
EVERY THU: Recording every Thu.
EVERY FRI: Recording every Fri.
EVERY SAT: Recording every Sat.
MON-FRI: Recording from Mon. to Fri.
MON-SAT: Recording from Mon. to Sat
.
EVERY DAY: Recording everyday.
•
The initial setting of “REC TO” and
“REC MODE” can be changed us-
ing “Setting the recording”. (See
page 25.)
•
VPS/PDC is a service provided by
the public TV station. When you se-
lect a VPS/PDC-compatible TV sta-
tion and activate the VPS/PDC func-
tion, the beginning and the end of
the timer recording will be controlled
by the TV station. Any program air
time delays will be taken care of. To
make certain this works correctly
always enter the exact starting time
as published in the news paper or
TV listing magazine.
5
Press
or to select “DATE” and press ENTER.
Press
or to select the date to be recorded and press EN-
TER.
6
Press
or to select “START” and press ENTER.
Set the time when the recording is started.
•To switch over the selection item (hour or minute), press
or , then press ENTER.
• Press
or to adjust the time.
• After setting the time, press ENTER.
7
Press
or to select “END” and press ENTER.
Set the end time in the same manner you set the start time for
timer recording.
8
Press
or to select “CH” and press ENTER.
• Press
or to select the channel to be recorded and press
ENTER.
•You can select the external input setting mode by pressing
.
Then press
or to select “AV1”, “AV2” or “AV3” and press
ENTER.
9
Press
or to select “REC TO” and press ENTER.
Select the media (DVD or VCR) you want to record onto from the
list and press ENTER.
RETURN BACK END
SELECT
SETUP
ENTER
ENTER
TIMER REC SET
REC REC
TO MODE
VPS/
PDCCHENDSTART
TYPE
DATE (DD/MM)
START
END
CH
REC TO
REC MODE
VPS/PDC
ONCE
1
DVD
SP
OFF
OK
20/11(THU)
20:17
04:17
SETUP MENU
SELECT
RETURN BACK END
SELECT
SETUP
ENTER
ENTER
TIMER REC SET
REC REC
TO MODE
VPS/
PDCCHENDSTART
TYPE
DATE (DD/MM)
START
END
CH
REC TO
REC MODE
VPS/PDC
ONCE
000
DVD
SP
OFF
OK
11,08,03(--)
02:17
03:17
SETUP MENU
ONCE
EVERY SUN
EVERY MON
EVERY TUE
EVERY WED
EVERY THU
EVERY FRI
EVERY SAT
MON-FRI
10
Press or to select “REC MODE” and press ENTER.
The recording modes for the media selected in “REC TO” item are listed.
Select the recording mode and press ENTER.
For the recording modes in VCR, see page 45, and for the record-
ing modes in DVD, see page 49.
11
Press
or to select “VPS/PDC” and press ENTER.
Select “ON” if you want to receive VPS/PDC signal.
Then press ENTER.