58
GB
Timer recording
2
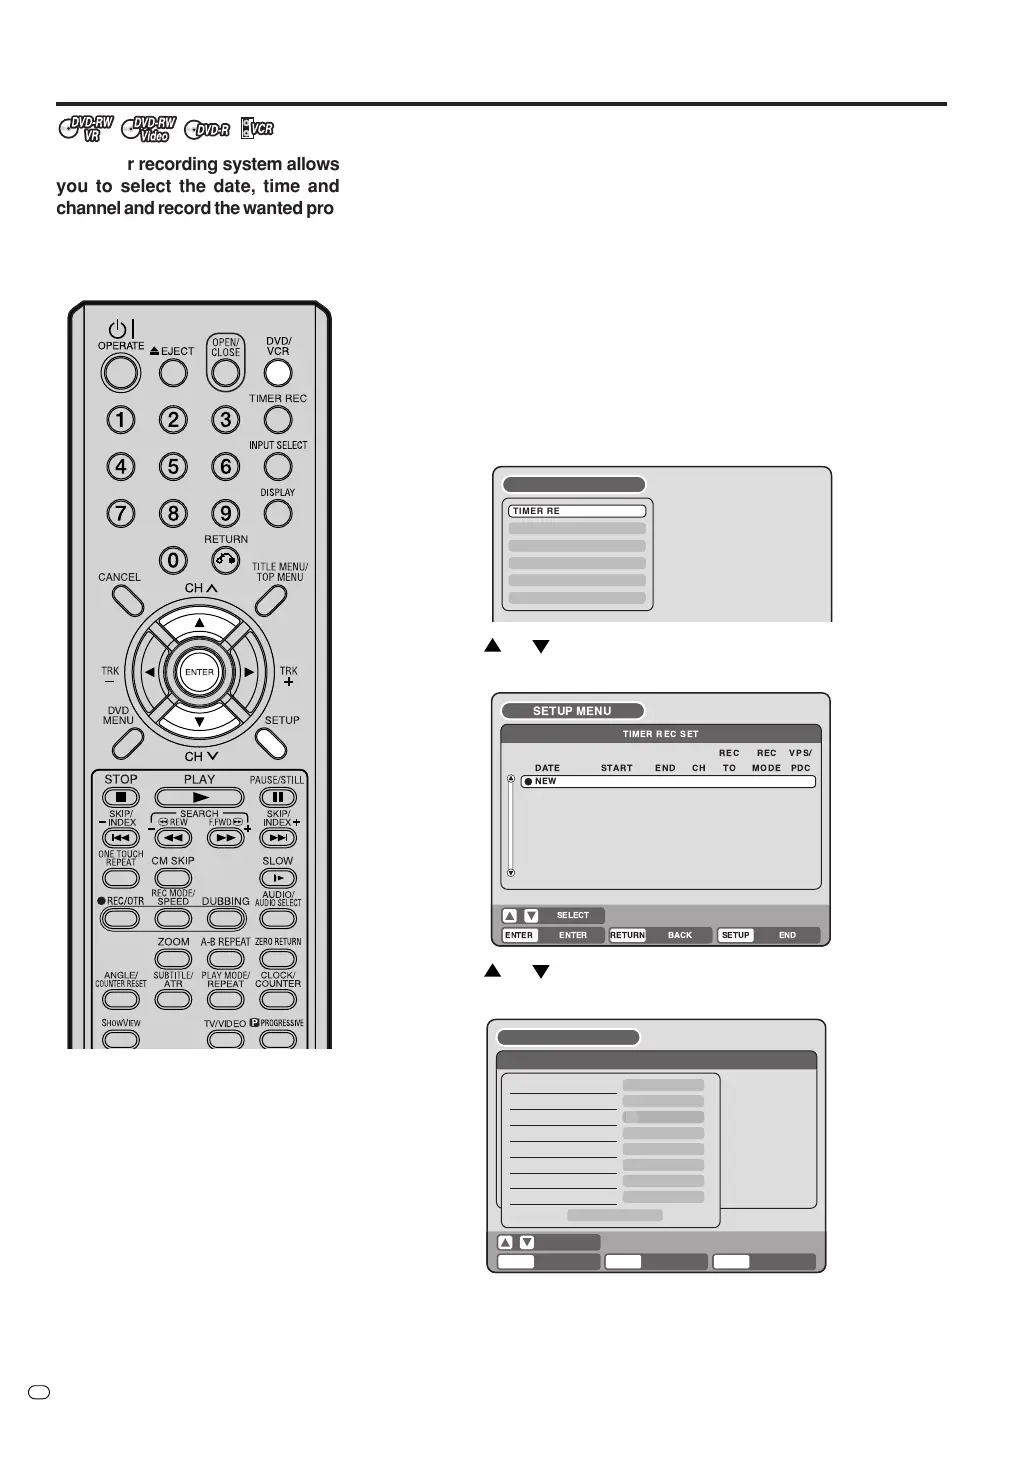
Press
or to select “TIMER REC SET” and press ENTER.
The TIMER REC SET screen will appear.
TV/VIDEO
TIMER REC SET
SYSTEM SETUP
AV SETUP
REC SETUP
CHANNEL SETUP
OTHER
SETUP MENU
RETURN BACK END
SELECT
SETUP
ENTER
ENTER
TIMER REC SET
REC REC
TO MODE
VPS/
PDC
TYPE
DATE (DD/MM)
START
END
CH
REC TO
REC MODE
VPS/PDC
ONCE
1
DVD
SP
OFF
OK
19/11(WED)
03:17
04:17
SETUP MENU
The timer recording system allows
you to select the date, time and
channel and record the wanted pro-
grams. Up to 12 timer programs in
a month can be stored in this unit.
NOTE:
In the event of a power failure, the
data of the automatic recording will
be maintained in the built-in memory
for approximately 30 minutes. Also,
the clock will continue to run for this
period of time. Thereafter the data
will be deleted. When power is re-
sumed, the time display will change
to “0:00”. Timer settings will have to
be reset.
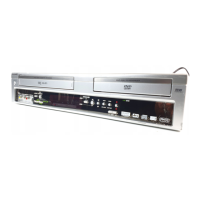
Setting timer recording
Preparation:
•Turn ON the TV and switch the TV to it’s AV channel (this may be
labelled EXT / AUX etc.)
• Load a recordable DVD or video tape.
• Press DVD/VCR to select the appropriate mode.
• Confirm that the clock is indicating the correct time.
Example: Set the recording mode to LP and record onto a DVD; the
TV program is on channel 1 starting at 20:00 and stopping at 23:00 on
the 20th of November.
1
Press SETUP.
The SETUP MENU screen appears.
3
Press
or to select “NEW” and press ENTER.
The program screen will appear.