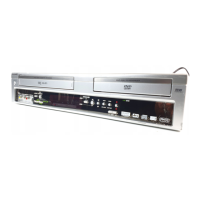
77
GB
Dubbing a tape onto a disc
You can record video or audio on
a video tape onto a disc.
Preparation:
•Turn ON the TV and switch the TV to it’s AV channel (this may be
labelled EXT / AUX etc.)
• Load a source video tape and a disc for recording.
• Remove the erase protection tab of the source video tape to prevent
the data from accidentally being erased.
• Confirm the disc space before operation.
1
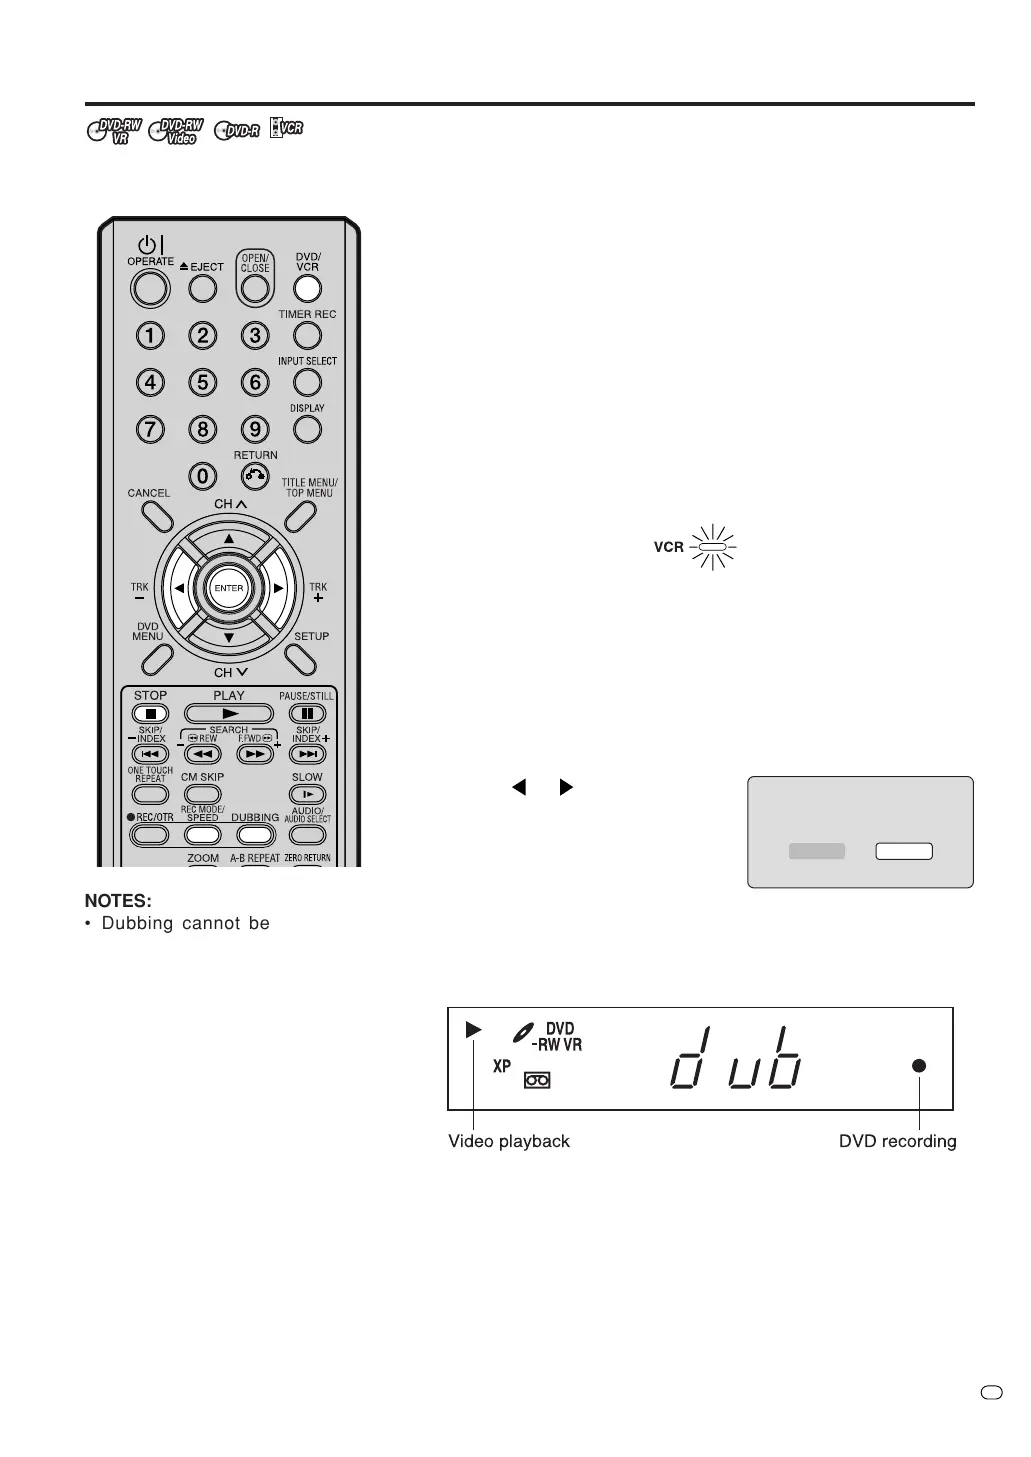
Press DVD/VCR to set this unit to DVD mode.
The DVD indicator will light.
2
Press REC MODE/SPEED and select the recording mode SP, LP,
SLP or XP.
• The recording mode is indicated on both the TV screen and the
display window.
• For the details of the recording mode, see page 49.
3
Press DVD/VCR and set the unit to VCR mode.
NOTE:
Confirm that the VCR indicator is lit.
When dubbing, VCR playback, DVD recording and “dub”, the
(dubbing) indicator will appear in the display window.
6
To stop dubbing, press STOP.
After you finalise a disc, you can play back this disc on other DVD
players. (See page 22.)
NOTES:
• Dubbing cannot be completed
when
- a copy protected tape is used.
- a finalised disc is used.
- disc protection is set.
- disc has no recording space.
• Dubbing stops when
- the video tape is played back to
the end and stops.
- recording space becomes full.
- the picture noise continues for 1
minute.
• Videos recorded from TV pro-
grams or movies can only be used
for your personal enjoyment with-
out obtaining permission of the
copyright holder.
• While dubbing from VCR to DVD,
the recording mode of DVD is
displayed on the front display.
4
Press DUBBING.
• The unit is changed to DVD mode automatically.
• The VCR is waiting for playback and the DVD is waiting for re-
cording. Then the following message will appear.
5
Press
or to select “YES” and
press ENTER.
Dubbing starts.
•To cancel dubbing, select “NO”
and press ENTER.