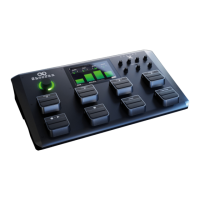
45
(5.12) Transfer
You can transfer loops, backing tracks, audio for importing and FX Rack preset files over a USB connection
between your computer and Sheeran Looper X.
To transfer files between Sheeran Looper X and your computer:
1. Use a standard USB cable to connect Sheeran Looper X's USB Type-B Port to an available USB port
(type-A) on your computer.
2. With your computer already powered on, power on Sheeran Looper X using the power switch.
3. Tap the Navigation Menu icon in the top-left corner of the touchscreen, and then tap Transfer.
4. On your computer, Sheeran Looper X will appear as a mass-storage device called LOOPER X.
Windows users: If this is the first time you have connected Sheeran Looper X to your computer, you
may need to wait a minute while the class-compliant drivers are installed.
5. Open the Sheeran Looper X drive. You can now freely click and drag contents between the Sheeran
Looper X drive and your computer. Note that any changes you make to the contents of your Sheeran
Looper X drive are immediate and cannot be cancelled.
Important: When you are finished transferring contents, you must unmount/eject the Sheeran Looper
X drive from your computer.
6. After the drive has been ejected, tap Sync on your Sheeran Looper X to "commit" any changes you
made to the contents of the Looper X drive. An additional prompt will appear to confirm you have
ejected the drive. Tap Proceed to continue or Cancel to continue accessing files on your computer.
Important:
Do not disconnect or power off Sheeran Looper X or your computer during the process. Doing so may
result in damage.
Any files unsupported by Sheeran Looper X will be ignored.
You cannot transfer an archived folder (such as a .zip) to and from Sheeran Looper X. Instead, transfer
supported files directly.
Transfer cannot be used at the same time as USB Audio.