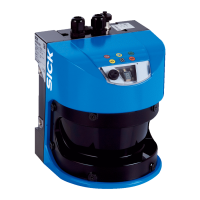
6 Electrical installation
6.1 Wiring instructions
NOTE
Pre-assembled cables can be found on the product page.
The call is made via the SICK Product ID: pid.sick.com/{P/N}/{S/N}
{P/N} corresponds to the part number of the product, see type label.
{S/N} corresponds to the serial number of the product, see type label (if indicated).
NOTICE
Faults during operation and defects in the device or the system
Incorrect wiring may result in operational faults and defects.
■
Follow the wiring notes precisely.
All electrical connections of the device are configured as round connectors.
The enclosure rating stated in the technical data is achieved only with screwed plug
connectors or protective caps.
Configure the circuits connected to the device as ES1 circuits or as SELV circuits (SELV
= Safety Extra Low Voltage). The voltage source must meet the requirements of ES1
(EN62368-1) or SELV (EN60950-1).
Connect the connecting cables in a de-energized state. Do not switch on the supply
voltage until installation is complete and all connecting cables are connected to the
device and control.
Wire cross-sections in the supply cable from the customer’s power system must be
implemented in accordance with the applicable standards.
In the case of open end cables, make sure that bare wire ends do not touch. Wires
must be appropriately insulated from each other.
6.1.1 Data cables
Important information
NOTE
Layout of data cables
■
Use screened data cables with twisted-pair wires.
■
Implement the screening design correctly and completely.
■
To avoid interference, always use EMC-compliant cables and layouts. This applies,
for example, to cables for switched-mode power supplies, motors, clocked drives,
and contactors.
■
Do not lay cables over long distances in parallel with power supply cables and
motor cables in cable channels.
Length of cable and data transmission rate
The maximum length of cable between device and, for example, host computer
depends on the interface type and the data transmission rate.
Use cables with a maximum length of 10m for the Power/CAN connection (male
connector, M12, 17-pin, A-coded).
6 ELECTRICAL INSTALLATION
22
O P E R A T I N G I N S T R U C T I O N S | Lector85x 8027859/1INN/2023-03-08 | SICK
Subject to change without notice