EasyManua.ls Logo

SICK LFP CUBIC - User Manual

SICK LFP CUBIC
72 pages
Print Icon
To Next Page IconTo Next Page
Loading...
OPERATING INSTRUCTIONS
LFP CUBIC
TDR level sensor
en

Table of Contents

Questions and Answers

  • C
    Carmen JohnsonSep 23, 2025
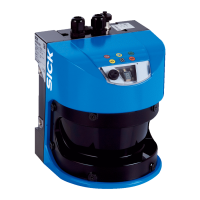
    What to do if SICK LFP CUBIC Measuring Instruments displays an error message because the load resistance at the output is too low?
    • A
      Allison BallSep 23, 2025
      If the SICK Measuring Instruments displays an error message because the load resistance at the output is too low, increase the load resistance.
  • N
    nealterriAug 25, 2025
    Why does my SICK LFP CUBIC Measuring Instruments show an error message when AutCal is called up in Foam sensor mode?
    • L
      Lisa MccormickAug 25, 2025
      If your SICK Measuring Instruments displays an error message because AutCal was called up in Foam sensor mode, note that AutCal is available only in Pulse mode. Perform foam calibration in Foam mode.
  • V
    vhicksAug 25, 2025
    What to do if SICK Measuring Instruments displays an error message due to low supply voltage for IO-Link communication?
    • B
      brian54Aug 26, 2025
      If the SICK Measuring Instruments displays an error message because the supply voltage is too low for IO-Link communication, increase the supply voltage to achieve the desired functionality.
  • K
    Kayla PetersAug 27, 2025
    What to do if SICK LFP CUBIC displays an error message due to low supply voltage for analog output?
    • C
      Cody HillAug 27, 2025
      If the SICK Measuring Instruments displays an error message because the supply voltage is too low for analog output, increase the supply voltage to achieve the desired functionality.
  • D
    darrellwestAug 27, 2025
    What to do if SICK LFP CUBIC displays an error message due to low supply voltage for switching outputs?
    • T
      taylor70Aug 27, 2025
      If the SICK Measuring Instruments displays an error message because the supply voltage is too low for switching outputs, increase the supply voltage to achieve the desired functionality.
  • J
    Jose LindseySep 16, 2025
    What to do if SICK Measuring Instruments displays an error message because the analog current output Qa is not wired?
    • L
      Lisa AdamsSep 16, 2025
      If the SICK Measuring Instruments displays an error message because the analog current output Qa is not wired, connect the load to Qa.
  • A
    anthonyharperSep 13, 2025
    What to do if SICK LFP CUBIC displays an error message because the ohmic load at the analog current output Qa is too high?
    • J
      Jared WhiteSep 13, 2025
      If the SICK Measuring Instruments displays an error message because The ohmic load at the analog current output Qa is too high, reduce the load at Qa.
  • M
    Matthew HunterSep 14, 2025
    Why does my SICK LFP CUBIC Measuring Instruments display an error message when DspVal menu parameter is at QaBarG?
    • M
      Maureen GentrySep 14, 2025
      If the SICK Measuring Instruments displays an error message because the DspVal menu parameter is at QaBarG and the level is below QALOW, change QALOW or DspVal.
  • J
    Justin NunezSep 5, 2025
    What to do if my SICK LFP CUBIC shows an error because AutCal wasn't executed?
    • B
      Brandon GrahamSep 6, 2025
      If your SICK Measuring Instruments displays an error message because AutCal was not executed, or interference superimposes medium reflection, perform commissioning.
  • W
    Willie SmithSep 3, 2025
    What to do if SICK LFP CUBIC Measuring Instruments displays an error message because a parameter was written outside of the valid value range?
    • K
      Kelsey CunninghamSep 3, 2025
      If the SICK Measuring Instruments displays an error message because a parameter was written outside of the valid value range, rewrite the value in the valid range.

Summary

About this document

Information on the operating instructions

Provides important notes on using SICK AG sensors and prerequisites for safe work.

Scope

Explains that instructions apply to all device variants and how to identify them.

Explanation of symbols

Details symbols used for warnings and important information in the document.

Further information

Directs users to the online product page for additional documentation and resources.

Customer service

Provides contact information for technical support and advice.

Safety Information

Intended use

Describes the sensor's design for continuous and point level measurement in liquids.

Incorrect use

Defines uses outside specified areas or technical specifications as incorrect.

Limitation of liability

States manufacturer's non-liability for damages caused by misuse or non-compliance.

Modifications and conversions

Warns against modifications; invalidates warranty and requires prior approval.

Requirements for skilled persons and operating personnel

Outlines qualifications and training needed for safe operation and installation.

Operational safety and particular hazards

Highlights the importance of safety notes and warnings to reduce risks.

General safety notes

Includes notes on reading instructions, firmware validity, and safety regulations.

Repairs

Specifies that repairs must be performed by qualified SICK AG personnel only.

Product description

Product ID

Details information printed on the housing identifying the sensor and its electrical connection.

Product characteristics

Describes the device view, including probe, connection, buttons, and display.

Product features and functions

Explains the TDR technology principle and sensor output capabilities.

Transport and storage

Transport

Provides safety notes for proper packaging and handling during transport.

Transport inspection

Guides on checking delivery for completeness and transit damage.

Storage

Specifies conditions for storing the device, including dry area and avoiding shocks.

Mounting

Installation conditions

Details mounting requirements, distances, and considerations for various container types.

Mounting the coaxial tube

Refers to separate operating instructions for mounting the coaxial tube.

Shortening or replacing the probe rod;rope probe

Explains procedures for shortening or replacing probes, including length configuration.

Mounting the probe rod

Provides specifications and procedures for customer modification of the probe rod.

Electrical installation

Safety

Highlights important notes on electrical installation, voltage, and working with live parts.

Electrical connection

Describes connecting the sensor using M12 connectors and pin assignments.

Commissioning

Quick commissioning (with factory settings)

Outlines steps for basic commissioning under reference conditions.

Advanced commissioning

Details advanced commissioning for challenging applications or conditions.

Foam commissioning (with factory settings)

Provides specific instructions for commissioning in applications with significant foam buildup.

Operation

Display and pushbuttons

Explains how to navigate menus and operate the sensor using its display and buttons.

Configuring the switching outputs

Details setting up switching outputs with hysteresis and window functions.

Configure the analog output

Guides on configuring analog output signals, including automated detection and inversion.

Advanced functions

Covers expert mode, filtering, signal limits, evaluation methods, and probe length settings.

Menu overview

Overview of parameters

Troubleshooting

Error message on the display

Lists common error messages, their causes, and possible solutions.

Operating the display

Explains issues related to the display not showing expected information.

Outputs

Troubleshoots issues with switching or analog outputs not behaving as expected.

Error behavior

Describes common error behaviors like incorrect level readings and fluctuating values.

Repair work

Maintenance

Recommends regular checks for probe contamination and connections.

Returns

Provides guidelines for cleaning devices before return and the need for a return form.

Disposal

Technical data

Features

Lists key features like medium type, detection type, probe length, and certifications.

Performance

Specifies accuracy, reproducibility, resolution, response time, and other performance metrics.

Mechanics;materials

Details materials in contact with media, housing, process connection, and enclosure rating.

Reference conditions

Defines standard conditions for measurement accuracy, including container size and medium.

Ambient conditions

Specifies the operating and warehouse temperature ranges for the device.

Electrical connection values

Lists supply voltage, current consumption, initialization time, and output signal specifications.

Measurement accuracy

Provides graphical representation and data for measurement accuracy in different container types.

Dimensional drawings

LFP Cubic with rod probe

Shows detailed dimensions and measurement ranges for the rod probe version.

LFP Cubic with cable probe

Illustrates dimensions and measurement ranges for the cable probe version.

LFP Cubic with remote amplifier

Presents dimensional information for the LFP Cubic with a remote amplifier.

Factory setting

Accessories

Media list

SICK LFP CUBIC Specifications

General IconGeneral
BrandSICK
ModelLFP CUBIC
CategoryMeasuring Instruments
LanguageEnglish

Related product manuals