5.3 Assembling the product
Prerequisites
•
If the ambient operating temperature will be ≥45°C, ensure adequate heat
dissipation when mounting the device. For example, mount the product using a
mounting bracket on a suitable heat sink. A suitable heat sink is an aluminum
profile with minimum dimensions 40mm x 80mm x 665mm. To ensure air
circulation, mount the product, for example, at an adequate distance from walls,
ceilings and other devices.
•
In order to avoid reflections from the surfaces to be scanned, mount the product
so that it is tilted from the perpendicular to the surface. Depending on the applica‐
tion, an angle of 0° (brightfield illumination) or up to 45° (darkfield illumination) is
appropriate.
Figure 3: Mounting angle to use, depending on the application
1
Typical angle 10° ... 20°
•
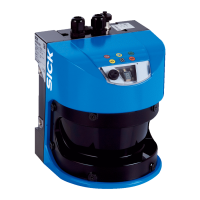
Make sure the product has a clear view of the codes of the objects to be scanned.
Approach
1. Mount the product on suitably prepared mounting equipment using M5 screws
and by means of the threaded mounting holes or sliding nuts. Mounting equip‐
ment is available as an accessory.
°
Screw the screws no more than 5mm into the threaded mounting holes or
sliding nuts.
°
To do so, either use all 4 threaded mounting holes on the rear of the product
or the two sliding nuts on the side of the product.
°
Attach the optional SICK mounting equipment ordered separately using the
sliding nuts on the product.
2. In application areas with severe vibrations or shocks caused by vibrations, jolts
or abrupt changes in directions (e.g., when mounted to a manned forklift truck),
mount the product with vibration dampers. Mount the product in a freely sus‐
pended manner.
3. Align the product taking into consideration the field of view and the application
circumstances.
4. Connect the product to interfaces and supply voltage when disconnected from
voltage.
5. Start the product.
✓
The Ready status LED lights up green.
6. Perform fine adjustment.
MOUNTING 5
8027859/1INN/2023-03-08 | SICK O P E R A T I N G I N S T R U C T I O N S | Lector85x
21
Subject to change without notice