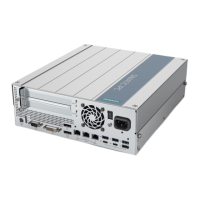
Operating the device
5.4 Onboard RAID system
Operating Instructions, 01/2021, A5E43920357-AA
81
Configure "Automatic integration of a new drive" (before replacing a defective drive)
If a new drive is automatically integrated, the new drive is not checked for partition
information or existing data.
All partitions and data of the new drive are deleted without warning.
• Insert only a brand new drive or a drive that is configured as a replacement drive.
Refer to the controller documentation for instructions on setting up replacement drives.
1. Select "Start" > "Intel" > "Intel Rapid Storage Technology".
2. Select the "Preferences" menu.
3. Go to the "Automatic Rebuild" area and activate the "Auto-rebuild on hot plug" option.
Configure "Manual integration of a new drive" (before replacing a defective drive)
The onboard RAID system is configured in the delivery state so that a new drive must be
integrated manually when a defective drive was replaced.
You can configure the manual integration of the drive or check the settings yourself.
1. Select "Start" > "Intel" > "Intel Rapid Storage Technology".
2. Select the "Preferences" menu.
3. Go to the "Automatic Rebuild" area and deactivate the "Auto-rebuild on hot plug" option.
Manual integration of the replaced drive (in the event of an error)
You can manually integrate a replaced drive in the onboard RAID system as follows:
• In the running system (without restarting the device)
• After switching off the device
Integrating a replaced drive in the running system (without restarting the device):
1. Select "Start" > "Intel" > "Intel Rapid Storage Technology".
2. Select the "Status" menu.
The new drive is displayed on the right-hand side of the program window in the "Storage
System View" area.
If the new drive is not displayed, click the
icon "Run Hardware Scan now".
3. Click on the RAID volume in the "Storage System View" area on the right-hand side of the
program window.
4. In the "Manage" menu, click on the link "Rebuild to another Disk".
5. Select the newly integrated drive in the next dialog and click "Rebuild".
The data synchronization of the onboard RAID system (Page 82) is started.