Page 34 SITRANS LUT400 (HART) – OPERATING INSTRUCTIONS 7ML1998MV01
mmmmm
Commissioning
1. Power up the device. SITRANS LUT400 automatically starts up in Measurement
mode. A transition screen showing first the Siemens logo and then the current
firmware revision of the LUI is displayed while the first measurement is being
processed.
2. The first time the device is configured, you will be prompted to select a language
(English, German, French, Spanish, Chinese, Italian, Portuguese, or Russian). To
change the language again (after initial setup), see
Language
on page 219.
3. Device time is set to Eastern Standard Time (EST) at the factory. To modify, see
Date
and Time
on page 188. The correct date and time should be set prior to configuring
the device.
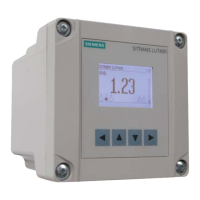
The LCD Display
Measurement mode display:
1
Normal operation
Fault present
1.
Press UP or DOWN arrow to switch
SITRANS LUT400
1/2
M
LEVEL
5 SAVING PARAMETERS
11223
18.91
SITRANS LUT400
1/2
M
L/S
FLOW
5 SAVING PARAMETERS
HEAD
DAILY TOTAL,...
60.000
999999.99
500313..
11
1
22
2
3
1 – tag
2 – measured value (level, space, distance,
volume, flow, or head)
3 – value being displayed [Primary Variable
(PV)=1 of 2, Secondary Variable (SV)=2 of 2]
4 – toggle indicator
1
for PV or SV
5 – units
6 – bar graph indicates level
7 – secondary region indicates configured
relays (left) and discrete inputs (right)
8 – text area displays status messages
9 – device status indicator
10 – selected (primary) sensor mode: level,
space, distance, volume, head, or flow
11 – secondary sensor mode = head when
primary sensor mode = flow
12 – totalizer values: display alternates between
daily totalizer and running totalizer
5
6
7
1
3
4
2
10
8
9
1
5
6
7
3
4
2
10
8
9
11
12
Level
Flow
0 LOE
8 – text area displays a fault code and an error message
9 – service required icon appears

 Loading...