EasyManuals Logo

Simplex 4100ES Installation & Maintenance

Simplex 4100ES
164 pages
To Next Page IconTo Next Page
To Previous Page IconTo Previous Page
Page #38 background imageLoading...
Page #38 background image
2-15
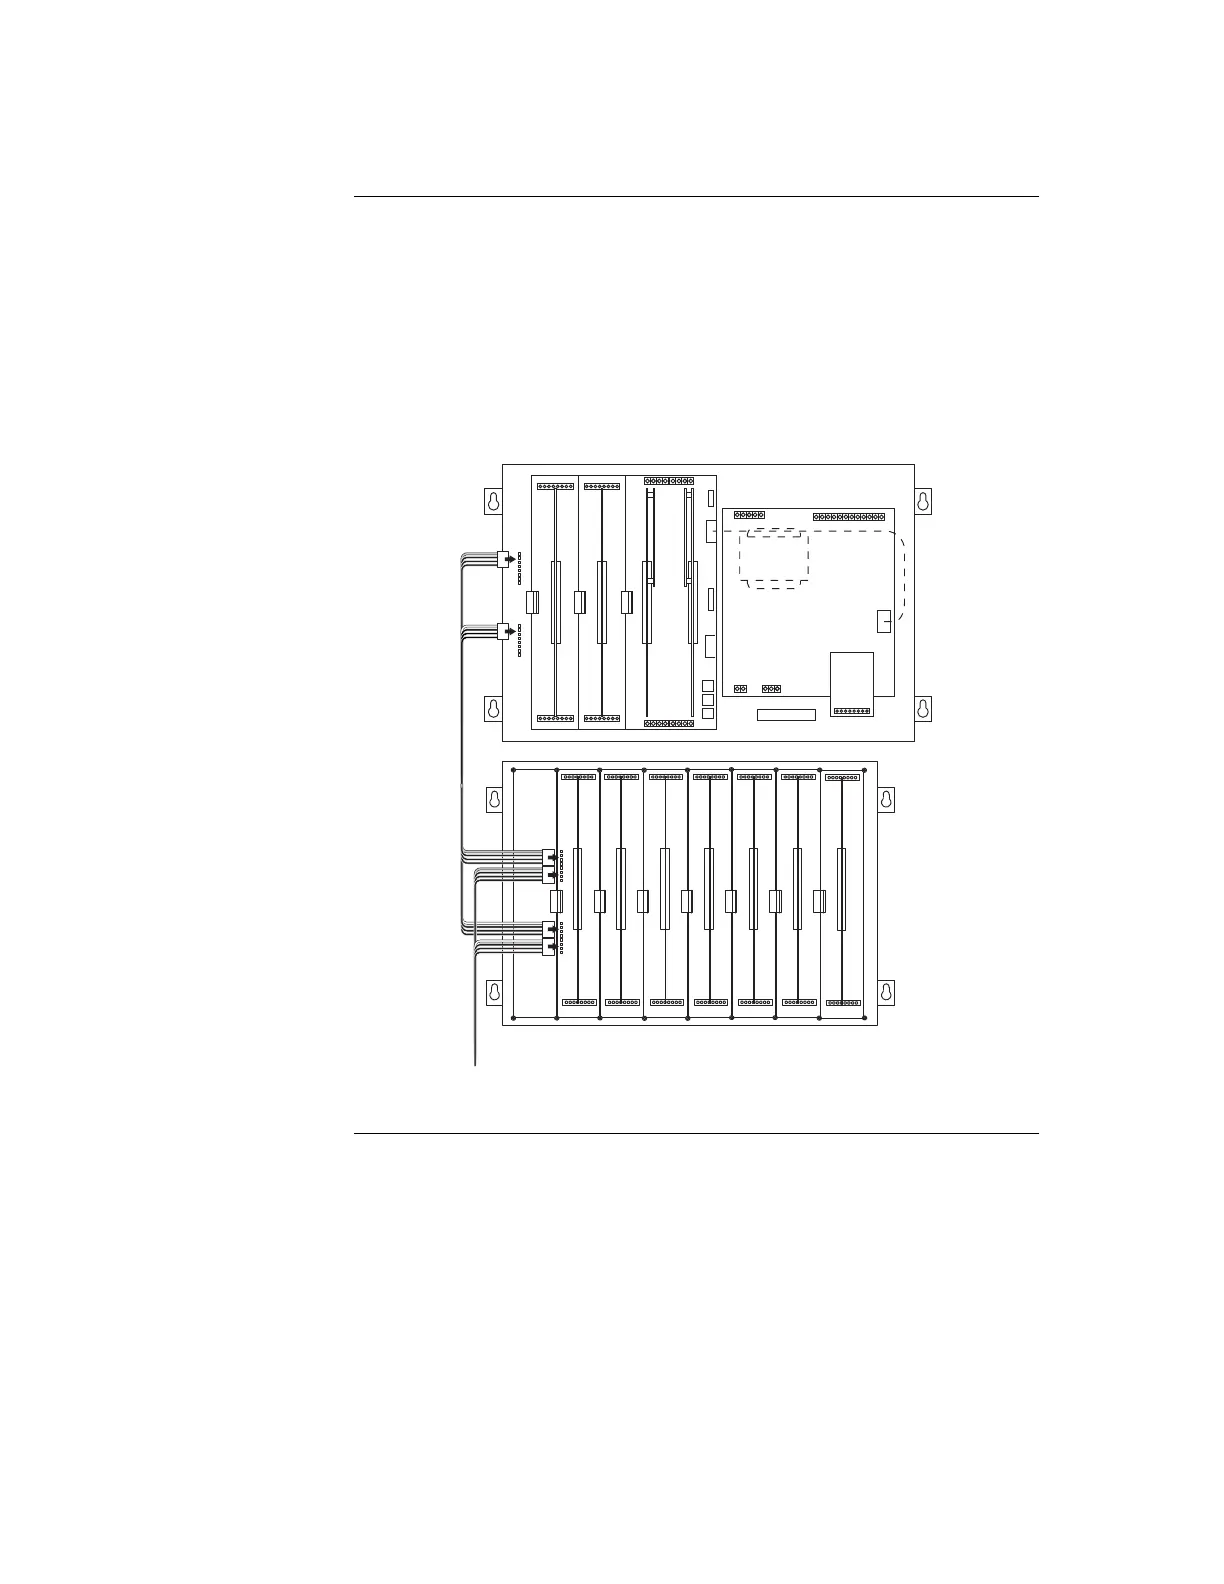
2. Connect the other end of the harness to the leftmost motherboard in the next bay,
as described below. Make sure to route the wiring on the left side of the bay.
Insert the harness connector with the blue wire into the P2 connector. Note
that the P2 connector has eight pins. Insert the harness connector on either
the top four pins or the bottom four pins, not in the middle.
Insert the harness connector with the white wire into the P3 connector. Note
that the P3 connector has eight pins. Insert the harness connector on either
the top four pins or the bottom four pins, not in the middle.
Figure 2-9. Power and Communication Wiring for Motherboards
Step 4. Interconnecting Modules and Bays, Continued
Connecting to
Motherboards
(continued)
Connector with
Blue Wire Goes
to P2
Connector with
White Wire Goes
to P3
733-525 Harness

Table of Contents

Other manuals for Simplex 4100ES

Questions and Answers:

Question and Answer IconNeed help?

Do you have a question about the Simplex 4100ES and is the answer not in the manual?

Simplex 4100ES Specifications

General IconGeneral
TypeFire Alarm Control Panel
DisplayLCD
Battery BackupYes
Model4100ES
ManufacturerSimplex
Communication ProtocolOptional Ethernet
Signaling Line Circuits (SLCs)Up to 10
Notification Appliance Circuits (NACs)Up to 10
Agency ListingsUL, FM, CSFM, MEA
Max Relay Circuits20
Communication PortsEthernet
Operating Temperature32°F to 120°F (0°C to 49°C)
HumidityUp to 93% RH, non-condensing

Related product manuals