© Feb. 2023
76 TB20J Plus Maintenance Manual
POWER SYSTEM
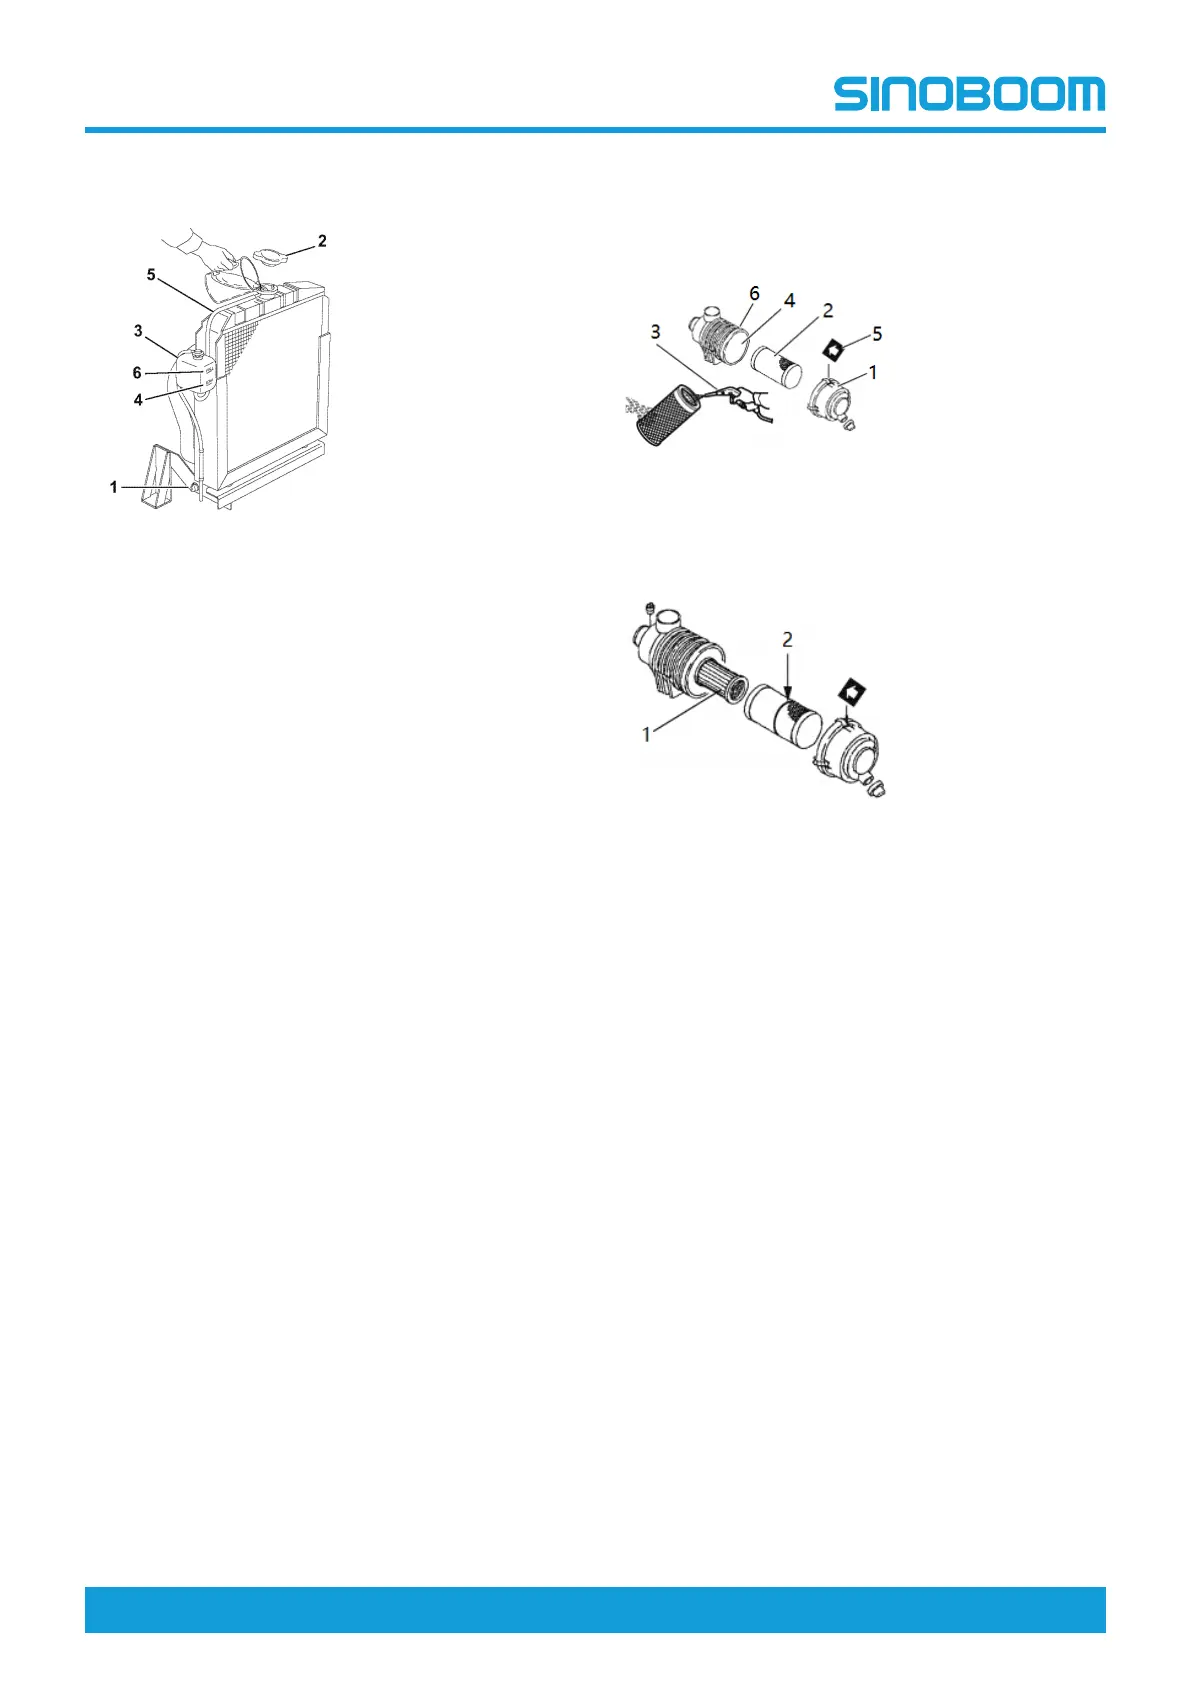
Fill with Coolant
Fig 28
1. Drain plug
2. Radiator cap
3. Reserve tank
4. LOW (COLD) mark
5. Hose connecting
the reserve tank to
the radiator
6. FULL (HOT) mark
1. Check to be sure the radiator drain plug is installed
and tightened. Also make sure the coolant drain
plug in the cylinder block is closed and the coolant
hoses are installed at the oil cooler.
2. Remove the radiator cap by turning it
counterclockwise.
3. Pour the engine coolant slowly into the radiator until
it is even with the lip of the engine coolant filler port.
Make sure that air bubbles do not develop as you fill
the radiator.
4. Reinstall the radiator cap. Align the tabs on the back
side of the radiator cap with the notches on the en-
gine coolant filler port. Press down and turn the cap
clockwise.
5. Remove the cap of the reserve tank, and fill it to the
LOW (COLD) mark. Reinstall the cap.
6. Check the hose that connects the reserve tank to
the radiator. Be sure it is securely connected and
there are no cracks or damage. If the hose is dam-
aged, engine coolant will leak out instead of going
into the reserve tank.
7. Run the engine until it reaches operating tempera-
ture. Check the level of engine coolant in the re-
serve tank. When the engine is running and the
engine coolant is at normal temperature, the coolant
level in the reserve tank should be at or near the
FULL (HOT) mark. If the coolant is not at the FULL
(HOT) mark, add coolant to the reserve tank to bring
the coolant level to the FULL (HOT) mark.
Intake System
Clean the Air Filter Element
Fig 29 Typical air filter
(single element)
1. Air filter cover
2. Element
3. Compressed air
4. Air filter housing
5. Arrow on the
cover
6. Outer housing
Fig 30 Typical air filter
(double element)
1. Inner element
2. Red line on the
outer element
1. Unlatch and remove the air filter cover.
2. Remove the element (outer element if equipped
with two elements).
3. Blow air through the element from the inside out us-
ing 0.29-0.49MPa (42-71psi) compressed air to re-
move the particulates. Use the lowest possible air
pressure to remove the dust without damaging the
element.
4. If the air filter is equipped with a double element, on-
ly remove and replace the inner element if the en-
gine lacks power or the dust indicator actuates (if
equipped).
Note: The inner element should not be removed
when cleaning or replacing the outer element. The
inner element is used to prevent dust from entering
the engine while servicing the outer element.
5. Replace the element with a new one if the element
is damaged, excessively dirty or oily.
6. Clean inside of the air filter cover.
7. Reinstall the element into the air filter housing.
Note: If there is a red line in the outer element, rein-
sert the element until the overlap position of red line
and end face of the air filter housing.
 Loading...