© Feb. 2023
66
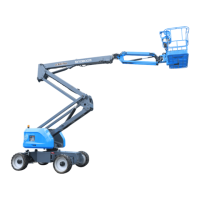
TB20J Plus Operation Manual
OPTIONS
Table 11-1
No. Part Number Part Name Quantity Comment
1 215030000108
Nut M8-8-ZnD GB/T 6183
2
2 105070043011 Support 1
3 105070043028 Foldable plate 2
4 105070043030
Support
1
5
103010013495
Cushion block
2
6 215040000031
Washer 4-A2 GB/T 97.1
4
7
215030000109
Nut M10-8-ZnD GB/T 6183
8
8 215040000035
Washer 10-200HV-ZnD GB/T 97.1
4
9 203060003031 Travel switch (Schneider) 2
10 215020000113
Screw M5×25-A2-70 GB/T 818
4
11 105070043031 Bolt 2
12 215020000007
Screw M5×16-A2-70 GB/T 70.1
4
13 215030000091
Nut M5-8-A2-70 GB/T 6184
4
14 105070043032
Support
1
15 215030000003 Nut M5-A2-70 GB/T 6170 8
16 215010000256
Bolt M5×20-8.8-ZnD GB/T 5789
4
17 105029043013 Plate 4
18 209990003011 Magnet 2
19 215040000032
Washer 5-A2 GB/T 97.1
12
20 203050003058 Strobe light 2
21 215020000212
Screw M4×35-A2-70 GB/T 818
4
22 215010000238
Bolt M10×25-8.8-ZnD GB/T 5789
8
Installation and Removal
Unsafe Operation Hazard
Except for designated models and
corresponding markets, it is
forbidden to install the anti-pinch
device on other Sinoboom products
or any models in other markets.
Installation instructions
1. Position the support (#4 or #14) at the mounting po-
sition on the platform railing, align the support with
the mounting hole on mounting plate #17, and use
bolts and nuts to secure the support to the platform
railing. Install the support on the other side of the
platform in the same way.
2. Align the foldable plate #3 with the mounting holes
on the left and right supports, tighten it with bolts,
washers and nuts, and install the magnet #18 on
the foldable plate.
3. Then align the support #2 with the mounting holes
on the left and right supports, and make the foldable
plates on both sides of support #2 attracted by mag-
nets, and tighten it with bolts, washers and nuts.
4. Install the cushion block #5 on the left and right sup-
ports in turn, and tighten it with screws, washers
and nuts.
5. Install the travel switch #9 on the left and right sup-
ports in turn, and tighten it with screws and
washers.
6. Install the strobe light #20 on the left and right sup-
ports in turn.
7. Connect the anti-pinch harness.
Removal instructions