C
HAPTER
4
| Configuring the Switch
Configuring Security
– 72 –
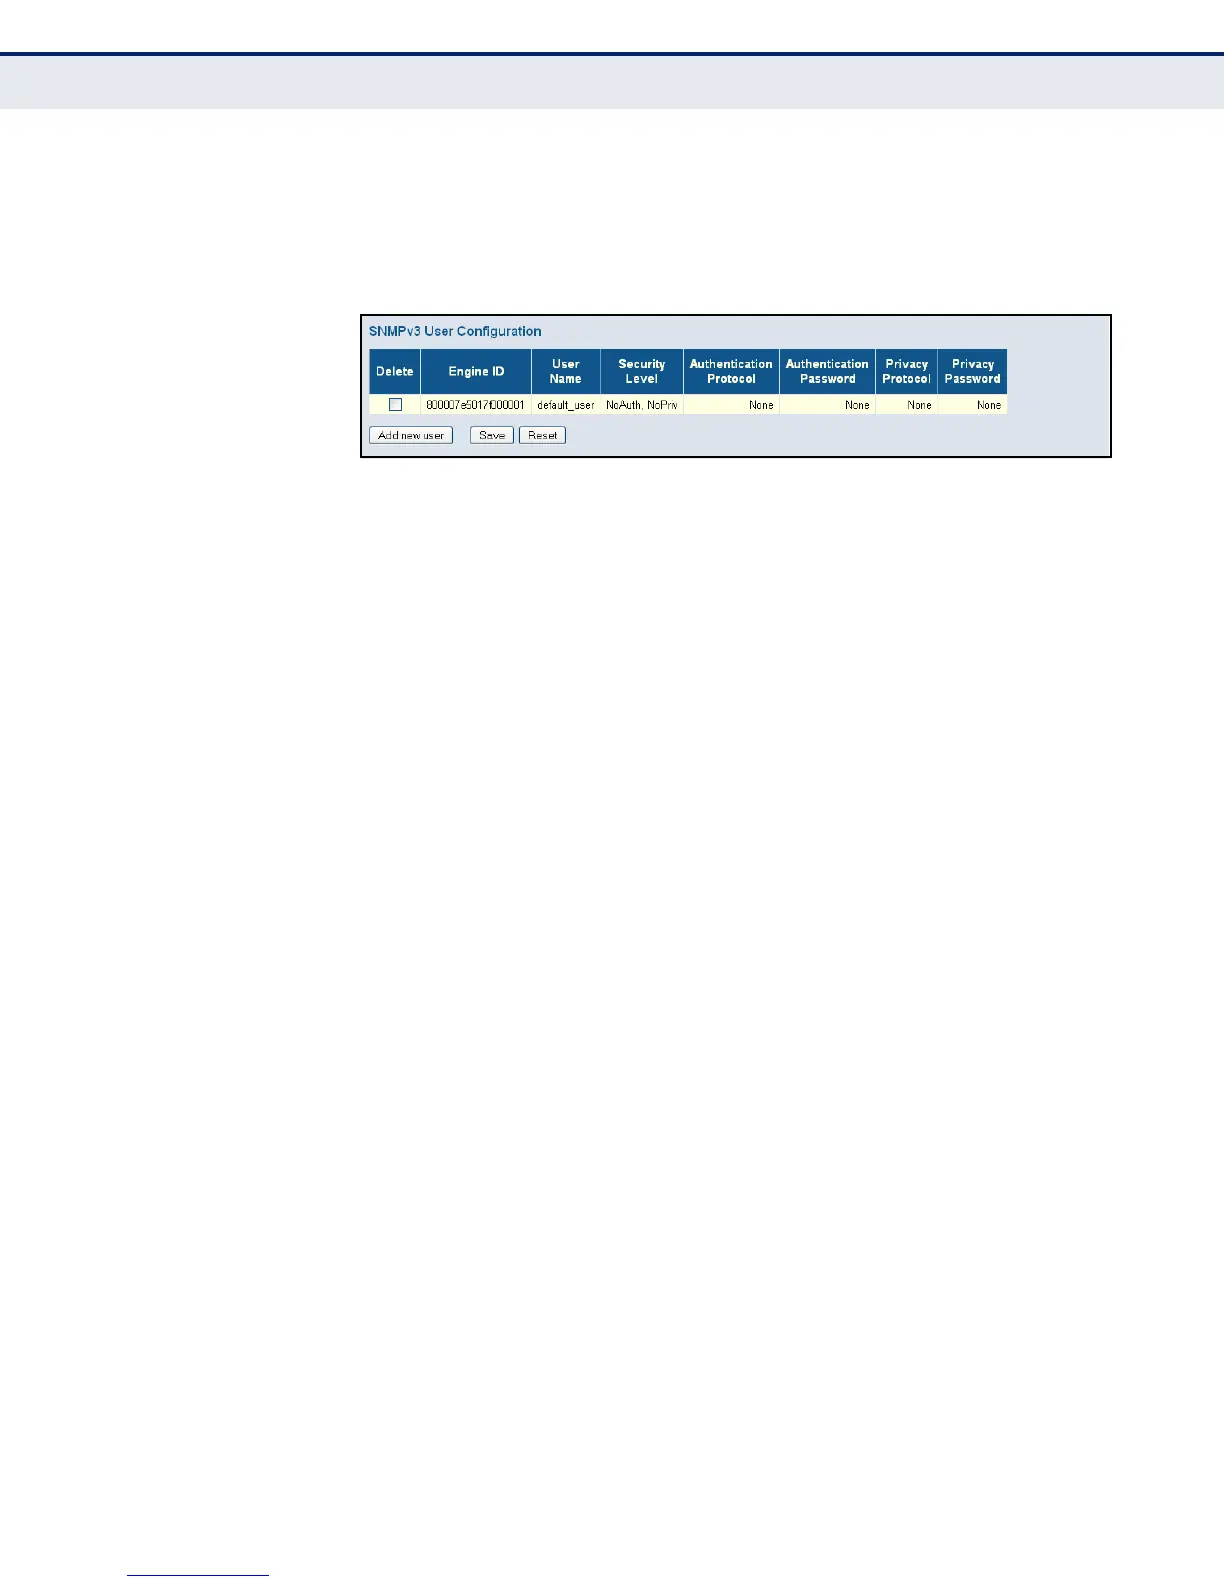
4. Define the user name, security level, authentication and privacy
settings.
5. Click Save.
Figure 22: SNMPv3 User Configuration
CONFIGURING SNMPV3 GROUPS
Use the SNMPv3 Group Configuration page to configure SNMPv3 groups.
An SNMPv3 group defines the access policy for assigned users, restricting
them to specific read and write views as defined on the SNMPv3 Access
Configuration page (page 74). You can use the pre-defined default groups,
or create a new group and the views authorized for that group.
PATH
Configuration, Security, Switch, SNMP, Groups
PARAMETERS
These parameters are displayed:
◆ Security Model - The user security model. (Options: SNMP v1, v2c, or
the User-based Security Model – usm).
◆ Security Name - The name of a user connecting to the SNMP agent.
(Range: 1-32 characters, ASCII characters 33-126 only)
The options displayed for this parameter depend on the selected
Security Model. For SNMP v1 and v2c, the switch displays the names
configured on the SNMPv3 Communities Configuration menu (see
page 69). For USM (or SNMPv3), the switch displays the names
configured with the local engine ID in the SNMPv3 Users Configuration
menu (see page 70). To modify an entry for USM, the current entry
must first be deleted.
◆ Group Name - The name of the SNMP group. (Range: 1-32 characters,
ASCII characters 33-126 only)
WEB INTERFACE
To configure SNMPv3 groups:
1. Click Configuration, Security, Switch, SNMP, Groups.
2. Click “Add new group” to set up a new group.
3. Select a security model.
 Loading...