1 Getting Started
1-32
SolSensor Installation Procedure
No installation steps are required for the SolSensor.
Charging the Battery
Charging the Battery on the PVA-1500xx I-V Measurement units
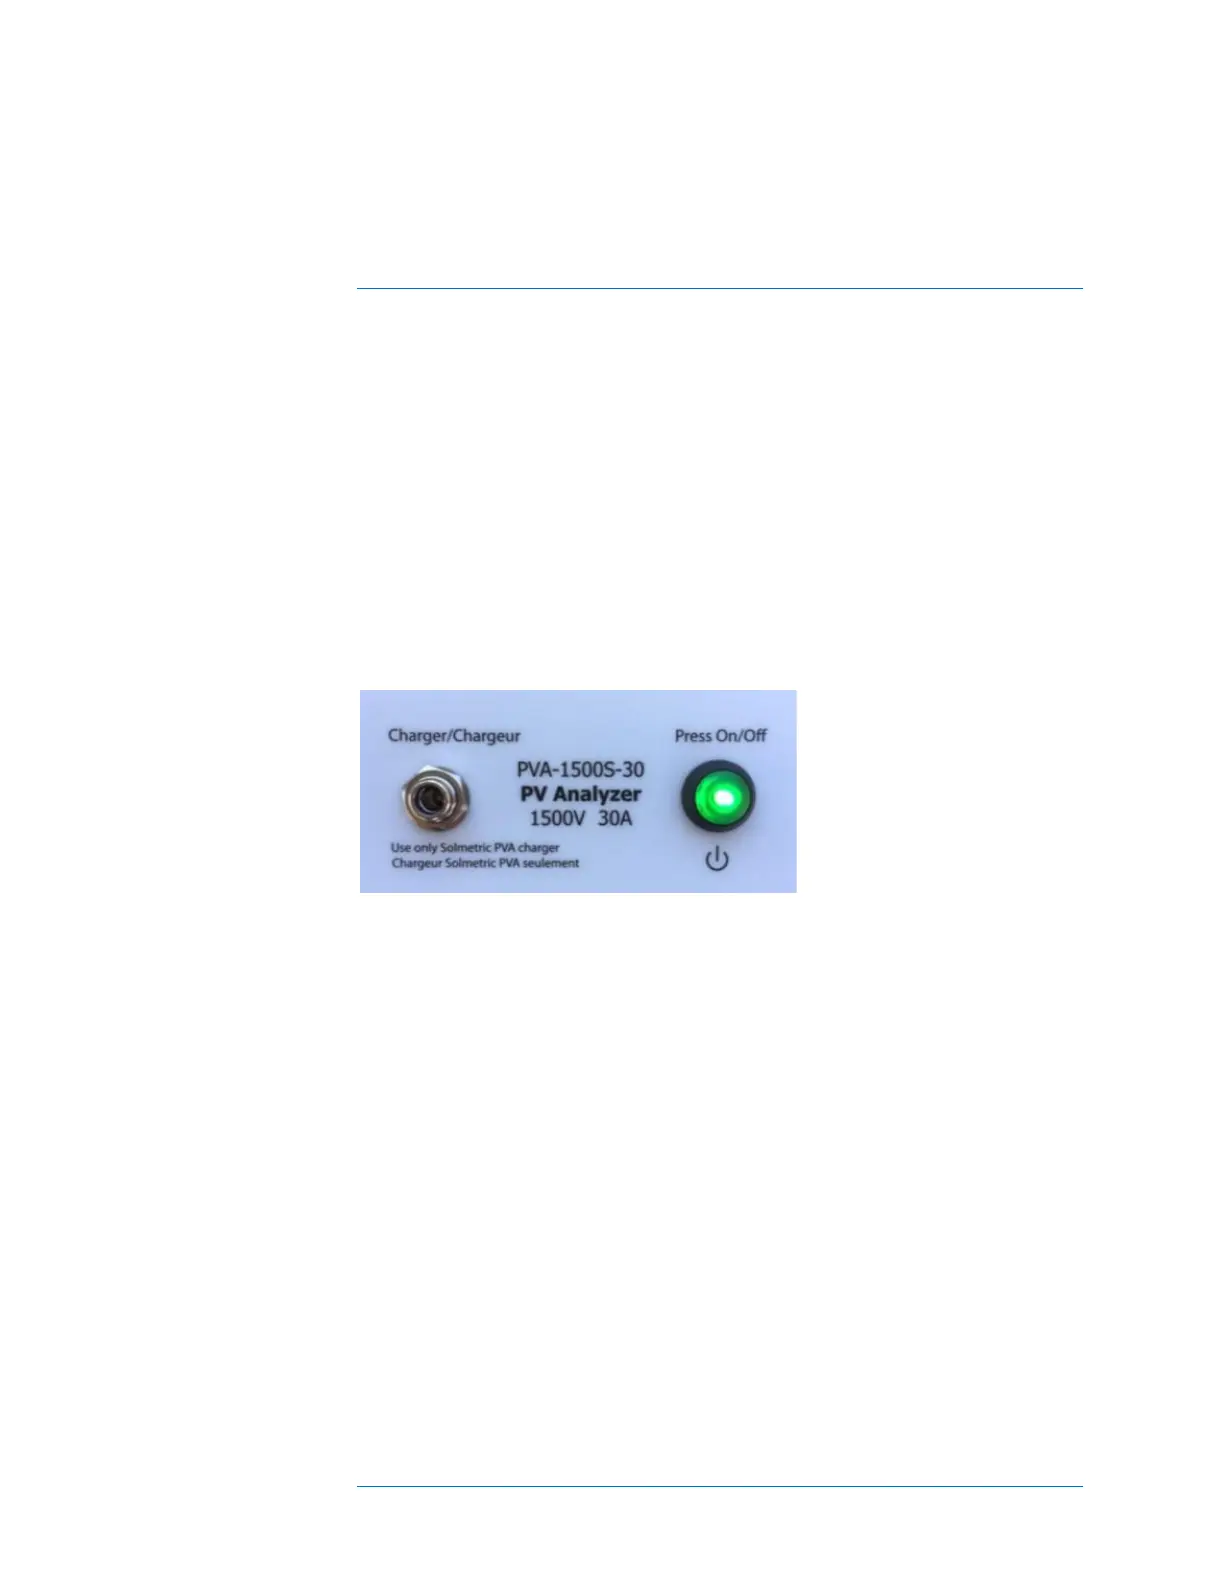
The battery in the I-V Unit is not removable. It may be recharged by attaching the battery
charger to the connector on the I-V Unit shown in Figure 12 and plugging the charger
into an AC outlet. If you are using a PVA-1500V2/V3/V4/T, the pushbutton LED will
blink slowly to indicate that the I-V Unit battery is being charged, and the LED will glow
solid when the battery is fully charged.
The charging indicator feature is not available for the PVA-1000S or PVA-600+.
Figure 12. Battery charger connector on the I-V Measurement Unit
Charging the battery can take up to 6 hours. Charge the battery every night before use in
the field.
The PVA software interface will warn you when the battery level is low and close to
shutting down the I-V Measurement Unit. Also, you can check the battery voltage level
by clicking on the Ready button following an I-V measurement, or by selecting Battery
Level in the Utility menu. When checking the battery level, make sure the I-V Unit has
been turned on for at least 30 seconds.
The software user interface displays the Disabled alert (below the Measure Now button)
when the battery is nearing the end of its charge. In this state, no measurements can be
taken.
 Loading...