3 Software Overview
3-5
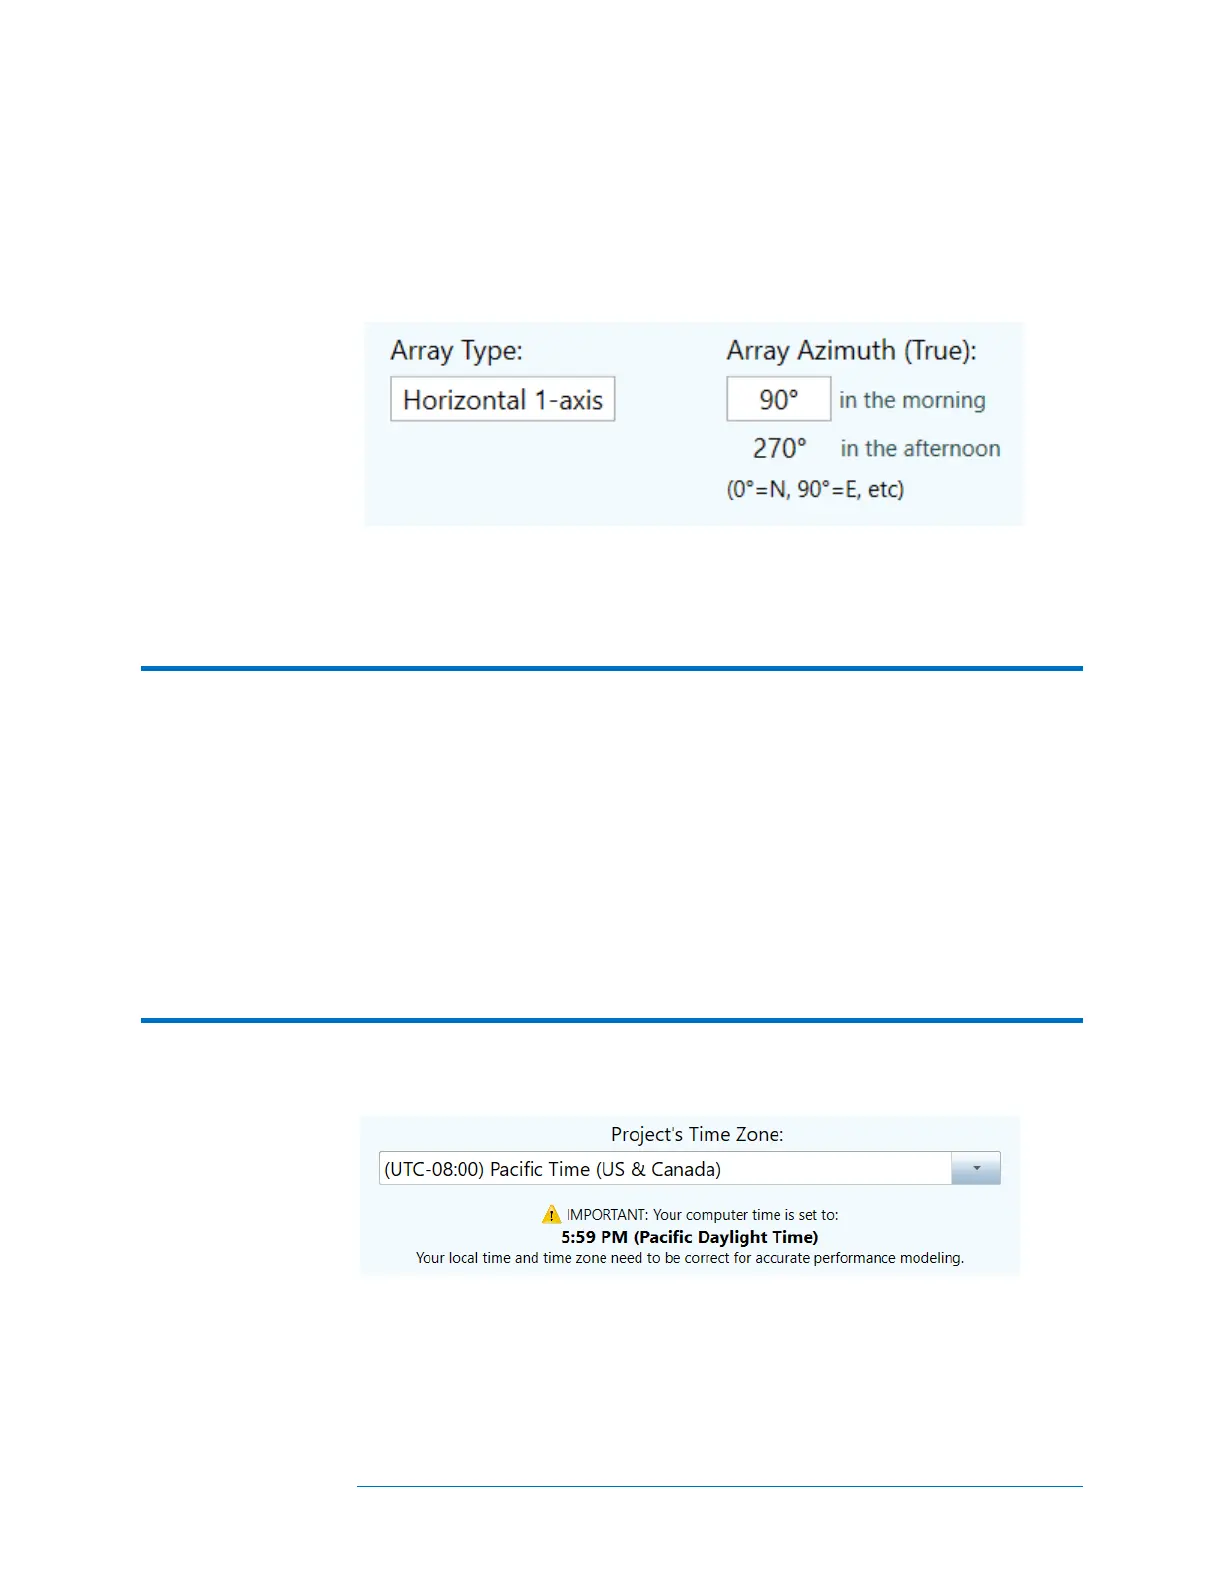
To clarify what we mean by azimuth in a tracker, imagine that the tracker is stopped at a
fixed setting and we want to determine the azimuth at which the modules are oriented.
Imagine placing a marble on the module's glass surface, near the upper frame element,
and releasing the marble to roll downhill. It will roll down in a straight line, like an
arrow, and the projection of that arrow on a horizontal surface (typically the ground, if it's
level) is in the direction of the azimuth of your module.
Figure 34. Most common settings for a horizontal single-axis tracking system.
The final step in the Site Info screen is to make sure that your PC clock is set correctly.
These parameters include the time, date, and time zone.
CAUTION Each measurement you make is stamped with the technician’s PC’s values of time, date,
and time zone. These values must be correct for the irradiance sensor to correctly
interpret the irradiance, and for the PVA software to correctly calculate the Performance
Factor. The time, date, and time zone cannot be corrected after the measurements have
been taken.
This caution applies to the PC that is controlling the I-V curve measurement process, not
the PC on which the PVA project file was originally created. At the start of a
measurement session, always be sure the PC’s time, date, and time zone are correct.
When the operator launches the software at the PV system site for a day of
measurements, the first thing to do is to check the PC’s clock to make sure that the date,
time, and time zone are correct.
In the drop list control, select the time zone of the PV project installation site, as shown
in the example in Figure 35. [filename Computer Clock]
Figure 35. The time zone control in the Site Info screen.
When the latitude, longitude, azimuth, date, time, and time zone are entered correctly,
click Next to advance to the PV Module screen, shown in Figure 36.
 Loading...