1 Getting Started
2-41
When you turn the PVA-1000S or PVA-600
+
I-V Unit on by pressing the pushbutton
once, the LED blinks on and off until it connects with the Wireless USB Adapter plugged
into your PC. Once it connects, LED stays steadily lighted.
Before connecting the I-V Unit’s test leads to the PV circuit, press the pushbutton once to
pause the I-V Unit. This prevents accidentally triggering while you are making electrical
connections. The LED stays unlighted during the pause state for these instruments. If the
I-V Unit is left in the paused state for longer than 15 minutes, it will turn itself off to
conserve battery power. When this happens, just turn it back on with a single button push.
Press the button once to enable the I-V Unit to make measurements under control of the
PVA software. The LED stays steadily lighted, indicating the I-V Unit is ready to take
measurements.
If the network connection is lost, the LED begins blinking on and off again, to indicate
it’s trying to establish a network. It should reconnect within 10-20 seconds.
If it is necessary to reset either the I-V Unit or the SolSensor, just hold the LED
pushbutton down for at least 12 seconds and release. Following the reset, the instruments
will attempt to re-connect.
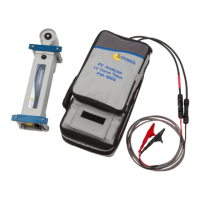
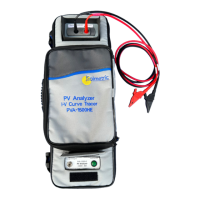
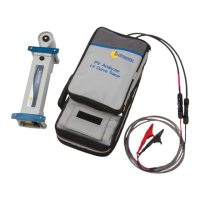
Setting Up the I-V Measurement Unit
1. Place the I-V Measurement Unit near the PV circuits to be measured.
2. Ensure that the connector-saver jumpers are installed on the primary test leads.
The connector-saver jumpers protect the PVA's main lead connectors from the
wear and tear of repeated interconnections. They should not be removed except
for replacement.
3. If necessary, connect alligator clip leads or extension cables to the connector-
saver jumpers. Use only clip leads or cables that are rated for at least the
maximum current and voltage of the I-V Measurement Unit. The Solmetric PVA
test leads are recommended for this application. These heavy-duty armored test
leads have MC-4 connectors at one end and 4-mm sheathed banana plugs with
jumbo alligator clips at the other end. PVA-1500xx test leads are specially
designed for 1500v use. Do not re-use PVA-1000S test leads with the PVA-
1500xx.
4. If long PV cables are connected to the I-V Measurement Unit to reach the test
device, the cables should be laid alongside one another rather widely spaced, to
minimize the inductance they add to the measurement circuit.
5. Connect the Wireless USB adapter to a USB port in your computer. This step is
not necessary for PVA-1500xx because communication is by WiFi.
 Loading...