1-8
Before performing advanced operations
31
Note
You cannot clear the menu bar during INDEX screen display (page 45).
The “Advanced operations” section of this manual refers to selecting and
entering items by the above procedure as “Select [(item name)].”
Turning on/off the operation buttons (menu bar) on the LCD screen
Selecting items and images on the LCD screen
1
Press v/V/b/B on the
control button to select the
item you want to set or the
image you want to display.
The color of the selected item or
the border of the selected image
changes from blue to yellow.
2
Press the center z
to enter
the item.
Repeat steps 1 and 2 to execute
each function.
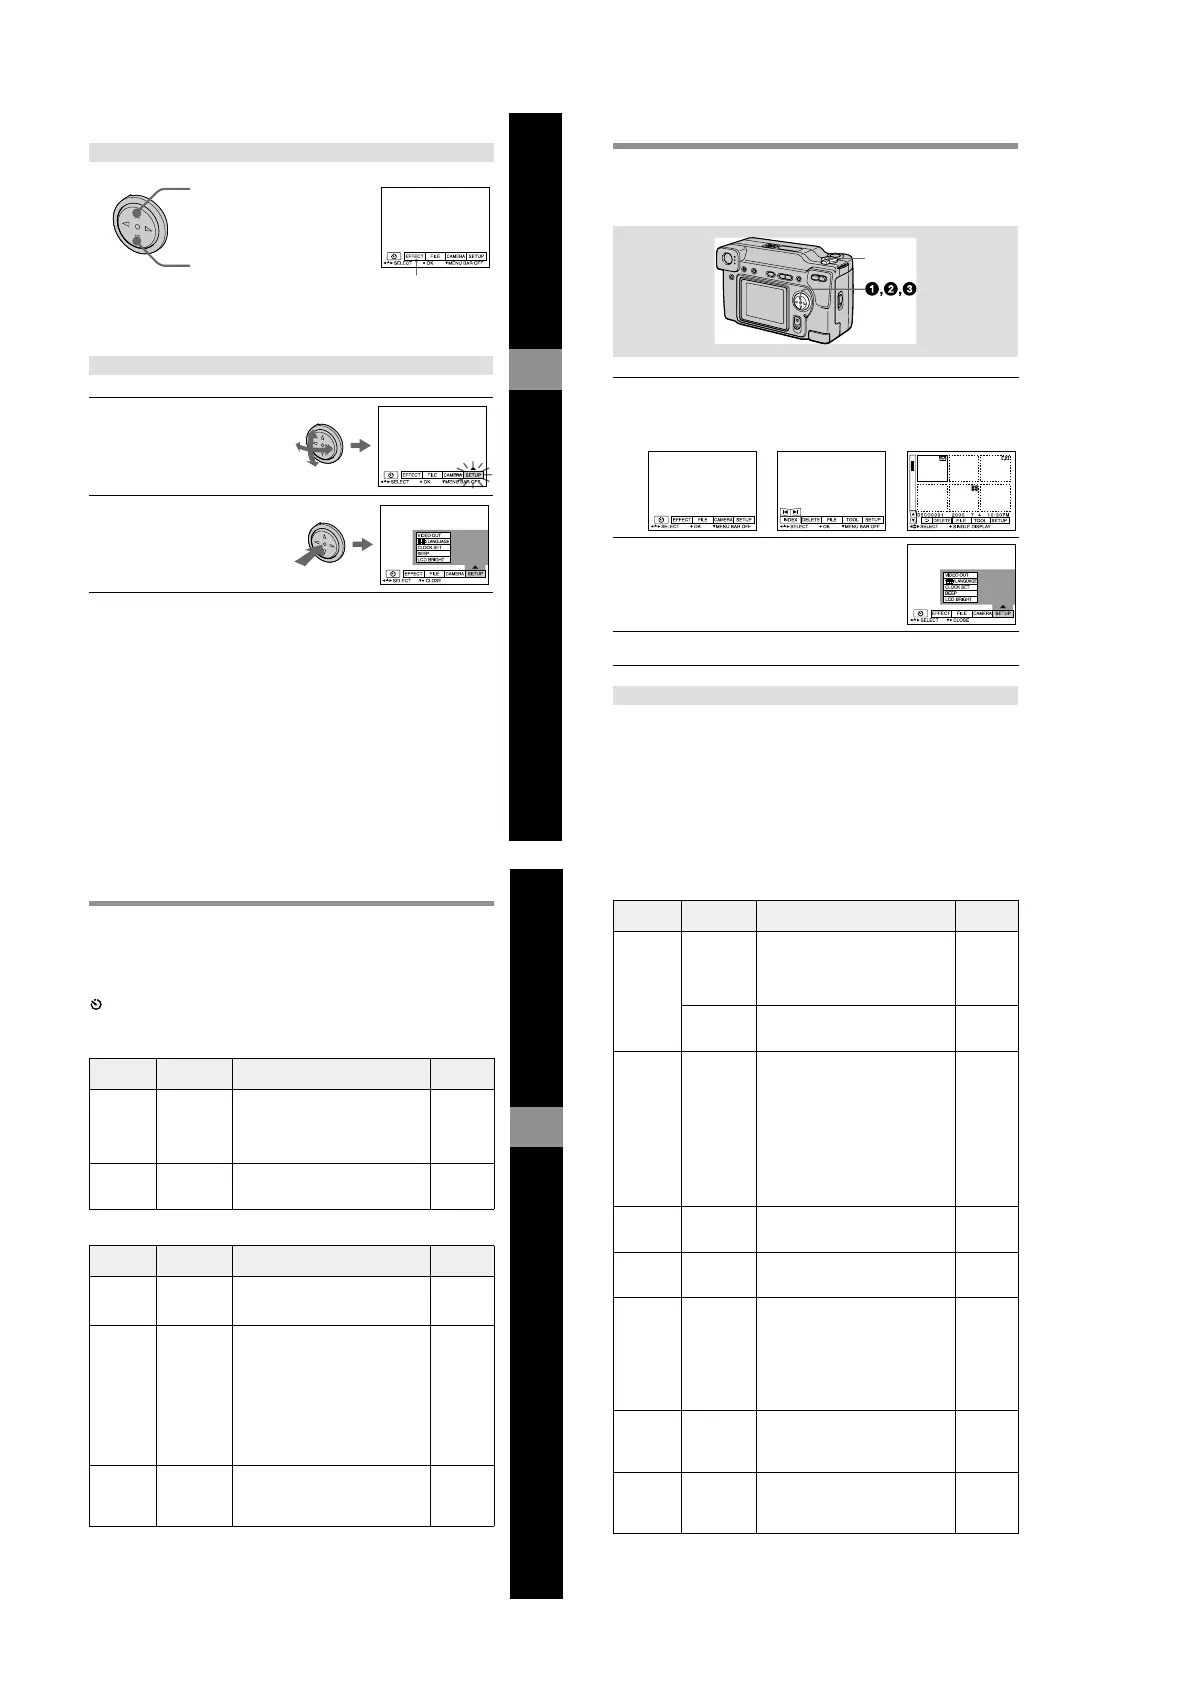
Press v to display the menu bar
on the LCD screen.
Press V to clear the menu bar
from the LCD screen.
Menu bar
32
How to change the menu settings
Some of the advanced operations for your camera are executed by selecting menu
items displayed on the LCD screen with the control button.
Press V on the control button until the LCD screen returns to the menu bar display in
step 1. To clear the menu bar, press V again.
1
Press v on the control button to display the menu bar.
The menu bar appears as follows according to the setting of the MODE
selector.
2
Select the desired item with v/V/b/B on the
control button, then press the center z.
The color of the selected item changes from blue to
yellow, and when you press the center z, the modes
,
that can be set for that item are displayed.
3
Select the desired mode with v/V/b/B on the control button, then
press the center z.
To clear the menu
MODE selector
MOVIE/STILL PLAY (single mode) PLAY (INDEX mode)
Before performing advanced operations
33
Menu settings
Menu items that can be modified differ depending on the setting of the MODE
selector. The LCD screen shows only the items you can operate at the moment. Initial
settings are indicated with x.
(SELF TIMER)
Records with the self-timer (page 19).
EFFECT
FILE
Item Setting Description MODE
selector
P.EFFECT SOLARIZE
B&W
SEPIA
NEG.ART
x OFF
Sets the image special effects (page 44). MOVIE
STILL
DATE/
TIME
DAY&TIME
DATE
x OFF
Sets whether to insert the date and time
into the image (page 44).
STILL
Item Setting Description MODE
selector
FORMAT OK Formats a “Memory Stick.” MOVIE
STILL
PLAY
CANCEL Cancels formatting of a “Memory
Stick.”
POS.
SENSOR
ON Plays back images recorded with the
camera on its side (vertical images) as
horizontal images. This function does
not work for images recorded in TEXT
mode.
STILL
x OFF When this camera may be subject to
vibration such as when you record
images from inside a moving car, set
this to OFF to prevent improper
horizontal/vertical judgement.
FILE
NUMBER
SERIES Assigns numbers to files in sequence
even if the “Memory Stick” is changed.
MOVIE
STILL
x NORMAL Resets the file numbering each time the
“Memory Stick” is changed.
34
IMAGE
SIZE
x 2048×1536
2048 (3:2)
1600× 1200
1280× 960
640× 480
Selects the image size when recording
still images.
STILL
320 (HQ)
320× 240
x 160×112
Selects the MPEG image size when
recording moving images.
MOVIE
REC MODE TIFF Records a TIFF (uncompressed) file in
addition to the JPEG file.
STILL
TEXT Records a GIF file in black-and-white.
VOICE Records an audio file (with still image)
in addition to the JPEG file.
E-MAIL Records a small-size (320×240) JPEG
file in addition to the selected image
size.
x NORMAL Records a JPEG file in the selected
image size.
REC TIME
SET
15 SEC
10 SEC
x 5 SEC
Adjusts the recording time for moving
images.
MOVIE
ROTATE
(in single
mode only)
—
Rotates the still image. PLAY
SLIDE
SHOW
(in single
mode only)
INTERVAL
Sets the slide show interval.
x 3 SEC/5 SEC/10 SEC/30 SEC/1 MIN
PLAY
REPEAT Repeats the slide show.
x ON/OFF
START Starts the slide show.
CANCEL Cancels the slide show settings and
execution.
PRINT
MARK
ON Marks the still images to be printed
(page 53).
PLAY
x OFF Unmarks the print mark of the still
images.
PROTECT ON Protects images against accidental
erasure (page 49).
PLAY
x OFF Releases protection of images against
accidental erasure.
Item Setting Description MODE
selector