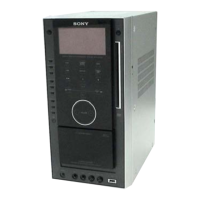
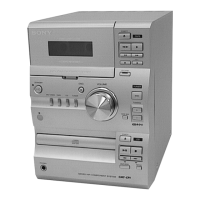
HCD-AZ33D
23
TEST DISC LIST
Use the following test disc on test mode.
YEDS-18 (CD) : PART No. 3-702-101-01
PATD-012 (CD) : PART No. 4-225-203-01
HLX-503 (DVD-SL) (NTSC) : PART No. J-6090-069-A
HLX-504 (DVD-SL) (NTSC) : PART No. J-6090-088-A
HLX-506 (DVD-SL) (PAL) : PART No. J-6090-077-A
HLX-501 (DVD-DL) (NTSC) : PART No. J-6090-071-A
HLX-505 (DVD-DL) (NTSC) : PART No. J-6090-089-A
HLX-507 (DVD-DL) (PAL) : PART No. J-6090-078-A
Note: Do not use excepting test disc for DVD.
1. DVD SERVICE MODE GENERAL DESCRIPTION
This mode let you make diagnosis and adjustment easily by using
the remote commander and the TV screen. The instructions, diag-
nostic results, etc. are given on the on-screen display.
2. ENTERING DVD SERVICE MODE
Procedure:
1. Press the [
?/1
] button to turn on the system.
2. Touch the [DVD] sensor to select the “DVD”
3. Press the [
Z
] button and touch two sensors of [
x
] and
[VOLUME +] simultaneously.
4. The message “SERVICE IN” appears on the fl uorescent in-
dicator tube and top menu of the Remocon Diagnosis Menu
appears on the on-screen display on the TV screen as follows.
The model name, IF-con version and Syscon version are dis-
played at the bottom of the on-screen display.
Drive Manual Operation
0. External Chip Check
1. Servo Parameter Check
2. Drive Manual Operation
3. Emergency History
4. Version Information
Model Name :ARX2DM_xx
IF-con:Ver.xx.xx(xxxx)
Syscon:Ver.x.xxx
5. To execute each function, press its number by using numeric
button on the remote commander.
6. To release from this mode, press the [
?/1
] button to turn off
the system.
DVD SECTION
3. EXECUTING IOP MEASUREMENT
In order to execute IOP measurement, the following standard pro-
cedures must be followed.
Procedure:
1. From the top menu of Remocon Diagnosis Menu, select “2.
Drive Manual Operation” by pressing the [2] button on the
remote commander. The following screen appears on the on-
screen display
Remocon Diagnosis Menu
1. Servo Control
2. Track/Layer Jump
3. Manual Adjustment
4. Tray Aging Mode
5. MIRR time Adjust
0. Return to Top Menu
2. Select “3. Manual Adjustment” by pressing the [3] button on
the remote commander. The following screen appears on the
on-screen display.
Manual Adjust
1. Track Balance Adjust:
2. Track Gain Adjust:
3. Focus Balance Adjust:
4. Focus Gain Adjust:
5. Eq Boost Adjust:
6. Iop:
7. TRV. Level:
8. S curve(FE) Level:
9. RFL(PI) Level:
0. MIRR Time:
V
v
Change Value
[RETURN]Return to previous menu
3. Select “6. Iop:” by pressing [6] button on the remote com-
mander.
4. Wait until a hexadecimal number appear in the on-screen dis-
play as below.
Manual Adjust
1. Track Balance Adjust:
2. Track Gain Adjust:
3. Focus Balance Adjust:
4. Focus Gain Adjust:
5. Eq Boost Adjust:
6. Iop: 5D
7. TRV. Level:
8. S curve(FE) Level:
9. RFL(PI) Level:
0. MIRR Time:
V
v
Change Value
[RETURN]Return to previous menu