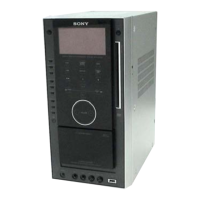
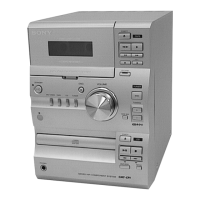
HCD-AZ33D
22
SECTION 4
TEST MODE
COLD RESET
The cold reset clears data except DVD data stored in the RAM to
initial conditions. Execute this mode when returning the set to the
customers.
Procedure:
1. Press the [
?/1
] button to turn the power on.
2. Press two buttons of [
?/1
], [DISPLAY] and touch the [
x
] sen-
sor simultaneously.
3. The message “COLD RESET” is displayed on the fl uorescent
indicator tube, then become standby mode.
PANEL TEST MODE
This mode is used to check the fl uorescent indicator tube, LED,
model, destination, software version and key.
Procedure:
1. Press two buttons of [EQ EDIT], [DIRECTION] and touch the
[
x
] sensor simultaneously.
2. All LEDs and segments in fl uorescent indicator tube are light-
ed up.
3. When you want to enter the software version display mode,
touch the [
.
-] sensor. The model name is displayed.
4. Each time [
.
-] sensor is touched, the display changes from
destination, MC version, SYS version, UI version, DVD ver-
sion, ST version, TA version, DSP version, TM version, TC
version, MM version, CLA version in this order, and returns to
the model name display.
5. When [
>
+] sensor is touched while the version numbers
are being displayed except model name and destination, the
date of the software creation appear. When [
>
+] sensor
is touched again, the display returns to the software version
display. When [
.
-] sensor is touched while the date of the
software creation is being displayed, the date of the software
creation is displayed in the same order of software version dis-
play.
6. Press the [DSGX] button, the key check mode is activated.
7. In the key check mode, the fl uorescent indicator tube displays
“K 0” Each time a button is pressed, “K 0” value increases.
However, once a button has been pressed, it is no longer taken
into account.
8. To release from this mode, press three buttons in the same
manner as step 1 or disconnect the power cord.
SHIP MODE
This mode moves the optical pick-up to the position durable to
vibration. Use this mode when returning the set to the customer
after repair.
Procedure:
1. Press the [
?/1
] button to turn the power on.
2. Touch the [DVD] sensor to select “DVD”
3. Press the [
?/1
] button and touch [
bB
] sensor simultaneously.
4. After the “STANDBY” blinking display fi nish, the message
“MECHA LOCK” is displayed on the fl uorescent indicator
tube.
MEMORY CLEAR MODE
This mode moves clears main microprocessor data stored in the
RAM to initial conditions. Use this mode when returning the set to
the customer after repair.
Procedure:
1. Press the [
?/1
] button to turn the power on.
2. Touch the [DVD] sensor to select the “DVD”
3. Press the [PRESET EQ] button and touch two sensors of
[DVD], [
x
] simultaneously.
4. After the “STANDBY” blinking display fi nish, the message
“MECHA LOCK” is displayed on the fl uorescent indicator
tube.
DISC SLOT LOCK
This mode let you lock the disc slot. When this mode is activated,
the disc will not eject when [
Z
] button is pressed. The message
“LOCKED” will be displayed in on the fl uorescent indicator tube.
Procedure:
1. Press the [
?/1
] button to turn the power on.
2. Touch the [DVD] sensor to select the “DVD”
3. Touch the [
x
] sensor and press the [
Z
] button simultaneously
and hold down until “LOCKED” or “UNLOCKED” displayed
on the fl uorescent indicator tube (around 5 seconds).
TUNER STEP CHANGE
(Except AEP model)
The step interval of AM channels can be toggled between 9 kHz
and 10 kHz.
Procedure:
1. Press the [
?/1
] button to turn the power on.
2. Touch the [TUNER/BAND] sensor to select the “AM”
3. Press the [
?/1
] button to turn the power off.
4. Touch the. [
.
-] sensor and press [
?/1
] button simultane-
ously. The set power on automatically. The message “AM 9k
Step” or “AM10k Step” displayed on the fl uorescent indicator
tube and thus the channel step is changed.
FUNCTION NAME CHANGE
This mode let you change from VIDEO to SAT and vice-versa.
Procedure:
1. Press the [
?/1
] button to turn the power on.
2. Touch the [VIDEO/SAT] sensor and press [
?/1
] button simul-
taneously. The set power on automatically and the function
will changed to SAT. Do the same procedures again to change
from SAT to VIDEO.
COLOR SYSTEM CHANGE
(Except AEP model)
This mode let you change the color system of the video output
from PAL to NTSC or vice-versa.
Procedure:
1. Press the [
?/1
] button to turn the power on.
2. Touch the [DVD] sensor to select the “DVD”
3. Press the [
?/1
] button to turn the power off.
4. Touch the [
X
] sensor and press [
?/1
] button simultaneously.
5. The message “COLOR PAL” or “COLOR NTSC” will be dis-
played on the fl uorescent indicator tube.