36 Installation and set-up manual 208668
3. Installing the unit CRANEX Novus e
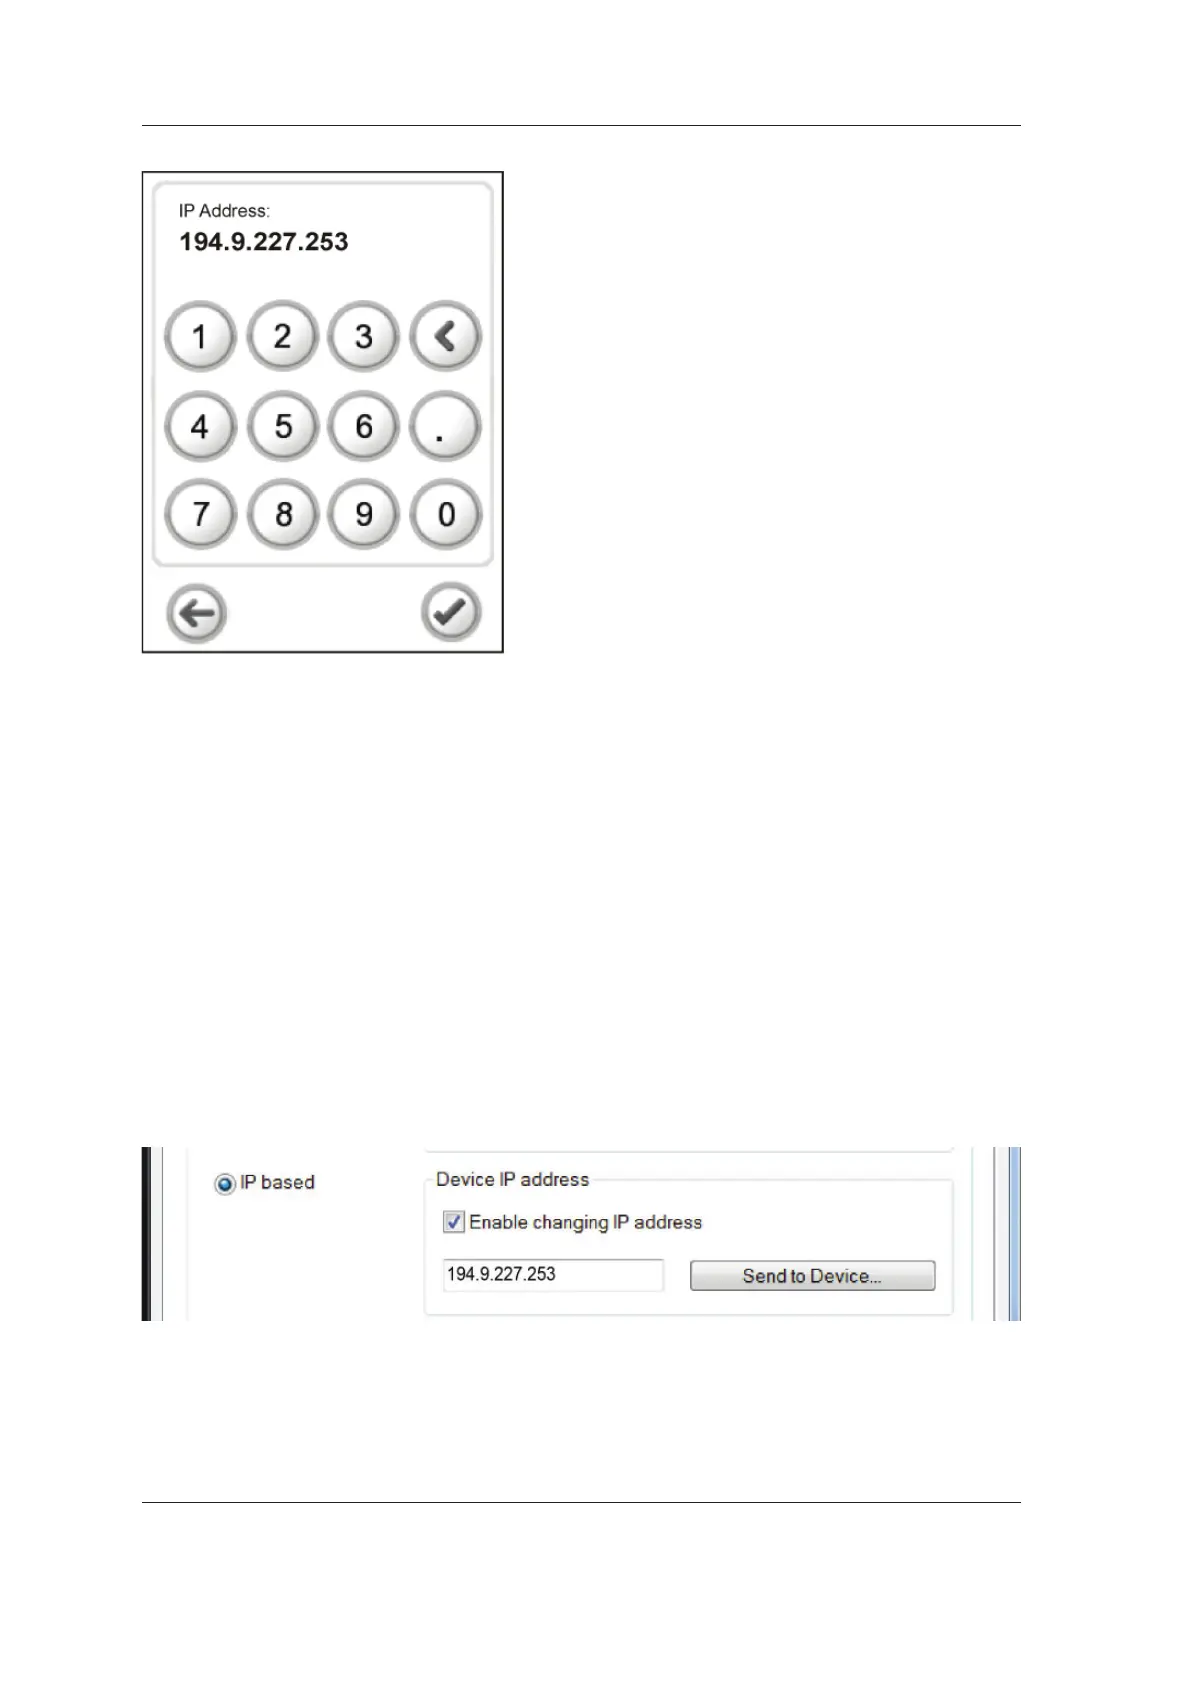
4. The Manual IP address connection screen will
appear.
Key in the new IP address.
When the new IP address has been keyed in
the OK (tick) key will become active.
Touch the OK (tick) key to accept the change
and return to the main screen.
Touch Arrow key to discard the change and
return to the main screen.
5. PC: Start the PC. Then open the dental
imaging software that was previously installed
and select Settings:
- SCANORA software: Select Tools / Cranex
Novus e Settings and then the Settings
page.
- DIGORA for Windows: Select Options
/ Cranex Novus e Settings and then the
Settings page.
6. PC: In the Device Connection section, click
the IP based radio button to select it. Then
click the Enable changing IP address check
box to activate the IP-address fi eld.
7. PC: Key in the new IP address into the IP-
address fi eld.
8. PC: Click the OK button to close the settings
window.